
Dyson DC24 Ball Lower Small Bearing Replacement

What you need

  1. Dyson DC24 Ball Lower Small Bearing Replacement, DC24 Ball's Lower Small Bearing: step 1, image 1 of 1
    • Recline vacuum all the way to expose as much of the ball as possible.

  2. Dyson DC24 Ball Lower Small Bearing Replacement: step 2, image 1 of 1
    • Using a Torx screwdriver, remove the four screws that hold both sides of the ball together.

  3. Dyson DC24 Ball Lower Small Bearing Replacement: step 3, image 1 of 1
    • Remove the end of the lower duct hose to reveal a torx screw.

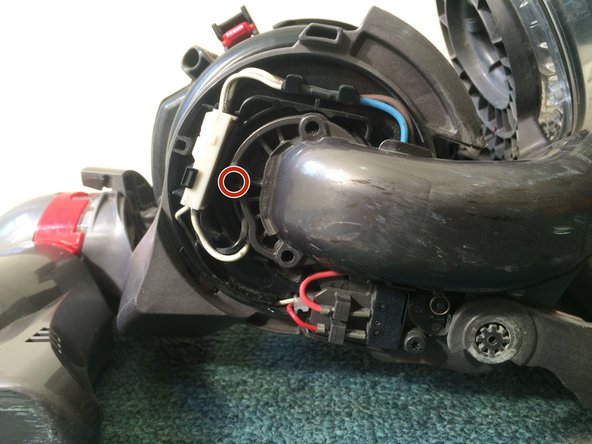
    • Remove the screw that holds the motor to the axel.

  4. Dyson DC24 Ball Lower Small Bearing Replacement: step 4, image 1 of 2 Dyson DC24 Ball Lower Small Bearing Replacement: step 4, image 2 of 2
    • Remove the three torx screws on the otherside.

    • Then remove the cover which will reveal some power cables.

    • Then remove the last screw that holds the motor to the axel.

  5. Dyson DC24 Ball Lower Small Bearing Replacement: step 5, image 1 of 1
    • Remove the post motor filter.

    • Carefully pull the axel out of its hole and down.

  6. Dyson DC24 Ball Lower Small Bearing Replacement: step 6, image 1 of 2 Dyson DC24 Ball Lower Small Bearing Replacement: step 6, image 2 of 2
    • Place the new bearing on the axel. (It doesn't matter which way it goes on)

  7. Dyson DC24 Ball Lower Small Bearing Replacement: step 7, image 1 of 2 Dyson DC24 Ball Lower Small Bearing Replacement: step 7, image 2 of 2
    • When reassembling, it is easiest to put the vacuum in its upright position to insert the axel screws.

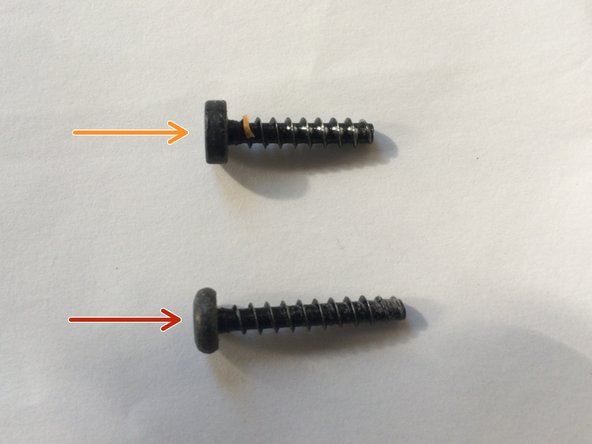
    • The red arrow points to the type of torx screws that hold the motor in place while the orange arrow points to the type that hold the orange ball together.

ForumHermit

Member since: 08/16/13

1,730 Reputation

2 Guides authored

View Statistics:

Past 24 Hours: 0

Past 7 Days: 3

Past 30 Days: 21

All Time: 5,416