Free Shipping on Domestic Orders $75+

DualShock 4 Touch Pad Replacement

Archived Guide
This guide is retained solely for historical purposes. Use the updated version of the guide to perform your repair.

What you need

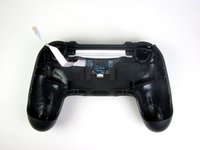
    1. DualShock 4 Touch Pad Replacement, Touch Pad: step 1, image 1 of 1
      • Using the Phillips #00 Screwdriver, remove the four 6.0 mm screws securing the rear cover to the controller.

      • Do not forcefully loosen the screws, as it will amount to permanent damage of the threads, making removal impossible.

      Ask FixBot

      Add Comment

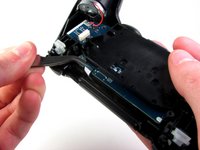
    2. DualShock 4 Touch Pad Replacement: step 2, image 1 of 3 DualShock 4 Touch Pad Replacement: step 2, image 2 of 3 DualShock 4 Touch Pad Replacement: step 2, image 3 of 3
      • Four fragile plastic clips hold the casing together. You can see their locations more clearly in this guide.

      • The clips help hold the seams together. If you break these clips, the controller will still work.

      • Beginning with the left handle:

      • Pinch the left handle of the controller to introduce an opening.

      • Wedge a plastic opening tool into the opening and slide it up towards the joystick.

      • Pull down on the plier to crack open the casing.

      • Repeat these steps for the right handle.

      Ask FixBot

      Add Comment

    3. DualShock 4 Touch Pad Replacement: step 3, image 1 of 3 DualShock 4 Touch Pad Replacement: step 3, image 2 of 3 DualShock 4 Touch Pad Replacement: step 3, image 3 of 3
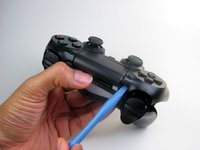
      • Wedge a plastic opening tool into the case-splittings and pull down to crack open the casing near the following buttons:

      • Share button

      • Options button

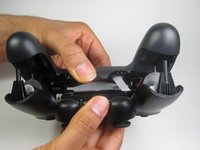
      • Split the plastic covers of the controller apart, taking note that they will still be attached by circuit board ribbons.

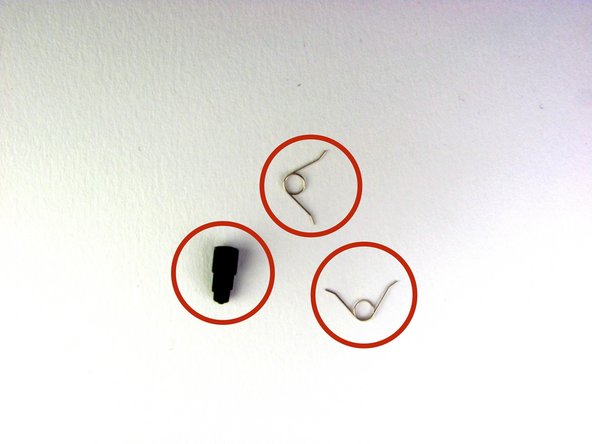
      • Three small pieces are often released from the framework. To prevent loss, maintain a controlled work field.

      • 2 Trigger Springs

      • 1 Grey Reset Button Extension

      Ask FixBot

      Add Comment

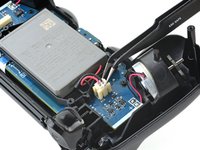
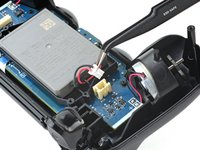
    4. DualShock 4 Touch Pad Replacement, Disconnect the battery: step 4, image 1 of 2 DualShock 4 Touch Pad Replacement, Disconnect the battery: step 4, image 2 of 2
      Tool used on this step:
      Tweezers
      $4.99
      Buy
      • Use tweezers or your fingers to grab and disconnect the head of the battery cable from the motherboard.

      • Only pull on the head of the connector—don't pull on the cable itself.

      Ask FixBot

      Add Comment

    5. DualShock 4 Touch Pad Replacement, Remove the battery: step 5, image 1 of 1
      • Remove the battery.

      Ask FixBot

      Add Comment

    6. DualShock 4 Touch Pad Replacement: step 6, image 1 of 1
      • Remove the single 6.0 mm Phillips screw found below the battery retainer with the Phillips #00 Screwdriver.

      • Do not forcefully loosen the screw, as it may amount to permanent damage of the threads, making removal impossible.

      Ask FixBot

      Add Comment

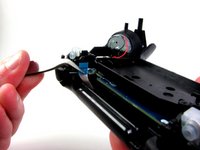
    7. DualShock 4 Touch Pad Replacement: step 7, image 1 of 2 DualShock 4 Touch Pad Replacement: step 7, image 2 of 2
      • Gently detach the touchpad ribbon connected to the motherboard using the blunt forceps. The touchpad ribbon is connected to the motherboard by a connector that flips to tighten and loosen. During reassembly, to reattach the ribbon, the plastic tray will need to be gently removed from the motherboard and the flip-lock flipped up.

      Ask FixBot

      Add Comment

    8. DualShock 4 Touch Pad Replacement: step 8, image 1 of 2 DualShock 4 Touch Pad Replacement: step 8, image 2 of 2
      • Carefully dislodge the motherboard assembly from the front cover.

      • Vibration motors are loosely attached to the motherboard assembly. Provide support at the two ends to ease the separation.

      • When removing the motherboard assembly, try not to tilt the front cover upside down as the buttons and their covers may fall out.

      Ask FixBot

      Add Comment

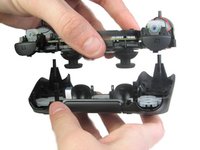
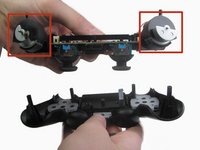
    9. DualShock 4 Touch Pad Replacement, Disassembly Complete: step 9, image 1 of 3 DualShock 4 Touch Pad Replacement, Disassembly Complete: step 9, image 2 of 3 DualShock 4 Touch Pad Replacement, Disassembly Complete: step 9, image 3 of 3
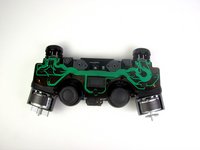
      • Successful disassembly of the controller will result in the following three parts, respectively:

      • Motherboard Assembly

      • Front Cover

      • Rear Cover

      Ask FixBot

      Add Comment

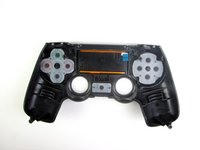
    10. DualShock 4 Touch Pad Replacement: step 10, image 1 of 1
      • After the motherboard is set aside, lay the front panel on the ground.

      • You can now see the touch pad which is outlined on the top and bottom by an orange line.

      Ask FixBot

      Add Comment

    11. DualShock 4 Touch Pad Replacement: step 11, image 1 of 3 DualShock 4 Touch Pad Replacement: step 11, image 2 of 3 DualShock 4 Touch Pad Replacement: step 11, image 3 of 3
      • Now pick the front panel up, and use one hand to press the touch pad up from the front of the panel.

      • There are no other restrictions attached to the touch pad. It should slide right out and back in without any effort.

      Ask FixBot

      Add Comment

Conclusion

To reassemble your device, follow these instructions in reverse order.

Cancel: I did not complete this guide.

Mark

Member since: 01/21/14

8,106 Reputation

6 Guides authored

Team

Cal Poly, Team 6-21, Maness Winter 2014 Member of Cal Poly, Team 6-21, Maness Winter 2014

CPSU-MANESS-W14S6G21

4 Members

86 Guides authored

0 Guide Comments

Add Comment

View Statistics:

Past 24 Hours: 1

Past 7 Days: 3

Past 30 Days: 6

All Time: 70