
DualShock 4 CUH-ZCT1 Charging Port Replacement

What you need

  1. DualShock 4 CUH-ZCT1 Charging Port Replacement, Charging Port: step 1, image 1 of 1
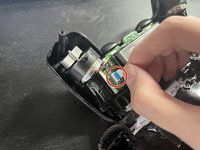
    • Flip the Dualshock 4 controller on its back, and use a Phillips #00 screwdriver to remove the four 6 mm screws.

  2. DualShock 4 CUH-ZCT1 Charging Port Replacement: step 2, image 1 of 1
    • Slowly lift the backplate onto the front side of the controller making sure not to fully remove the backplate.

  3. DualShock 4 CUH-ZCT1 Charging Port Replacement: step 3, image 1 of 2 DualShock 4 CUH-ZCT1 Charging Port Replacement: step 3, image 2 of 2
    • Remove the ribbon cable from the motherboard of the controller and place the top half of the controller on the side for later.

  4. DualShock 4 CUH-ZCT1 Charging Port Replacement: step 4, image 1 of 1
    • Remove the light bar's sub-assembly by gently lifting up the piece.

  5. DualShock 4 CUH-ZCT1 Charging Port Replacement: step 5, image 1 of 1
    • Lift the clear plastic piece out of the controller by pulling into the controller and removing it.

  6. DualShock 4 CUH-ZCT1 Charging Port Replacement: step 6, image 1 of 1
    • Remove the two 6 mm Phillips screws that are on top of the PCB of the charging port.

  7. DualShock 4 CUH-ZCT1 Charging Port Replacement: step 7, image 1 of 2 DualShock 4 CUH-ZCT1 Charging Port Replacement: step 7, image 2 of 2
    • Gently wiggle the charging port's PCB side to side until it detaches from the controller.

Conclusion

To reassemble your device, follow these instructions in reverse order.

6 other people completed this guide.

Andy Lam

Member since: 01/31/23

283 Reputation

1 Guide authored

Team

0 Comments

Add Comment

View Statistics:

Past 24 Hours: 6

Past 7 Days: 60

Past 30 Days: 273

All Time: 3,042