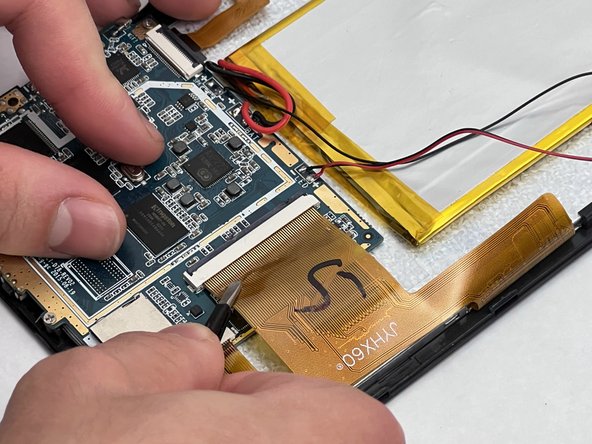
Dragon Touch Y88X Plus Motherboard Replacement

What you need

  1. Dragon Touch Y88X Plus Motherboard Replacement, Motherboard: step 1, image 1 of 1
    • Remove the back case using a plastic opening tool or spudger.

    • Start at the corners and work your way around the perimeter of the tablet.

    • Be gentle to avoid damaging the case or any internal components.

  2. Dragon Touch Y88X Plus Motherboard Replacement: step 2, image 1 of 1
    • Remove any adhesive strips keeping wires in place.

  3. Dragon Touch Y88X Plus Motherboard Replacement: step 3, image 1 of 1
    • Desolder the wires connected to the motherboard to disconnect the battery and speaker.

  4. Dragon Touch Y88X Plus Motherboard Replacement: step 4, image 1 of 2 Dragon Touch Y88X Plus Motherboard Replacement: step 4, image 2 of 2
    • Use the tip of a spudger or your fingernail to flip up the small locking flap on the three ZIF connectors.

    • Be sure to pry up on the hinged flap, not the connector socket.

    • Use a spudger to slide the ribbon cables from the connectors.

  5. Dragon Touch Y88X Plus Motherboard Replacement: step 5, image 1 of 1
    • Use a Phillips #00 screwdriver to remove the three 4 mm screws from the edges of the motherboard.

  6. Dragon Touch Y88X Plus Motherboard Replacement: step 6, image 1 of 1
    • Gently lift the motherboard from the device.

Conclusion

To reassemble your device, follow these instructions in reverse order.

2 other people completed this guide.

Cody Camara

Member since: 11/01/23

149 Reputation

1 Guide authored

Team

UMass Dartmouth, Team 1-4, Petersen Fall 2023 Member of UMass Dartmouth, Team 1-4, Petersen Fall 2023

UMASSD-PETERSEN-F23S1G4

4 Members

4 Guides authored

0 Comments

Add Comment

View Statistics:

Past 24 Hours: 0

Past 7 Days: 3

Past 30 Days: 3

All Time: 55