Free Shipping on Domestic Orders $75+

Disconnect the Battery

Prerequisite Only
This is a prerequisite-only guide! This guide is part of another procedure and isn’t meant to be used alone.

What you need

    1. Disconnect the Battery, Back Cover: step 1, image 1 of 1
      • Flip the Nook over.

      Ask FixBot

      Add Comment

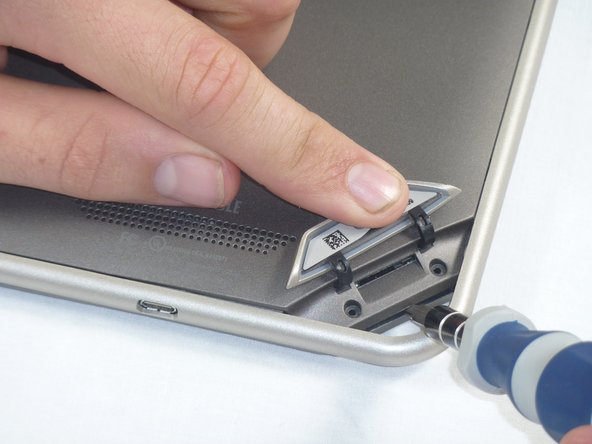
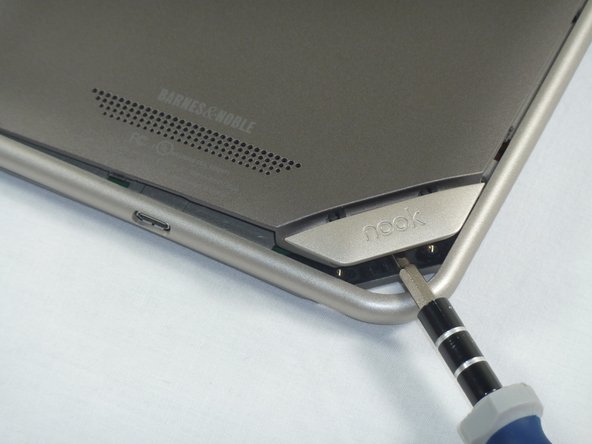
    2. Disconnect the Battery: step 2, image 1 of 2 Disconnect the Battery: step 2, image 2 of 2
      • Lift the flap that reads "Nook" to reveal the tape that is underneath. Remove the memory card if one is present.

      • Remove the tape covering the round holes to reveal two T5 Torx screws.

      • Remove the two T5 Torx screws securing the back cover.

      Ask FixBot

      Add Comment

    3. Disconnect the Battery: step 3, image 1 of 2 Disconnect the Battery: step 3, image 2 of 2
      • Insert the flat end of a spudger between the front panel and the rear assembly.

      • Though these photos show a screwdriver, use a spudger or plastic opening tool in order to prevent damage to the device.

      • Use a spudger to lift the the back panel from the rest of the Nook.

      Ask FixBot

      Add Comment

    4. Disconnect the Battery: step 4, image 1 of 2 Disconnect the Battery: step 4, image 2 of 2
      • Slide the spudger around the edges of the Nook to loosen the back panel.

      Ask FixBot

      Add Comment

    5. Disconnect the Battery: step 5, image 1 of 1
      • Pull the back panel off the Nook.

      Ask FixBot

      Add Comment

    1. Disconnect the Battery, Disconnect the Battery: step 6, image 1 of 2 Disconnect the Battery, Disconnect the Battery: step 6, image 2 of 2
      • Lift up the foam pad at the corner of the battery to reveal the battery connector.

      • Use a spudger or plastic opening tool to disconnect the battery cable from the motherboard.

      • These photos show a screwdriver, but we recommend using a nonconductive tool like a spudger to prevent a potential short.

      Ask FixBot

      Add Comment

Conclusion

To reassemble your device, follow these instructions in reverse order.

Cancel: I did not complete this guide.

Holly Lowe

Member since: 09/26/12

238 Reputation

3 Guides authored

0 Guide Comments

Add Comment

View Statistics:

Past 24 Hours: 1

Past 7 Days: 4

Past 30 Days: 15

All Time: 192