Free Shipping on Domestic Orders $75+

This teardown is in progress – Reload periodically to see the latest changes!

What you need

Featured Document

Preview of the first page of this document
Fujitsu Manual

Log in to view the full document

Log In
    1. Disassembly Fujitsu Primergy, Open the Case: step 1, image 1 of 1
      • Pull the green tab on the side and pull back the panel.

      • Remove the panel and store it somewhere.

      Ask FixBot

      Add Comment

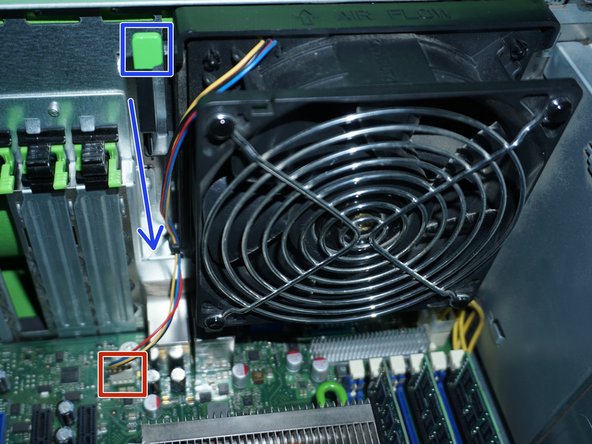
    2. Disassembly Fujitsu Primergy, Remove the fan on the CPUs: step 2, image 1 of 1
      • Press the two green tabs and pull up the fan on the CPUs.

      • Be careful to take it easy, the fan cable is short (red arrow).

      Ask FixBot

      Add Comment

    3. Disassembly Fujitsu Primergy, Remove the fan in the case: step 3, image 1 of 1
      • To remove the second fan you have to pull the green tab and pull the fan up.

      Ask FixBot

      Add Comment

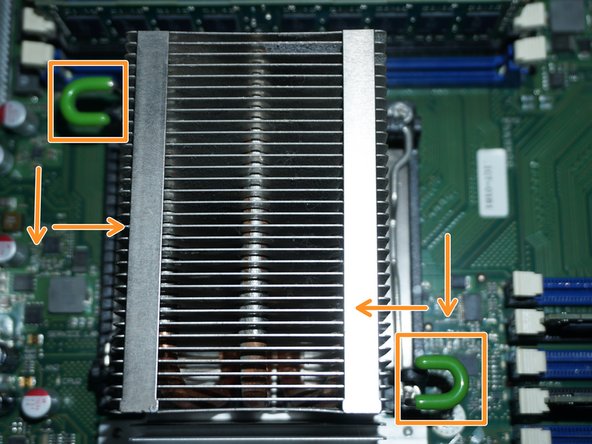
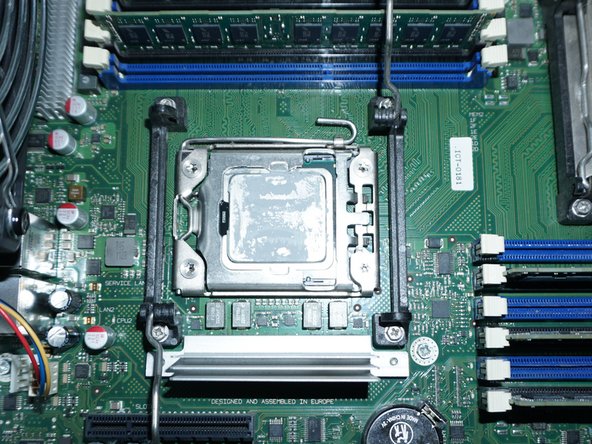
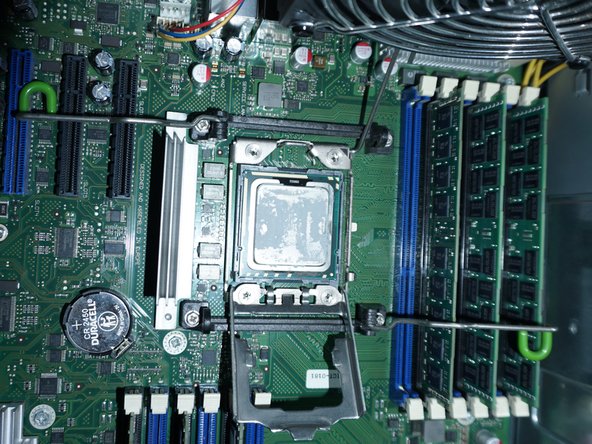
    4. Disassembly Fujitsu Primergy, Remove the CPUs: step 4, image 1 of 3 Disassembly Fujitsu Primergy, Remove the CPUs: step 4, image 2 of 3 Disassembly Fujitsu Primergy, Remove the CPUs: step 4, image 3 of 3
      • Pay close attention to the socket, it may get damaged.

      • Press down and at the same time move the two green tabs in (in orange).

      • Lift the heat sink.

      • Repeat the procedure to open the socket.

      • Repeat the procedure to open the socket.

      • Clean the thermal paste and apply new ones.

      Ask FixBot

      Add Comment

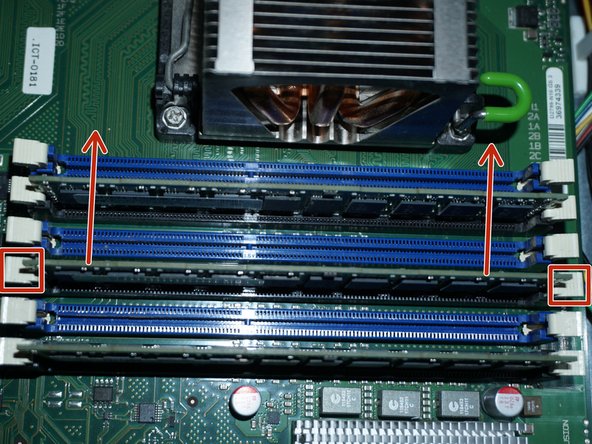
    5. Disassembly Fujitsu Primergy, Remove the RAM: step 5, image 1 of 1
      • To remove a RAM bank you have to press hard on the white clips.

      • Repeat the procedure for all desks.

      • Replacement RAM is present on Amazon.

      Ask FixBot

      Add Comment

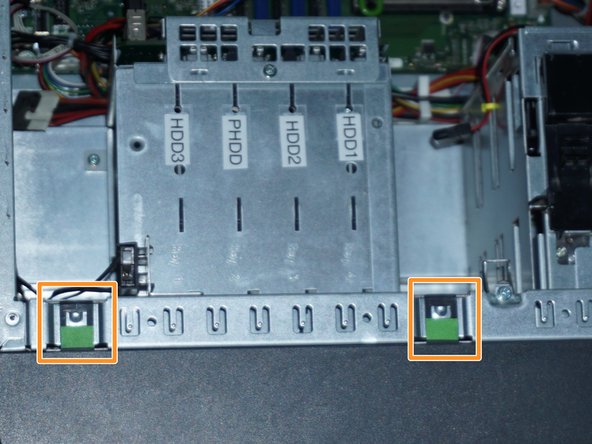
    6. Disassembly Fujitsu Primergy, Remove the Front Case: step 6, image 1 of 1
      • Pull out the 3 green tabs (in orange) and open slowly as if it were a door.

      • The tabs are very fragile.

      Ask FixBot

      Add Comment

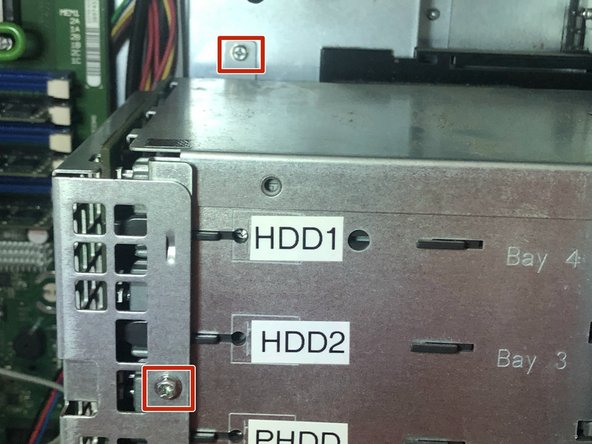
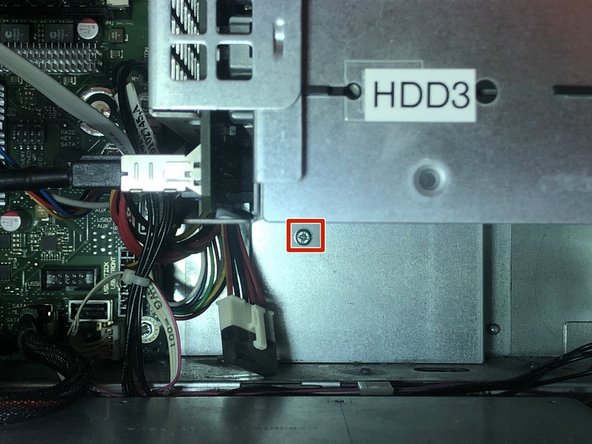
    7. Disassembly Fujitsu Primergy, Remove the caddy for HDDs (Bay 3,5"): step 7, image 1 of 2 Disassembly Fujitsu Primergy, Remove the caddy for HDDs (Bay 3,5"): step 7, image 2 of 2
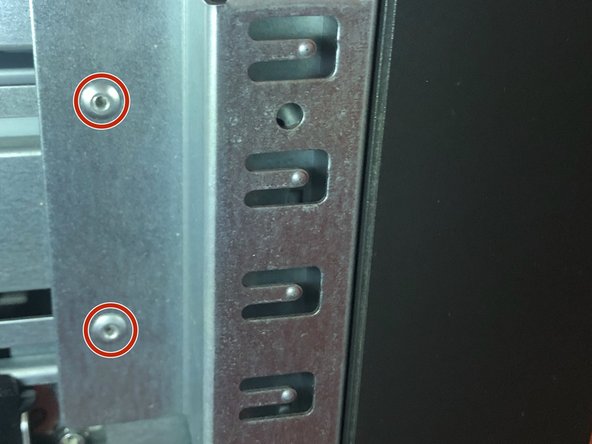
      • To remove the HDD caddy (Bay 3.5") you need to unscrew hidden screws.

      • Unscrew the three screws as shown in the photo.

      • Disconnect and the cables and pull out the front of the caddy.

      Ask FixBot

      Add Comment

    8. Disassembly Fujitsu Primergy, Remove CD players (Bay 5,25"): step 8, image 1 of 1
      • The CD player caddy (Bay 5.25") is NOT removable because it is sold to the case.

      Ask FixBot

      Add Comment

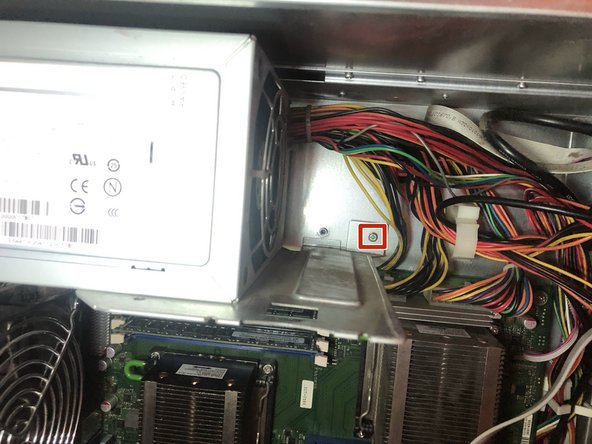
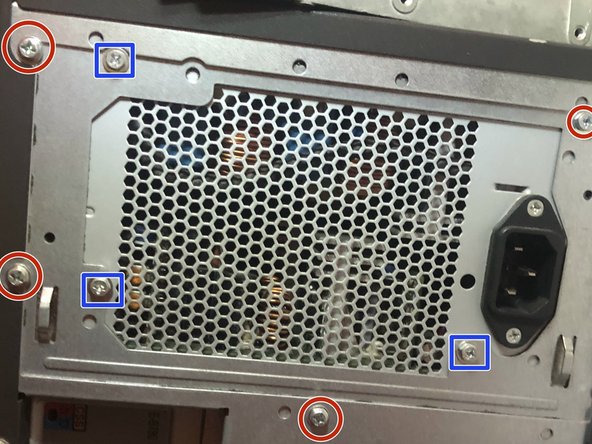
    9. Disassembly Fujitsu Primergy, Remove the power supply: step 9, image 1 of 2 Disassembly Fujitsu Primergy, Remove the power supply: step 9, image 2 of 2
      • Attention, the power supply can still be charged even when turned off. Handle with care.

      • Disconnect all cables from the motherboard (4x8Pin + 24Pin), peripherals (SATAPower) and caddy.

      • Unscrew the screw inside the case and the screws placed on the outside.

      • The external screws (in blue) secure the power supply to its caddy and are to be removed once out of the case.

      • Slide the power supply inward and pull it out.

      Ask FixBot

      Add Comment

      • TO BE FINISH

      Ask FixBot

      Add Comment

Special thanks to these translators:

it en

100%

Marc developer is helping us fix the world! Want to contribute?
Start translating ›

Attached Documents

Marc developer

Member since: 08/16/21

1,536 Reputation

4 Guides authored

0 Guide Comments

Add Comment

View Statistics:

Past 24 Hours: 0

Past 7 Days: 5

Past 30 Days: 23

All Time: 534