Introduction
The Sleepytroll Baby Rocker is a device designed to gently rock a baby’s stroller or crib, helping to soothe them when they start to stir. It can detect movement or sounds, like crying, and responds by rocking the baby back to sleep. With adjustable settings, it allows parents to control the intensity and duration of the rocking motion, providing a practical way to keep babies calm and settled.
-
-
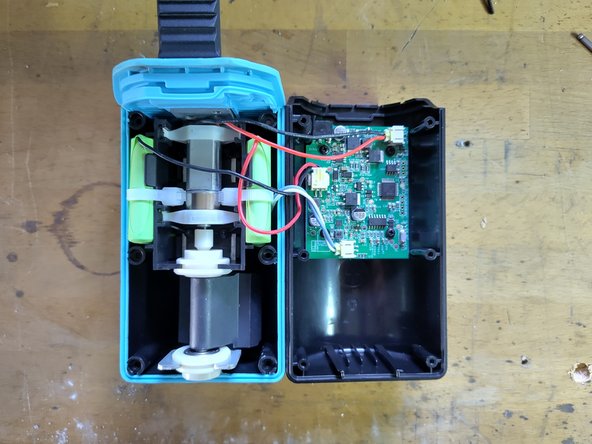
Remove the screws along the sides as well as on the top, holding the band.
 Ask FixBot
-
-
-
-
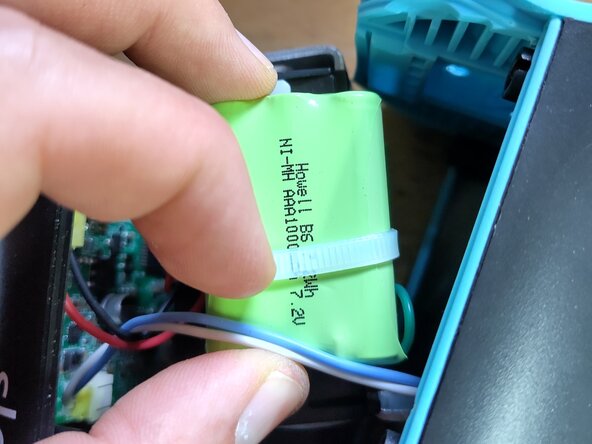
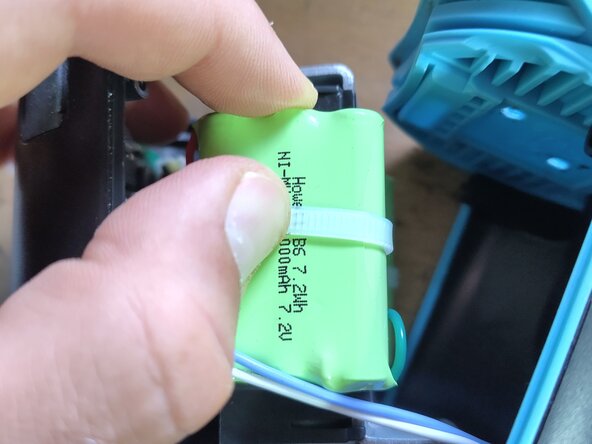
To replace the battery, just find a suitable battery pack and replace it. Follow the writing on the battery.
-


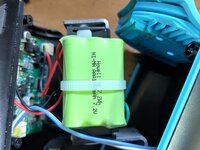
To reassemble your device, follow these instructions in reverse order.
Team

5 Guide Comments
Is there any way to fix the charging port? It was charging when it got yanked to the side, and now it will only charge by putting a lot of force on the port capble and you kind of have to force it to the side to make it connect. I have sit holding it to make it charge, and that just kinda sucks. I opened it to see if there was anything to do about it, but I was too scared to break anything to mess around too much, and the port didn't seem to be moveable at all.
Really hope you have some insights. Its the sleepytroll rocker gen 2 but it seems to look very similar inside.
Hi Marita,
As you have the Gen 2, it's charging with a USB-C port, the Gen 1 has a round generic DC-plug. I haven't actually opened a Gen 2 yet, but I expect that they just replaced the charging port.
1. Have you tried cleaning the USB-C plug? Could it be dust or something else that got stuck? Try with a needle without pulling on the copper contacts.
2. Have you tried another cable? Any USB-C cable should work and sometimes they are just slightly bigger or smaller...
3. If you actually have to replace the USB-C port that should not be too difficult, as its only for charging and therefore quite big. But you likely need to solder and it won't necessarily stay watertight.
If you don't feel comfortable with the last step, I'd recommend to look for community repair places in your area or ask a professional.
Feel free to post some images to see how the charger is connected inside.
Hi Johannes! Do you know where to find a suitable nimh battery? I have a gen 1 sleepytroll baby rocker. when i open the casing, i can see two batteries packs on each side. Every battery pack seems to consist of 3 AAA batteries. There's no description whatsoever on the green wrap, contrary to what it shows on your photos. Am i right to assume i will need two 1000mah 7.2v nimh batteries?
@sdr85 any news on this?
@johansalveson found a 700mah version on 123accu.nl: (Nortel NT7B65LD / NT7B65KL accu (700 mAh, 123accu).
Works pretty ok although it seems the battery indicator light doesnt work correctly after installation.
original battery is 1000mah by the way, so with this one installed, battery will not last as long. Thebattery spec turned out to be printed on the other battery pack by the way.