Introduction
Before any work can be done, we need to remove the plate amp from the case.
⚠ Mains voltage!
Before opening up make sure to switch the amp ON, then remove the power cord. This will drain the internal capacitors quiker. Even then, wait for 15 minutes before opening. Make sure you test for safe power before continuing. If you do not know how, then do not follow this guide. Practice on low voltage devices first.
What you need
-
-
Place the subwoofer on it legs to protect the driver. Be careful not to touch the driver/speaker on the bottom when you handle the case.
-
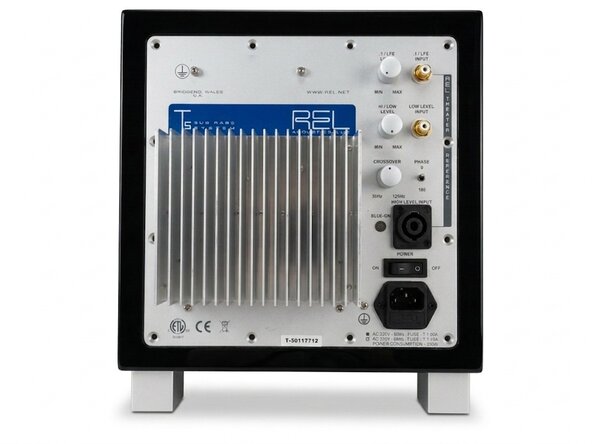
Using the 3mm hex tool, remove only the outer rim of screws, starting from the bottom.
-
Make sure to support the plate amp by gripping the heat sink.
-
Remove the top screws. Be aware: the heavy transformer is located at the top. Removing the top screws will probably make the plate amp tilt out of the case.
-
Using the heatsink, carefully lift the plate amp out of the case. Again: it's heavier than you might expect!
 Ask FixBot
-
-
-
-
The plate amp is still connected to the driver via faston connectors. I found it easiest to disconnect the driver connectors, but removing them from the amplifier side works equally well.
-
-
-
You've now removed the plate amp. Set it aside on the heatsink side. The height of the heatsink will make sure that the controls are not damaged.
-
Now is a good time to check the voltage rails for residual voltage. Everything after the rectifier bridge should be <45V, but always take appropriate precautions when it comes to mains powered devices.
-


To reassemble your device, follow these instructions in reverse order.
