Introduction
To remove the case of a Panasonic Microwave Oven NN-SN966S you will need a Torx Security (TS) or Tamper Resistant Torx (Torx TR or just TR) screwdriver or bit size 20 (TS20 or TR20) that fits screws with a 6-point star shape with a central post. Some or all the screws for the case will be this type, but others may also be standard Philips #2 type (PH2). These instructions should work for a lot of other Panasonic microwave ovens as they are similar in design.
What you need
-
-
-
WARNING: HIGH VOLTAGE HAZARD. Unplug the power cord and leave it unplugged for at least two minutes before removing the outer case. The front panel display should be blank. If it is still showing the time or any other part of it is lit, then the oven is still plugged in.
-
IMPORTANT: Do not touch the parts inside the oven marked with red boxes, even when it is unplugged. These can hold a voltage of 2,000 V or more for some time. Avoid touching them with your fingers or any metal tool that lacks insulation. Do not insert any wire or tool inside them. There is no need to touch these parts in these instructions.
-
Disclaimer: Repairing a microwave yourself can be hazardous. If you are not comfortable working around high-voltage electronics, it is recommended to take the unit to a qualified service technician.
 Ask FixBot
-
-
-
Remove five screws from the rear of the oven. Some or all will be Torx Security or Tamper Resistant size 20 (TS20 or TR20). Others may be Philips #2.
-
-
-
-
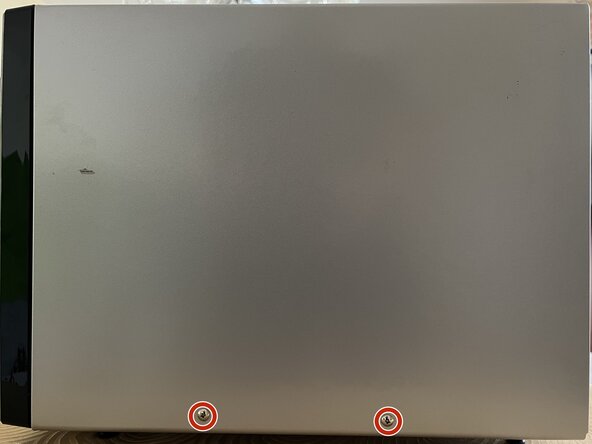
Remove two Philips #2 screws from the right side of the oven. These screws are usually different from the ones on the rear so keep them separate or label them.
-
-
-
Slide the outer case towards the rear of the oven and then lift it straight up. Be careful of the edges of the case as they are sharp and may cause injury. It is a good idea to wear gloves to do this. Also be careful that the edges of the case do not touch internal components during removal as this can damage them.
-
-
-
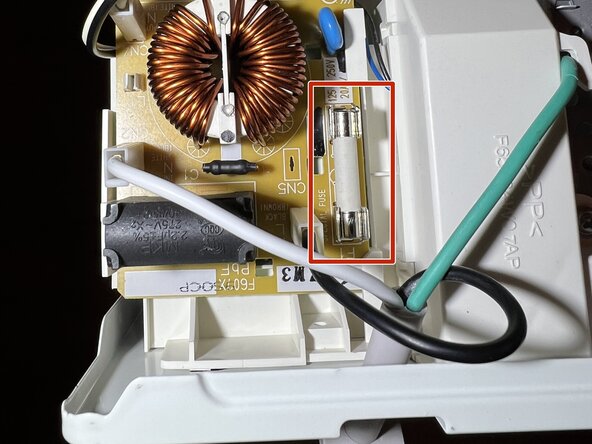
While you have the cover off, it is a good idea to reposition the fuse near the power cord. Over time some metal oxide can form between the fuse and the contacts, which can result in the fuse becoming hot. This can eventually melt the fuse causing it to fail. Lifting the fuse out of the fuse holder and putting it back will help remove any oxide.
-
The last two pictures show how to slide the molding around power cord up and then away from the back panel to gain better access to the fuse.
-
If you need to replace the fuse look for part number F62308F20AP (originally F62308F00AP). It is a 6 mm x 30 mm (0.24 x 1.18 inch) 20 amp slow blow fuse. It can also be called a 1.25 inch fuse.
-
-






To reassemble your device, follow these instructions in reverse order.
IMPORTANT: After sliding the cover back onto the oven, replace all the side and rear screws to ensure a proper seal to prevent microwave leakage.

