Disassembling Nintendo DSi Bottom case

Archived Guide
This guide is retained solely for historical purposes. Use the updated version of the guide to perform your repair.

What you need

  1. Careful: steps 1-2 are sourced from a guide that's marked as in-progress.

    Disassembling Nintendo DSi Bottom case, Battery: step 1, image 1 of 1
    • Loosen the two screws on the battery panel. Then lift the panel up to remove it.

  2. Disassembling Nintendo DSi Bottom case: step 2, image 1 of 1
    • L Button.

    • Top of the battery pack.

    • To remove the battery pack, place your fingernail or a spudger at the top of the battery near the L button. Gently lift the battery out.

  3. Careful: steps 3-4 are sourced from a guide that's marked as in-progress.

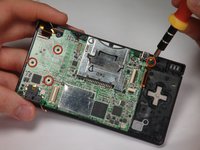
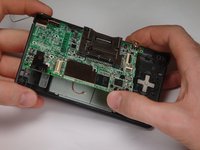
    Disassembling Nintendo DSi Bottom case, Motherboard: step 3, image 1 of 2 Disassembling Nintendo DSi Bottom case, Motherboard: step 3, image 2 of 2
    • Remove 4 Phillips screws from the board.

    • Lift the main board from the bottom end and flip it over to reveal the last connector.

    • Keep the main board fairly close to the case, making sure not to damage the last ribbon cable holding it in place.

  4. Disassembling Nintendo DSi Bottom case: step 4, image 1 of 1
    • Disconnect the ribbon cable by gently using a plastic opening tool to flip up the black connector latch. The cable should easily slide out from the connector.

    • The motherboard should now be free from the rest of the device.

  5. Disassembling Nintendo DSi Bottom case, Disassembling Nintendo DSi Bottom case: step 5, image 1 of 1
    • Remove the rubber front-panel button membranes from the device. Pay careful attention to where the buttons go, so you can replace them correctly.

    • A/B/X/Y button assembly

    • Select/Start button assembly

    • D-pad

    • Power button

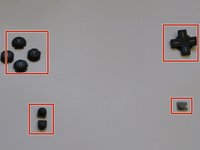
  6. Disassembling Nintendo DSi Bottom case: step 6, image 1 of 2 Disassembling Nintendo DSi Bottom case: step 6, image 2 of 2
    • Remove the plastic buttons and keep them in a safe place.

    • All of the buttons have "key" notches to prevent them from being inserted incorrectly (backwards or in the wrong place), but it can take a while to figure out where everything goes if they get shuffled around.

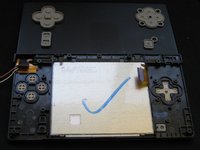
  7. Disassembling Nintendo DSi Bottom case: step 7, image 1 of 2 Disassembling Nintendo DSi Bottom case: step 7, image 2 of 2
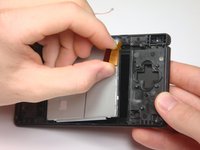
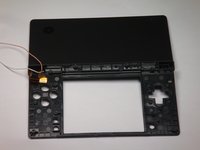
    • Flip the case open, and push the lower screen assembly out of the frame.

Conclusion

To reassemble your device, follow these instructions in reverse order.

rjcamero

Member since: 11/05/09

50 Reputation

3 Guides authored

Team

Cal Poly, Team 6-1, Maness Fall 2009 Member of Cal Poly, Team 6-1, Maness Fall 2009

CPSU-MANESS-F09S6G1

5 Members

4 Guides authored

0 Comments

Add Comment

View Statistics:

Past 24 Hours: 0

Past 7 Days: 3

Past 30 Days: 10

All Time: 5,338