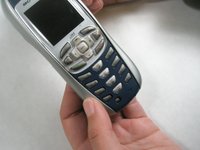
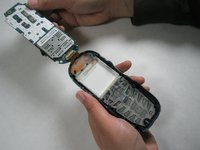
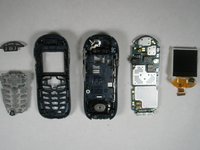
15% Off Selected iFixit Tools — Limited Time
Free Shipping on Domestic Orders $75+

Disassembling Motorola i265 Faceplate

What you need

  1. Disassembling Motorola i265 Faceplate, Rear Casing/Battery/SIM Card: step 1, image 1 of 2 Disassembling Motorola i265 Faceplate, Rear Casing/Battery/SIM Card: step 1, image 2 of 2
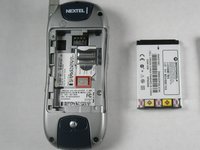
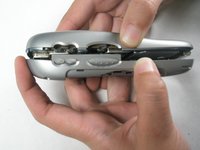
    • Press thumb against the top of the rear casing as shown and push down as you slide the casing off of the body.

    • You should hear a click as the latches on the casing disengage.

    Ask FixBot

    Add Comment

  2. Disassembling Motorola i265 Faceplate: step 2, image 1 of 3 Disassembling Motorola i265 Faceplate: step 2, image 2 of 3 Disassembling Motorola i265 Faceplate: step 2, image 3 of 3
    • To remove the battery, press thumb against the bottom edge of the battery and push towards the top of the phone.

    • Then, lift the bottom edge of the battery upwards out of the body. Gently pull the battery towards yourself, and out of the phone.

    Ask FixBot

    Add Comment

  3. Disassembling Motorola i265 Faceplate: step 3, image 1 of 3 Disassembling Motorola i265 Faceplate: step 3, image 2 of 3 Disassembling Motorola i265 Faceplate: step 3, image 3 of 3
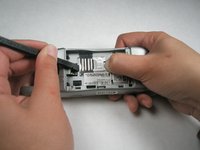
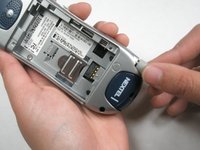
    • To remove SIM card, press thumb against tab marked “PUSH.”

    • While still pressing the PUSH tab, gently press spduger into the groove between the top of the SIM card and the body. Use spudger to slide SIM card toward the PUSH tab, so that when the spudger reaches the metal cover, the card itself is depressing the tab.

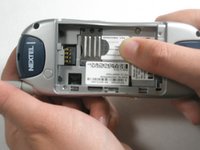
    • Press your thumb against the exposed section of the SIM card, and slide it towards the rear of the phone until it is completely free of the metal cover.

    Ask FixBot

    Add Comment

  4. Disassembling Motorola i265 Faceplate, Logic Board: step 4, image 1 of 3 Disassembling Motorola i265 Faceplate, Logic Board: step 4, image 2 of 3 Disassembling Motorola i265 Faceplate, Logic Board: step 4, image 3 of 3
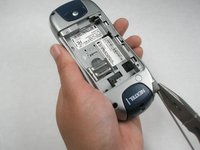
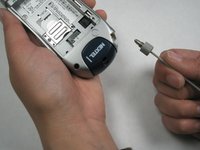
    • To remove the antenna, first extend it all the way.

    • Grab the rubber end connected to the phone and twist counterclockwise until the antenna comes out altogether.

    • If the rubber end won't twist manually, try using pliers to get it started.

    Ask FixBot

    Add Comment

  5. Disassembling Motorola i265 Faceplate: step 5, image 1 of 2 Disassembling Motorola i265 Faceplate: step 5, image 2 of 2
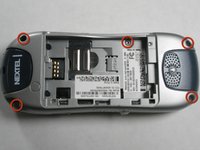
    • Locate all five screws on the phone, as indicated.

    • Using a T-6 screwdriver, remove each screw by turning it counterclockwise until it is free of the casing.

    Ask FixBot

    Add Comment

  6. Disassembling Motorola i265 Faceplate: step 6, image 1 of 3 Disassembling Motorola i265 Faceplate: step 6, image 2 of 3 Disassembling Motorola i265 Faceplate: step 6, image 3 of 3
    • Carefully separate the two sides of the casing by pulling each side apart as if opening a book. Do not be alarmed if the rubber volume control button falls out of the casing.

    • Lay the sides of the phone so they are open side up.

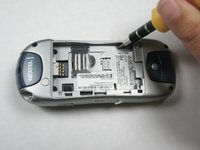
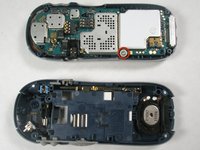
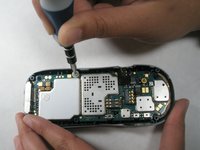
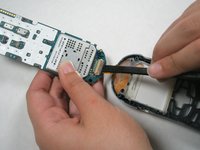
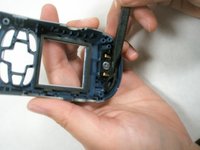
    • On the side of the phone with the logic board, locate the screw as indicated.

    • Use the T-6 screwdriver to remove the screw from this part of the board.

    • Note: Take special care not to lose the white washer that seperates the screw from the logic board.

    Ask FixBot

    Add Comment

  7. Disassembling Motorola i265 Faceplate: step 7, image 1 of 2 Disassembling Motorola i265 Faceplate: step 7, image 2 of 2
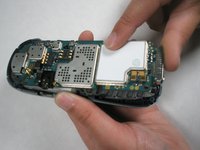
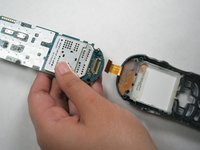
    • Place your thumb at the bottom of the logic board. Carefully lift up with your thumb to lift the logic board out of the casing.

    • Note: Do not try to completely remove the circuit board from the phone as it will be connected to the electrical strip at the top of the phone.

    Ask FixBot

    Add Comment

  8. Disassembling Motorola i265 Faceplate: step 8, image 1 of 3 Disassembling Motorola i265 Faceplate: step 8, image 2 of 3 Disassembling Motorola i265 Faceplate: step 8, image 3 of 3
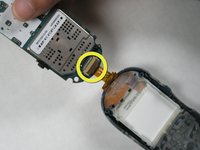
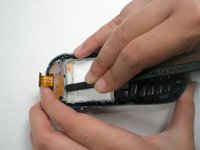
    • Locate the switch connecting the the logic board to the electrical strip.

    • Slide spudger under the switch and lift up to free the strip. This will separate the logic board from the phone cover

    Ask FixBot

    Add Comment

  9. Disassembling Motorola i265 Faceplate, Keypad: step 9, image 1 of 3 Disassembling Motorola i265 Faceplate, Keypad: step 9, image 2 of 3 Disassembling Motorola i265 Faceplate, Keypad: step 9, image 3 of 3
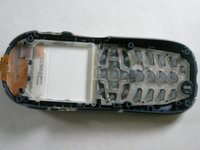
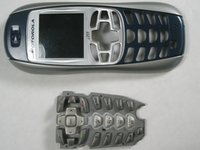
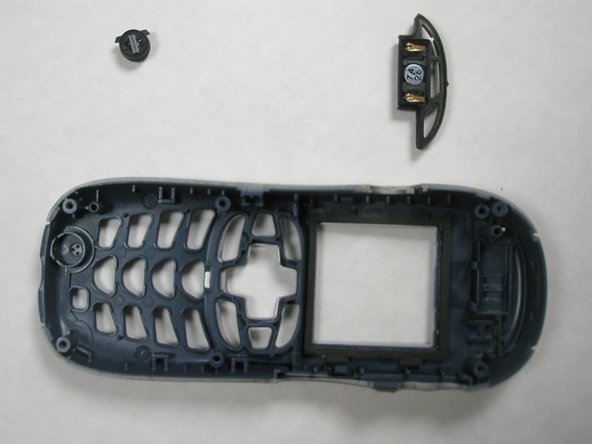
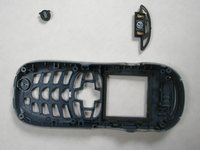
    • After you remove the logic board, there is nothing holding the keypad in place. Turn the phone casing over, and it should simply fall out.

    • If it does not immediately fall out after you turn the casing over, lightly press a few of the buttons to help it along.

    Ask FixBot

    Add Comment

  10. Disassembling Motorola i265 Faceplate, LCD Screen: step 10, image 1 of 1
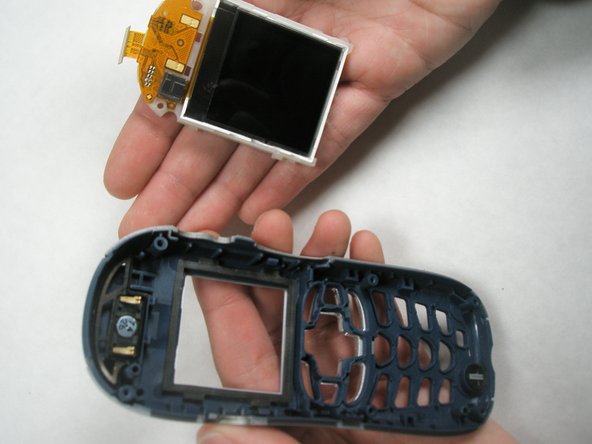
    • To remove the LCD screen, you will have to first release the 4 tabs that hold the screen in place.

    Ask FixBot

    Add Comment

  11. Disassembling Motorola i265 Faceplate: step 11, image 1 of 1
    • To release the 2 lower tabs, insert the flat end of the spudger between the tab and the LCD screen. Press firmly until the spudger hits the back of the faceplate. This should release the tab.

    • Repeat this for the second bottom tab.

    Ask FixBot

    Add Comment

  12. Disassembling Motorola i265 Faceplate: step 12, image 1 of 2 Disassembling Motorola i265 Faceplate: step 12, image 2 of 2
    • To release the 2 upper tabs, use the flat end of the spudger to push the tab towards the top of the phone. The LCD screen should move above the tab. Repeat this for the second tab.

    • If the LCD screen locks into the bottom tabs again, release them and then use your thumb to prop up the bottom of the screen while you release the upper tabs.

    • To fully remove the LCD screen, flip the casing over so that the top face of the phone is in your palm. The LCD screen should fall out of the casing.

    • Avoid as much contact with the actual screen as possible. Pressure on the screen may damage it.

    Ask FixBot

    Add Comment

  13. Disassembling Motorola i265 Faceplate, Speaker and Microphone: step 13, image 1 of 1
    • Locate the speaker (indicated in orange) and the microphone (indicated in yellow).

    Ask FixBot

    Add Comment

  14. Disassembling Motorola i265 Faceplate: step 14, image 1 of 1
    • To remove the microphone, locate the two small tabs on either side of it.

    • Use the pointed end of the spudger to lift one of these tabs. This should lift the microphone out of the casing.

    Ask FixBot

    Add Comment

  15. Disassembling Motorola i265 Faceplate: step 15, image 1 of 2 Disassembling Motorola i265 Faceplate: step 15, image 2 of 2
    • The design of the speaker includes several cavities.

    • To remove the speaker, slide the pointed end of the spudger into one of the cavities and under the frame of the speaker. This should pop it out of casing.

    Ask FixBot

    Add Comment

  16. Disassembling Motorola i265 Faceplate, Faceplate: step 16, image 1 of 2 Disassembling Motorola i265 Faceplate, Faceplate: step 16, image 2 of 2
    • The faceplate should now be empty and ready for replacement.

    Ask FixBot

    Add Comment

Conclusion

To reassemble your device, follow these instructions in reverse order.

Cancel: I did not complete this guide.

Jonathan Uder

Member since: 04/15/10

1 Reputation

6 Guides authored

Team

Cal Poly, Team 6-15, Maness Spring 2010 Member of Cal Poly, Team 6-15, Maness Spring 2010

CPSU-MANESS-S10S6G15

4 Members

9 Guides authored

0 Guide Comments

Add Comment

View Statistics:

Past 24 Hours: 0

Past 7 Days: 15

Past 30 Days: 34

All Time: 1,938