
Disassembling Keurig Mini B-31 Arm

Prerequisite Only
This guide is only intended to be used as a prerequisite for other guides. It's incomplete by itself.

What you need

  1. Disassembling Keurig Mini B-31 Arm, Arm: step 1, image 1 of 1
    • With the needle removed, open the device by pulling up on the handle.

  2. Disassembling Keurig Mini B-31 Arm: step 2, image 1 of 3 Disassembling Keurig Mini B-31 Arm: step 2, image 2 of 3 Disassembling Keurig Mini B-31 Arm: step 2, image 3 of 3
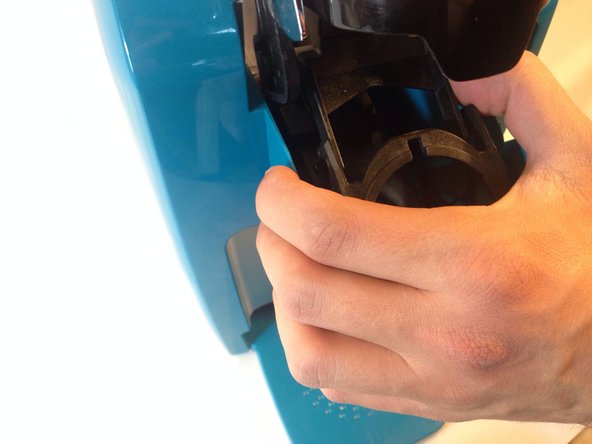
    • Push in on one of the arms attached to the K-cup holder plastic housing to remove it from its rails. The arms are identical for both sides so once one side is free repeat the process for the second side.

    • The plastic is flexible and will not snap with the force applied.

    • Once the arms are removed, the configuration should look like the picture. The K-cup holder housing should be separated from the arms.

  3. Disassembling Keurig Mini B-31 Arm: step 3, image 1 of 1
    • Use a Phillips #1 screw driver to remove the four 12 mm screws that hold the arm assembly in place.

  4. Disassembling Keurig Mini B-31 Arm: step 4, image 1 of 2 Disassembling Keurig Mini B-31 Arm: step 4, image 2 of 2
    • Lift up the arm and pull up the handle assembly. It should easily come off.

    • This white tab falls off easily, remove it and set it aside to ensure it is not lost.

Conclusion

To reassemble your device, follow these instructions in reverse order.

Andrew Adriance

Member since: 01/14/14

1,914 Reputation

7 Guides authored

Team

Cal Poly, Team 17-1, Forte Winter 2014 Member of Cal Poly, Team 17-1, Forte Winter 2014

CPSU-FORTE-W14S17G1

5 Members

17 Guides authored

0 Comments

Add Comment

View Statistics:

Past 24 Hours: 0

Past 7 Days: 0

Past 30 Days: 0

All Time: 68