What you need
-
-
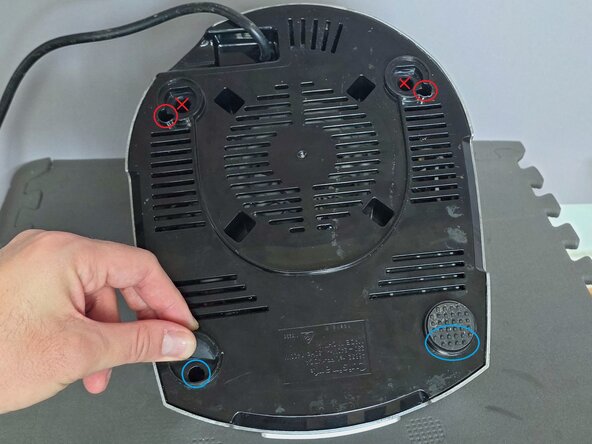
Pull out the rubber feet circled in red and lift up the bottom half flap of the rubber feet circled in blue, to reveal the screw holes under each.
 Ask FixBot
-
-
-
Note: Do not insert screwdrivers into the holes marked with red Xs as these lead directly into the appliance. The correct screw holes are circled.
-
Using a long Spanner #10 screwdriver, unscrew the one screw of this type securing the black base to the silver case. It is approximately 8cm deep.
-
Using a long Phillips #2 Screwdriver, unscrew the three screws of this type securing the black base to the silver case. They are approximately 8cm deep.
-
Note: The screws cannot be reached with the iFixit Mako Driver or Flex Extension due to the narrow holes. Alternatively, the HORUSDY 32-Piece Security Power Bits Set contains the two extra long drill bits required.
-
-
-
-
WARNING: Even when unplugged, mains-powered appliances can retain dangerous voltages in capacitors that may not immediately discharge. Always assume stored energy is present and verify safe discharge before touching internal components, as contact can result in serious injury or death.
-
Separate the black base from the silver cover.
-
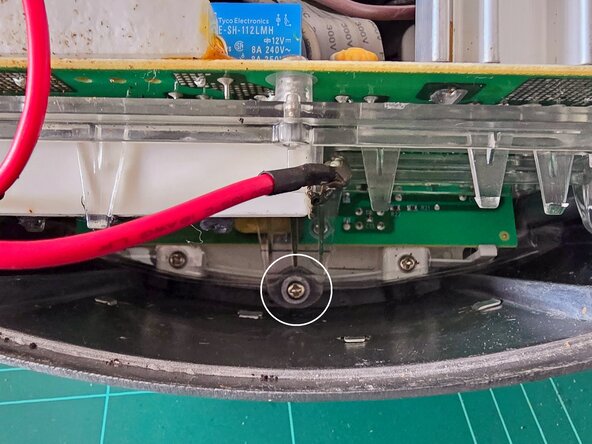
Using a Phillips #2 Screwdriver, unscrew the one screw to remove the power board, circled in white.
-
Tip: A Magnetic Pickup Bit may be useful to grab short screws (and put them back into position) if you don't have magnetised screwdriver bits.
-
-
-
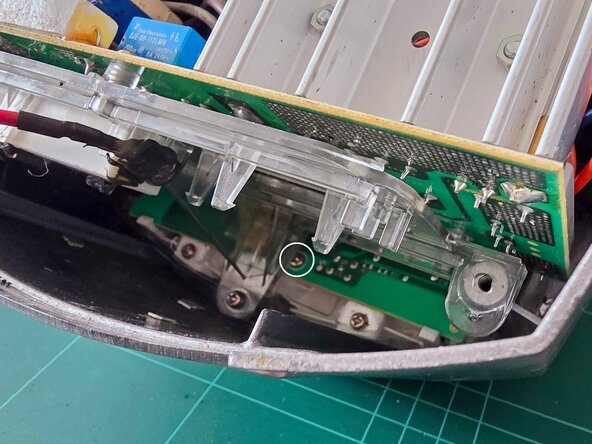
Using a Phillips #2 Screwdriver, unscrew the three screws securing the main circuit board, circled in white across the two photos.
-
This board contains the microswitches for each button.
-
-
-
Using a Phillips #2 Screwdriver, unscrew the two screws securing the plastic button cover.
-


To reassemble your device, follow these instructions in reverse order.
When reinstalling the two rubber feet, align the flat side of the rubber feet.
