
Disassembling Canon PowerShot A2500 Internal LCD Frame

Prerequisite Only
This guide is only intended to be used as a prerequisite for other guides. It's incomplete by itself.

What you need

  1. Disassembling Canon PowerShot A2500 Internal LCD Frame, Body Casing and Faceplate: step 1, image 1 of 2 Disassembling Canon PowerShot A2500 Internal LCD Frame, Body Casing and Faceplate: step 1, image 2 of 2
    • Remove the knot holding the wrist lanyard onto the camera

  2. Disassembling Canon PowerShot A2500 Internal LCD Frame: step 2, image 1 of 1
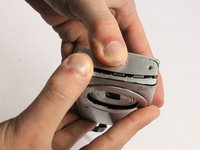
    • Open the latch at the bottom corner of the device to reveal the battery and SD card housing.

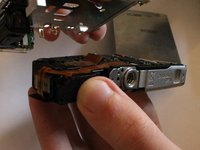
    • There is an orange latch holding the battery in place which must be pushed back in order to free the battery.

    • Once the battery is removed push the SD card and this will activate a spring ejecting the card from the camera.

  3. Disassembling Canon PowerShot A2500 Internal LCD Frame: step 3, image 1 of 3 Disassembling Canon PowerShot A2500 Internal LCD Frame: step 3, image 2 of 3 Disassembling Canon PowerShot A2500 Internal LCD Frame: step 3, image 3 of 3
    • Remove the 6 Phillips #00 exterior screws from the camera. Two are located on the bottom and two are located on either side as shown. Notice that one of the screws is under the AV Out Digital flap on the side. All exterior screws should be 2.4mm in length

  4. Disassembling Canon PowerShot A2500 Internal LCD Frame: step 4, image 1 of 3 Disassembling Canon PowerShot A2500 Internal LCD Frame: step 4, image 2 of 3 Disassembling Canon PowerShot A2500 Internal LCD Frame: step 4, image 3 of 3
    • Pry apart the camera casing using the plastic opening tool tool provided. Once the casing has begun to separate pull the two sides apart with your hands.

    • Be careful not to bend the plastic casing to much, as it will crack.

  5. Disassembling Canon PowerShot A2500 Internal LCD Frame, Buttons: step 5, image 1 of 1
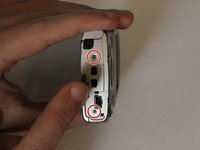
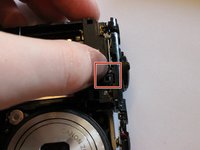
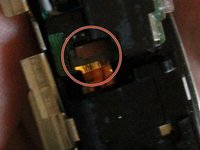
    • Remove the single philips #00 screw on the button pad which are 2.2mm long. This screw is circled in red in the guide image.

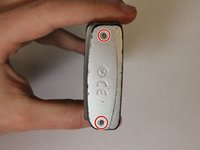
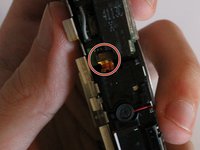
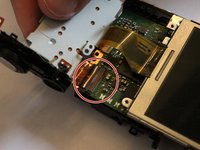
    • Next, remove the two 2.4mm long screws located in between the LCD screen and the touch pad. These screws will require a Phillips #00 screwdriver.

  6. Disassembling Canon PowerShot A2500 Internal LCD Frame: step 6, image 1 of 2 Disassembling Canon PowerShot A2500 Internal LCD Frame: step 6, image 2 of 2
    • Pull the two clips off located near the power button

    • The clips are easily broken, use care while disconnecting these clips.

  7. Disassembling Canon PowerShot A2500 Internal LCD Frame: step 7, image 1 of 3 Disassembling Canon PowerShot A2500 Internal LCD Frame: step 7, image 2 of 3 Disassembling Canon PowerShot A2500 Internal LCD Frame: step 7, image 3 of 3
    • Remove the circuit ribbon connecting the flash to the camera in order to proceed to the next instruction.

    • Carefully pull out the circuit ribbon from the camera which should be the last piece holding the button pad onto the camera.

  8. Disassembling Canon PowerShot A2500 Internal LCD Frame, Internal LCD Frame: step 8, image 1 of 1
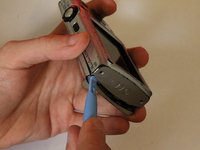
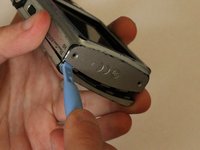
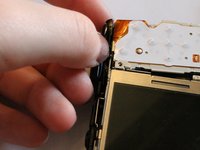
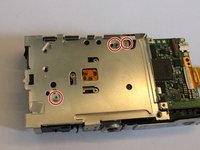
    • Pop the LCD display out of its frame using the plastic opening tool in order to get to the screws under the display. Use the plastic opening tool to complete this step

  9. Disassembling Canon PowerShot A2500 Internal LCD Frame: step 9, image 1 of 3 Disassembling Canon PowerShot A2500 Internal LCD Frame: step 9, image 2 of 3 Disassembling Canon PowerShot A2500 Internal LCD Frame: step 9, image 3 of 3
    • Remove the four following phillips #00 screws from the metal frame

    • There should be two screws top right, one bottom left, and one on bottom of the frame

    • The screw dimensions should follow: Top right should be 2.3mm and 3.6mm long. Bottom left should be 3.6mm and the bottom of the frame should be 1.6mm

Conclusion

To reassemble your device, follow these instructions in reverse order.

Victoria Winters

Member since: 03/23/15

293 Reputation

2 Guides authored

Team

0 Comments

Add Comment

View Statistics:

Past 24 Hours: 0

Past 7 Days: 0

Past 30 Days: 0

All Time: 44