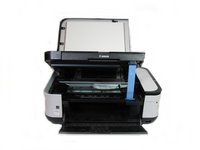
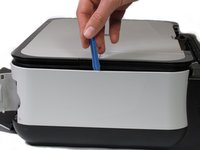
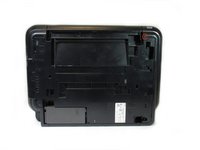
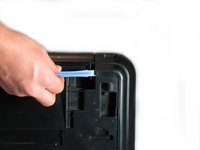
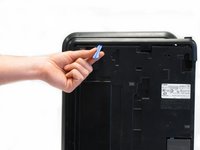
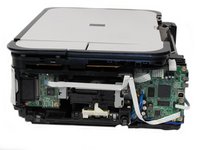
Disassembling Canon Pixma MP480 Rear and Side Panel

What you need

  1. Disassembling Canon Pixma MP480 Rear and Side Panel, Rear and Side Panel: step 1, image 1 of 2 Disassembling Canon Pixma MP480 Rear and Side Panel, Rear and Side Panel: step 1, image 2 of 2
    • Remove the two 7.9 mm screws using a Phillips #1 screwdriver.

  2. Disassembling Canon Pixma MP480 Rear and Side Panel: step 2, image 1 of 1
    • Lift up the back cover to remove it.

    • You may need to lift firmly as it requires quite a bit of force.

  3. Disassembling Canon Pixma MP480 Rear and Side Panel: step 3, image 1 of 1
    • Open the front tray.

  4. Disassembling Canon Pixma MP480 Rear and Side Panel: step 4, image 1 of 2 Disassembling Canon Pixma MP480 Rear and Side Panel: step 4, image 2 of 2
    • Open the scanner compartment.

    • Make sure the blue lever locks into place to keep the compartment open.

  5. Disassembling Canon Pixma MP480 Rear and Side Panel: step 5, image 1 of 2 Disassembling Canon Pixma MP480 Rear and Side Panel: step 5, image 2 of 2
    • Remove the blue lever from its slot by pushing it back and twisting clockwise.

    • Close the scanner compartment and cover.

  6. Disassembling Canon Pixma MP480 Rear and Side Panel: step 6, image 1 of 2 Disassembling Canon Pixma MP480 Rear and Side Panel: step 6, image 2 of 2
    • Pry open the side cover with the plastic opening tool.

  7. Disassembling Canon Pixma MP480 Rear and Side Panel: step 7, image 1 of 2 Disassembling Canon Pixma MP480 Rear and Side Panel: step 7, image 2 of 2
    • Flip the printer over so that you are facing the bottom of the printer.

    • Use the plastic opening tool to remove the corner of the side panel from the plastic pin.

  8. Disassembling Canon Pixma MP480 Rear and Side Panel: step 8, image 1 of 2 Disassembling Canon Pixma MP480 Rear and Side Panel: step 8, image 2 of 2
    • Use the plastic opening tool to loosen the side panel from the bottom of the printer.

Conclusion

To reassemble your device, follow these instructions in reverse order.

6 other people completed this guide.

Kevin Cole

Member since: 01/17/13

116 Reputation

1 Guide authored

Team

Cal Poly, Team 19-41, Regan Winter 2013 Member of Cal Poly, Team 19-41, Regan Winter 2013

CPSU-REGAN-W13S19G41

4 Members

6 Guides authored

2 Comments

Good job!!!!

lhitvietnam - Reply

Where is the rest of disassembly?

bill roberts - Reply

Add Comment

View Statistics:

Past 24 Hours: 0

Past 7 Days: 2

Past 30 Days: 25

All Time: 21,119