
DigiLand DL718M Screen Replacement

Alayna Knarian and 5 other contributors
Last updated on Jan 3, 2020
Views: 761
View statistics:
- Past 24 Hours:
- 3
- Past 7 Days:
- 16
- Past 30 Days:
- 73
- All Time:
- 761
Comments: 1
1 guide comment.
Go to guide commentsCompleted: 1 2
1 person has marked this guide "completed." Will you be next?
2 people have marked this guide "completed." Including you — great job!
Favorites: 0 1
No one has favorited (and subscribed to) this guide. Will you be the first?
1 person has favorited (and subscribed to) this guide — and that's you!
Needs More Images
A few more images would make this guide's procedures crystal clear.
Introduction
Go to step 1 ↓If your Digiland DL718M tablet has a damaged or unresponsive screen, use this guide to replace the screen of the device.
If you are considering replacing your screen because of unresponsiveness, refer to the DigiLand DL718M Troubleshooting page to find out what could be causing this problem and if it can be fixed without replacing the screen.
This process requires you to remove the back panel of the device and thus expose the motherboard. Be careful when working with an exposed motherboard as you could damage it, if it comes into contact with moisture. It is motion-sensitive, and small aspects can be easily jostled out of place.
Before you begin, make sure to power the tablet off completely and disconnect it from any external power source.
What you need
Tools


-
-
-
Remove back panel by wedging the iFixit opening tool on all four sides of the device.
 Ask FixBot
-
-
-
-
-
Remove two silver Phillips #0 screws along the bottom of the internal panel.
-
-
-
Remove the ribbon in the bottom left corner of the motherboard by lifting the black tab and sliding the ribbon out from the slot underneath the black tab.
-
-
-
Remove the small, circular microphone on the left side of the device by sliding it out of its slot using an opening tool.
-
-
-
Remove the front-facing camera in the top left corner of the device by sliding it out of its slot using an opening tool.
-
-
-
Remove the three black Phillips #0 screws along the left side of the motherboard.
-
-
-
Remove the rear-facing camera by prying it off of the back side of the screen using the an opening tool.
-
-
-
-
Remove the ribbon above the battery by lifting the black tab and sliding the ribbon out from the slot underneath the black tab using an opening tool.
-
-
-
Pry the battery off of the back of the screen by wedging the iFixit opening tool underneath.
-
-


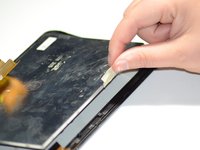
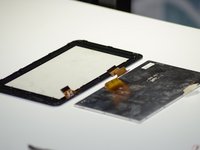
To reassemble your device, follow these instructions in reverse order.
Cancel: I did not complete this guide.
One other person completed this guide.

Team

Grand Valley State University, Team S4-G4, DeVasto Fall 2019 Member of Grand Valley State University, Team S4-G4, DeVasto Fall 2019
GVSU-DEVASTO-F19S4G4
4 Members
72 Guides authored
