Dexter 800W Corded Angle Grinder - 800AG2-125.5 Carbon Replacement

What you need

  1. Dexter 800W Corded Angle Grinder - 800AG2-125.5 Carbon Replacement, Unplug: step 1, image 1 of 1
    • Before you begin, remember to disconnect the mains plug.

  2. Dexter 800W Corded Angle Grinder - 800AG2-125.5 Carbon Replacement: step 2, image 1 of 2 Dexter 800W Corded Angle Grinder - 800AG2-125.5 Carbon Replacement: step 2, image 2 of 2
    • Remove the side handle and the protective cover.

  3. Dexter 800W Corded Angle Grinder - 800AG2-125.5 Carbon Replacement: step 3, image 1 of 2 Dexter 800W Corded Angle Grinder - 800AG2-125.5 Carbon Replacement: step 3, image 2 of 2
    • Unscrew the 4 screws to open the machine.

  4. Dexter 800W Corded Angle Grinder - 800AG2-125.5 Carbon Replacement: step 4, image 1 of 1
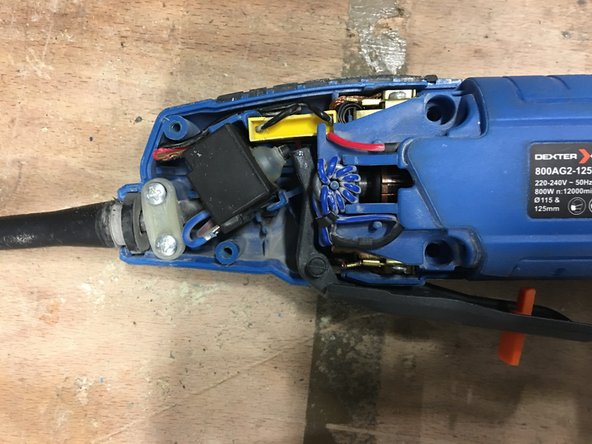
    • Remove the paddle switch for better access.

    • Remove the two pods.

    • Relax the blade springs.

    • Take out the carbons.

  5. Dexter 800W Corded Angle Grinder - 800AG2-125.5 Carbon Replacement: step 8, image 1 of 2 Dexter 800W Corded Angle Grinder - 800AG2-125.5 Carbon Replacement: step 8, image 2 of 2
    • Replace the new carbons.

    • Pay attention to the direction: the cable coming out of the carbon must be on the side of the head of the device and not towards the power cable.

  6. Dexter 800W Corded Angle Grinder - 800AG2-125.5 Carbon Replacement: step 9, image 1 of 3 Dexter 800W Corded Angle Grinder - 800AG2-125.5 Carbon Replacement: step 9, image 2 of 3 Dexter 800W Corded Angle Grinder - 800AG2-125.5 Carbon Replacement: step 9, image 3 of 3
    • Reconnect the carbons.

  7. Dexter 800W Corded Angle Grinder - 800AG2-125.5 Carbon Replacement: step 10, image 1 of 1
    • Replace the paddle switch.

  8. Dexter 800W Corded Angle Grinder - 800AG2-125.5 Carbon Replacement: step 11, image 1 of 1
    • Tighten the 4 screws to close.

  9. Dexter 800W Corded Angle Grinder - 800AG2-125.5 Carbon Replacement: step 12, image 1 of 2 Dexter 800W Corded Angle Grinder - 800AG2-125.5 Carbon Replacement: step 12, image 2 of 2
    • Replace the outer flange, protective cover and side handle.

Conclusion

by the end of the guide you will have replaced the carbon in your device

Special thanks to these translators:

fr en

100%

HelloMacOS is helping us fix the world! Want to contribute?
Start translating ›

Céline Chemineau

Member since: 01/29/20

16,581 Reputation

95 Guides authored

Team

Leroy Merlin Member of Leroy Merlin

Community

36 Members

239 Guides authored

0 Comments

Add Comment

View Statistics:

Past 24 Hours: 1

Past 7 Days: 12

Past 30 Days: 31

All Time: 774