This translation was generated by a machine and has not been reviewed by a person yet. Speak this language? Review it.

Dexter 750W Wired Jig Saw Base Plate Replacement

Céline Chemineau and one other contributor
Last updated on Sep 2, 2026
Views: 1.8K
View statistics:
- Past 24 Hours:
- 2
- Past 7 Days:
- 9
- Past 30 Days:
- 81
- All Time:
- 1,849
Comments: 0
No one has left comments on this guide. Will you be first?
Go to guide commentsCompleted: 0 1
No one has marked this guide "completed." Will you be the first?
1 person has marked this guide "completed." It's you — great job!
Favorites: 0 1
No one has favorited (and subscribed to) this guide. Will you be the first?
1 person has favorited (and subscribed to) this guide — and that's you!
Community-Contributed Guide
An awesome member of our community made this guide. It was not created by iFixit staff.
Introduction
Go to step 1 ↓This guide will show you how to replace the base plate on a Dexter 750 W wired jig saw. Unplug the saw from the mains before starting any work.
-
-
-
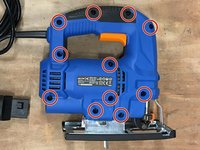
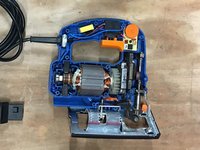
Using a screwdriver or screwdriver, unscrew and open the device.
-
Unlock the tray by lifting the lever.
-
-
-
-
Tighten until you get the right tension. To help you, you can replace the lid of the machine to best adjust.
-

 Ask FixBot



The reassemble follow guide through
Special thanks to these translators:
100%


These translators are helping us fix the world! Want to contribute?
Start translating ›