Introduction
The following description explains the structure of the Sony ICF-C717PJ projection alarm clock and how it can be disassembled for various repairs. Unfortunately, the device is designed in a way that makes it very difficult to repair. In my opinion, it is impossible to avoid damaging the housing if, for example, you want to access the display or the control buttons, or if you want to remove the projector. The assembly method chosen during initial assembly cannot be reversed.
The reason for my repair was that the projector could no longer be activated by pressing a button.
What you need
-
-
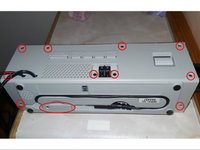
To open the housing, simply unscrew the marked small Phillips screws. Then the backup battery must be pulled out. E.g. with a knife, the plastic cover on the back can be carefully pressed off the aluminized housing part and the housing can be opened.
-
-
-
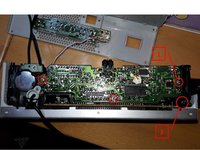
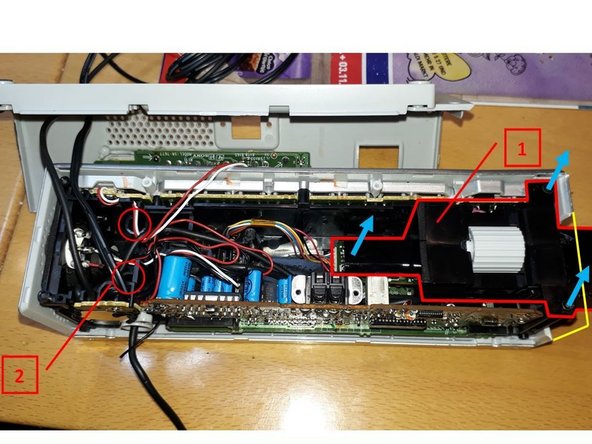
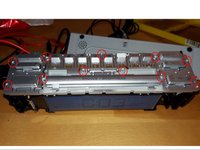
To loosen the receiver board, remove 3 screws [1]. By loosening another screw [2] the projector unit can already be loosened.
-
-
-
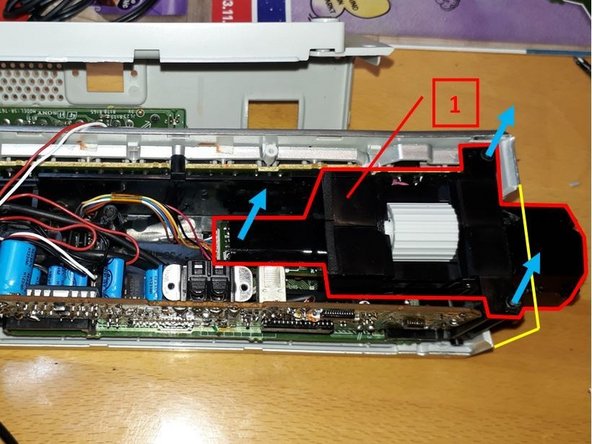
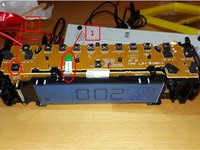
Unfortunately, the projector unit [1] cannot be pulled out upwards. The rotating lens unit is blocked on the housing. To remove the entire electronics from the housing, four screws actually have to be loosened. Only the two [2] screws are accessible. The other two are located out of reach underneath the projector.
-
-
-
-
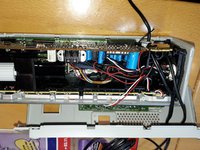
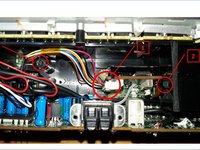
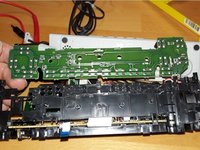
First disconnect the cable connector [1] by pulling it out. Below the ribbon cable [2] you can also reach the projector LED, which can be tested e.g. with the diode test of a multimeter. After that, removing the projector unit becomes complicated.
-
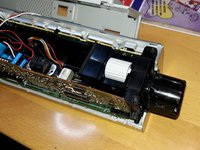
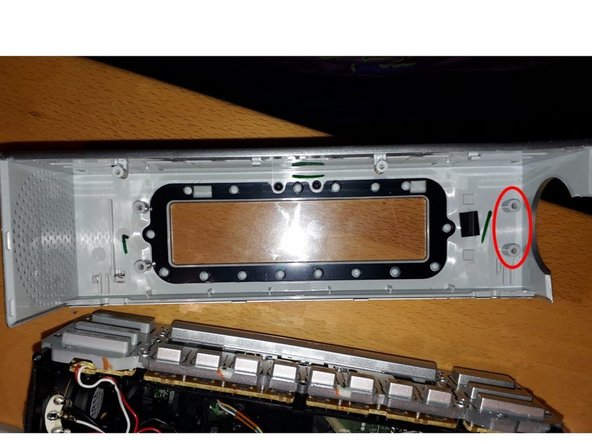
I found no other solution than to cut out one side of the case. Since you can't pull off the cover of the magnifier unit outside the housing, you have no choice but to cut the housing at the passage of the rotating magnifier unit so that you can pull the complete projector up afterwards.
-
In the last picture of this step you can see the cut out side part as well as the cover cap for the magnifier unit. The cap can only be removed after disassembling the projector by cutting it on the opposite side from the magnifier. However, the cap does not have to be removed at all to disassemble the projector!
-
-
-
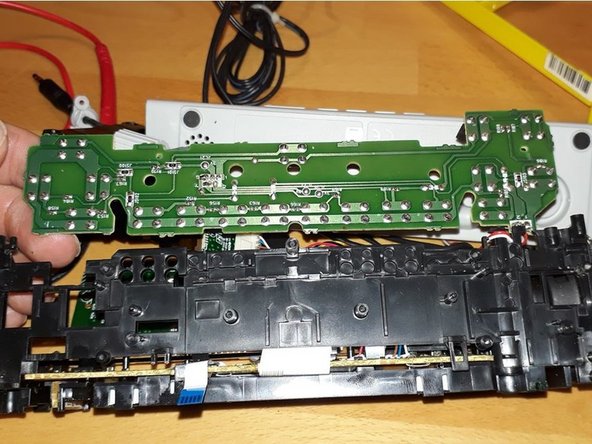
Once you have removed the projector, you can immediately see the two remaining screws underneath, which hold the entire inner workings in the case. These are easy to unscrew and then the whole interior can be taken out of the case with a little screwing in.
-
Then you can access all the components (keys, display, speakers, motherboard, etc.).
-
-
-
To remove the three-part keyboard, unscrew the marked screws. The middle keyboard part can be removed only after removing the small left and right keyboard parts. Attention, some screws may be covered by stickers.
-
The control board with the soldered micro pushbuttons is connected to the control board by means of a five-core ribbon cable [1]. This can easily be pulled out of the green socket. The marked button [2] is the button for switching the projector on and off.
-
When the ribbon cable is pulled out, the control board can be turned over easily and you can replace e.g. micro pushbuttons.
-
On my unit, I found a broken cable in the ribbon cable, which was routed somewhat awkwardly. Replacing the cable is difficult, especially because it is soldered on the motherboard relatively filigree. Therefore, I soldered a bypass only for the defective conductor and left the ribbon cable.
-
-
-
Accessing the display and its backlight is possible, but difficult since it is soldered on.
-
-
-
As described, the cover of the rotating magnifier unit does not need to be removed, it is also very complicated. I removed it with great effort with damage. You have to glue the removed side surface back on and unfortunately live with the optical defect.
-
-
-
The construction of the alarm clock is unseasonably small for the production year 2010 and is complex in terms of assembly. It is a good example of how Sony systematically fails to develop repair- and assembly-friendly products with high reliability due to outdated manufacturing technologie
-


Work through the steps in reverse order to reassemble your device.
Cancel: I did not complete this guide.
One other person completed this guide.
Special thanks to these translators:
100%

oldturkey03 is helping us fix the world! Want to contribute?
Start translating ›

2 Guide Comments
Vielen Dank für die tolle Anleitung! Mein Projektor funktionierte nicht mehr, ich hatte auf eine defekte LED getippt, war aber der Taster. Ich habe allerdings ein Service Manual von Sony im Netz gefunden, nach dem man den Projektor zerstörungsfrei ausbauen kann. Man muss dazu eine 3 mm-Stahlstange (ich hab einen langen Inbus-Schlüssel genommen) zwischen Linse und Gehäuse fest auf den Tubus drücken, dann springt die Linse heraus und der silberne Tubus kann entfernt werden. Danach lässt sich der gesamt Projektor problemlos nach innen herausschwenken.
https://elektrotanya.com/sony_icf-c717pj...
Gruß, Thomas
Vielen Dank, so etwas habe ich damals leider nicht gefunden. Ich habe mir das PDF gleich abgespeichert. Der Projektor läuft bei mir immer noch tadellos. Es hat sich rausgestellt, dass es die Taste war und ich habe da einfach ein paar Lötstellen an den Mikroschaltern erneuert oder sogar den Schalter ausgetauscht.
Gruß
Dirk
Dirk Mey -