
Dell XPS 8900 Motherboard Replacement

What you need

  1. Dell XPS 8900 Motherboard Replacement, Motherboard: step 1, image 1 of 2 Dell XPS 8900 Motherboard Replacement, Motherboard: step 1, image 2 of 2
    • Begin by unplugging and setting the Dell XPS in a clean work environment.

    • Make sure to have the replacement motherboard.

  2. Dell XPS 8900 Motherboard Replacement: step 2, image 1 of 2 Dell XPS 8900 Motherboard Replacement: step 2, image 2 of 2
    • First, unscrew the 2.5mm screw from the side panel from the back of the case using the #2 Phillips screwdriver.

    • Remove the side panel.

  3. Dell XPS 8900 Motherboard Replacement: step 3, image 1 of 2 Dell XPS 8900 Motherboard Replacement: step 3, image 2 of 2
    • Before working on the internal components put on the Anti-Static wristband to avoid an electrical shortage.

    • Connect the wristband to a metallic part of the computer case.

  4. Dell XPS 8900 Motherboard Replacement: step 4, image 1 of 3 Dell XPS 8900 Motherboard Replacement: step 4, image 2 of 3 Dell XPS 8900 Motherboard Replacement: step 4, image 3 of 3
    • Using the #2 Phillips screwdriver, unscrew the 1.5 mm screw from the metal slider holding the graphics card from the back of the computer.

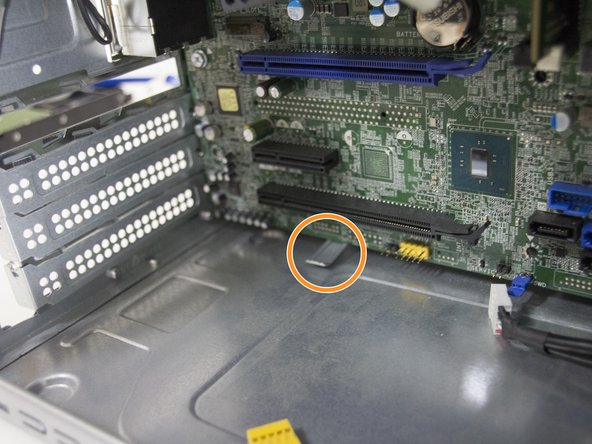
    • Once unscrewed take off the metal slider.

    • Take out the graphics card by holding down the blue release tab and gently pull on the card until it pops out.

  5. Dell XPS 8900 Motherboard Replacement: step 5, image 1 of 3 Dell XPS 8900 Motherboard Replacement: step 5, image 2 of 3 Dell XPS 8900 Motherboard Replacement: step 5, image 3 of 3
    • Now, unscrew the (4) 1.5 mm screws using the #2 Phillips screwdriver to remove the hard drive from the case.

    • Disconnect all cables from the hard drive.

    • Carefully remove the hard drive from the case.

  6. Dell XPS 8900 Motherboard Replacement: step 6, image 1 of 3 Dell XPS 8900 Motherboard Replacement: step 6, image 2 of 3 Dell XPS 8900 Motherboard Replacement: step 6, image 3 of 3
    • Locate the white wifi-adapter located next to the CPU cooler.

    • Using the Phillips #1 screwdriver, unscrew the 0.1 mm screw above the WiFi-adapter.

    • Carefully remove the wifi-adapter.

  7. Dell XPS 8900 Motherboard Replacement: step 7, image 1 of 3 Dell XPS 8900 Motherboard Replacement: step 7, image 2 of 3 Dell XPS 8900 Motherboard Replacement: step 7, image 3 of 3
    • Begin removing the motherboard by unscrewing all (7) 1.5 mm base screws using the #2 Phillips screwdriver indicated by the red circles.

    • Once the screws are removed, push down the metallic tab on the bottom of the computer case, while pulling from the cooler assembly.

  8. Dell XPS 8900 Motherboard Replacement: step 8, image 1 of 2 Dell XPS 8900 Motherboard Replacement: step 8, image 2 of 2
    • Gently remove the motherboard from the computer case by holding the CPU fan gently and pulling it out.

    • Place the motherboard onto the side to begin removing components from it.

  9. Dell XPS 8900 Motherboard Replacement: step 9, image 1 of 2 Dell XPS 8900 Motherboard Replacement: step 9, image 2 of 2
    • Now, carefully remove each RAM from its slot by pushing down the tabs as shown.

  10. Dell XPS 8900 Motherboard Replacement: step 10, image 1 of 3 Dell XPS 8900 Motherboard Replacement: step 10, image 2 of 3 Dell XPS 8900 Motherboard Replacement: step 10, image 3 of 3
    • Once you have removed the RAM cards from their slots, focus on removing the fan that is sitting on top of the CPU.

    • To disconnect the fan cable, gently pull the cable connected to the motherboard.

    • Now, unscrew the (4) 2 mm screws that hold the fan attached to the mother board using the #2 Phillips screwdriver as shown in the pictures.

    • Once all the screws have been unscrewed, remove the fan from the motherboard.

  11. Dell XPS 8900 Motherboard Replacement: step 11, image 1 of 3 Dell XPS 8900 Motherboard Replacement: step 11, image 2 of 3 Dell XPS 8900 Motherboard Replacement: step 11, image 3 of 3
    • Now we will be taking out the CPU from the motherboard.

    • First, pull up the lever to the left of the CPU.

    • This will allow the CPU to be removed by opening the CPU cover.

    • Lift up the CPU cover and gently pull out the CPU from its hub.

  12. Dell XPS 8900 Motherboard Replacement: step 12, image 1 of 1
    • You should now be ready to begin installation of the replacement motherboard.

Conclusion

To reassemble your device, follow these instructions in reverse order.

2 other people completed this guide.

Eyad Abdalkarim

Member since: 10/26/17

125 Reputation

1 Guide authored

0 Comments

Add Comment

View Statistics:

Past 24 Hours: 0

Past 7 Days: 5

Past 30 Days: 26

All Time: 4,999