Introduction
Pull the slow HDD from the Dell XPS 18 and install an mSATA SSD to really speed it up!
What you need
-
-
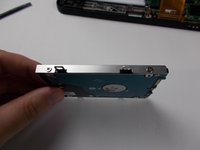
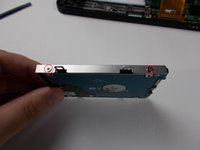
There are ten screws around the perimeter, circled in red in the second photo. Use a T8 Torx bit to remove these, and set them aside, we'll need them when we're done!
-
Place your XPS 18 face down on a flat surface. You may want to put a protective surface down such as a towel, microfiber cloth, etc., to make sure your screen doesn't get scratched. I'm using blank newsprint paper which also works great to give us a nice light background for the photos!
-
-
-
There are two feet/legs that fold out from the back. These are attached inside the unit, so fold them out before proceeding. You won't be able to remove the back panel if they're folded in.
-
There is a door on the right side that pushes in to allow access to the SD card port. This is a perfect place to insert your finger to get a good hold on the back panel. Use a finger to pull straight away from the unit to lift off the rear panel. It may stick a little but it will pull right off easily.
-
-
-
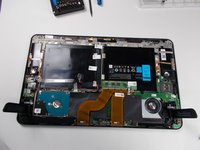
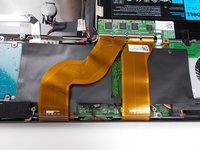
The internals are revealed!
-
There is a narrow plastic strip that covers the haptic motor, some connectors, etc. Carefully peel it up and set it aside until you're ready to close up the unit.
-
-
-
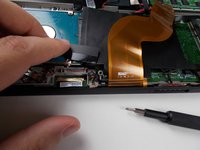
There are four Phillips screws here. Use the #0 phillips screwdriver to remove these.
-
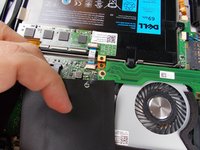
Lift up the end of the drive opposite the connector slightly and pull the drive away from the connector. It will slide right out!
-
-
-
-
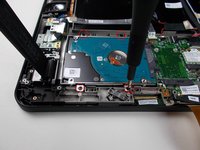
There are four phillips head screws, two on each side. Use the #0 driver to remove these and set them aside.
-
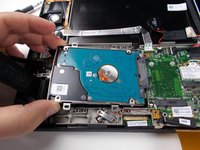
At this point if you're installing a SATA SSD, slip it in the caddy, screw it in, and go backwards through the steps to button everything back up.
-
-
-
I'm installing an mSATA SSD in mine, so I put these screws in a small plastic bag, taped them in the empty space the HDD occupied, and screwed the caddy back into place.
-
-
-
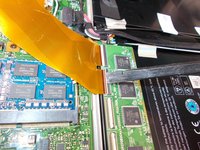
To access the mSATA and RAM slots we have to unclip the touch display cables and remove a plastic insulating sheet. It's easier than it sounds!
-
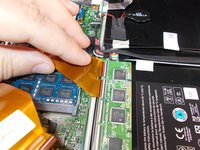
Use the pointy end of the spudger to flip the compression clips up to release the cables.
-
-
-
There are two screws that hold this plastic sheet down because it's also a grounded shield. Use the #0 screwdriver to unscrew the screws shown in these photos.
-
-
-
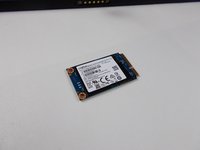
I had a 256GB mSATA SSD from a laptop upgrade a few months ago. It's perfect for this XPS 18!
-
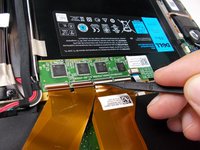
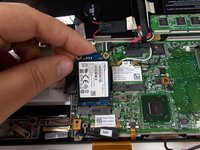
Insert the mSATA SSD into the slot. It's keyed so you can only insert it one way.
-
Secure it with two M2x3mm phillips head screws.
-
-
-
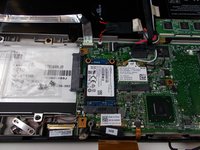
Screw the plastic shield back down.
-
Slip the connector ends of the flat cables back into their slots and use the flat end of the spudger to flip the clips back down.
-


To reassemble your device, follow these instructions in reverse order.
Cancel: I did not complete this guide.
One other person completed this guide.
6 Guide Comments
That’s not an M.2 keyed mSATA SSD is it?
No, mSATA is a different form factor from NGFF/m.2. mSATA is a bigger connector.
Honestly, that's up to you, about how much storage you think you'll use. I personally think a 256GB would be more than enough for most folks using this machine. It's more a consumption machine than a daily driver.