
Dell Vostro 3550 Disk Drive Tray Latch Replacement

What you need

  1. Dell Vostro 3550 Disk Drive Tray Latch Replacement, Disk Drive Tray Latch Mechanism: step 1, image 1 of 3 Dell Vostro 3550 Disk Drive Tray Latch Replacement, Disk Drive Tray Latch Mechanism: step 1, image 2 of 3 Dell Vostro 3550 Disk Drive Tray Latch Replacement, Disk Drive Tray Latch Mechanism: step 1, image 3 of 3
    • Push a paperclip that is bent straight into the small pin hole on the right of the release button.

    • When 3/4" of the paperclip is inserted the tray will pop open.

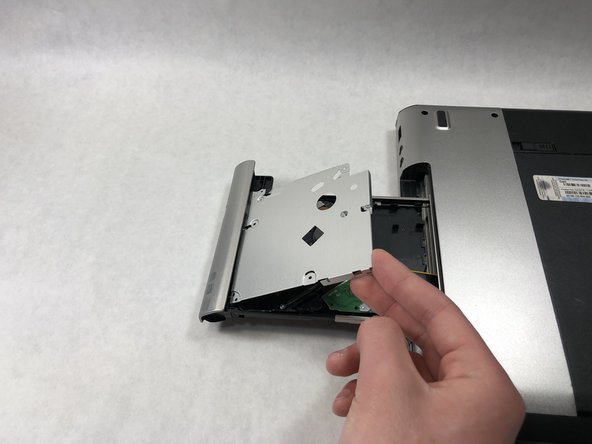
    • Pull the disk tray out as far as it will extend.

  2. Dell Vostro 3550 Disk Drive Tray Latch Replacement: step 2, image 1 of 3 Dell Vostro 3550 Disk Drive Tray Latch Replacement: step 2, image 2 of 3 Dell Vostro 3550 Disk Drive Tray Latch Replacement: step 2, image 3 of 3
    • Flip the laptop over and position it so the disk drive is in front of you.

    • Remove the five 5mm Phillips #0 screws fastening the top plate to the disk tray.

  3. Dell Vostro 3550 Disk Drive Tray Latch Replacement: step 3, image 1 of 3 Dell Vostro 3550 Disk Drive Tray Latch Replacement: step 3, image 2 of 3 Dell Vostro 3550 Disk Drive Tray Latch Replacement: step 3, image 3 of 3
    • Remove the top plate of the disk tray and place it off to the side.

  4. Dell Vostro 3550 Disk Drive Tray Latch Replacement: step 4, image 1 of 3 Dell Vostro 3550 Disk Drive Tray Latch Replacement: step 4, image 2 of 3 Dell Vostro 3550 Disk Drive Tray Latch Replacement: step 4, image 3 of 3
    • Remove the single 5mm Phillips #0 screw securing the latch mechanism to the disk drive.

    • Pull the damaged latch away from the disk drive and replace with the new latch.

Conclusion

To reassemble your device, follow these instructions in reverse order.

Dylan J. Souza

Member since: 03/22/19

781 Reputation

5 Guides authored

Team

0 Comments

Add Comment

View Statistics:

Past 24 Hours: 0

Past 7 Days: 0

Past 30 Days: 1

All Time: 238