Free Shipping on Domestic Orders $75+

Dell Studio 1537 RAM Replacement

Views: 1.5K

View statistics:

Past 24 Hours:
1
Past 7 Days:
16
Past 30 Days:
76
All Time:
1,475
Comments: 0

No one has left comments on this guide. Will you be first?

Go to guide comments
Completed: 2

2 people have marked this guide "completed." Will you be next?

Favorites: 0

No one has favorited (and subscribed to) this guide. Will you be the first?

Time Required: 15 minutes
Difficulty: Easy
Action Shots

Be an action hero! This guide needs images that better demonstrate how to perform specific actions.

Better Introduction

Improve this guide by completing or revising its introduction.

Dell Studio 1537 RAM Replacement

What you need

Tools

    1. Dell Studio 1537 RAM Replacement, Battery: step 1, image 1 of 2 Dell Studio 1537 RAM Replacement, Battery: step 1, image 2 of 2
      • Ensure the laptop is turned off and unplugged before attempting to remove any piece.

      • Place the laptop lid down so the underside is visible.

      • Pull battery release switch and gently pull the battery directly away from the switch.

      Ask FixBot

      Add Comment

    1. Dell Studio 1537 RAM Replacement, Back Cover: step 2, image 1 of 1
      • Identify the back cover of the laptop.

      Ask FixBot

      Add Comment

    2. Dell Studio 1537 RAM Replacement: step 3, image 1 of 1
      • Unscrew and remove all of the 6.0mm screws with a Phillips #1 screwdriver.

      Ask FixBot

      Add Comment

    3. Dell Studio 1537 RAM Replacement: step 4, image 1 of 1
      • Lift the back cover off of the laptop.

      Ask FixBot

      Add Comment

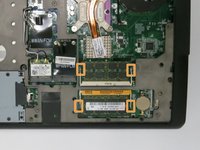
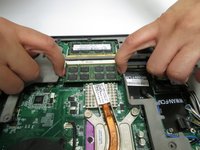
    1. Dell Studio 1537 RAM Replacement, RAM: step 5, image 1 of 2 Dell Studio 1537 RAM Replacement, RAM: step 5, image 2 of 2
      • Pull outwards on both of the tabs for one of the RAM slots.

      • The RAM stick should pop up at an angle after this.

      Ask FixBot

      Add Comment

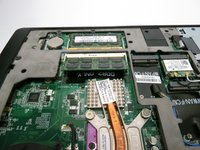
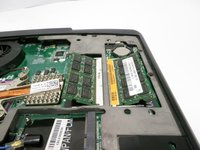
    2. Dell Studio 1537 RAM Replacement: step 6, image 1 of 2 Dell Studio 1537 RAM Replacement: step 6, image 2 of 2
      • Pull the RAM stick out of the slot.

      • Repeat with the remaining RAM stick.

      Ask FixBot

      Add Comment

Conclusion

To reassemble your device, follow these instructions in reverse order.

Cancel: I did not complete this guide.

2 other people completed this guide.
Zach Dylag

Member since: 03/24/15

575 Reputation

4 Guides authored

Team

Baylor, Team 6-2, Shaver Spring 2015 Member of Baylor, Team 6-2, Shaver Spring 2015

BU-SHAVER-S15S6G2

3 Members

48 Guides authored

0 Guide Comments

Add Comment

View Statistics:

Past 24 Hours: 1

Past 7 Days: 16

Past 30 Days: 76

All Time: 1,475