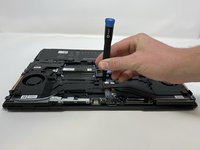
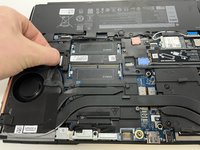
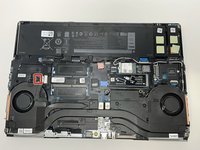
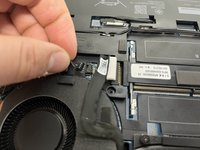
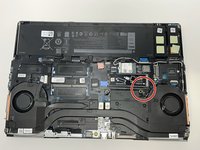
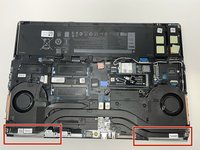
Dell Precision 7560 Fan Replacement

What you need

  1. Dell Precision 7560 Fan Replacement, Fan: step 1, image 1 of 2 Dell Precision 7560 Fan Replacement, Fan: step 1, image 2 of 2
    • The screws holding the fan in place cannot be fully removed.

    • Loosen the eight captive screws that secure the fan assembly.

    • Each screw is numbered in the order that they should be loosened.

  2. Dell Precision 7560 Fan Replacement: step 2, image 1 of 2 Dell Precision 7560 Fan Replacement: step 2, image 2 of 2
    • Locate connector cable and pull lightly to remove.

  3. Dell Precision 7560 Fan Replacement: step 3, image 1 of 2 Dell Precision 7560 Fan Replacement: step 3, image 2 of 2
    • Gently pull the first fan connector from the head until it is removed.

    • The thin wire is prone to damage. Exercise extra caution during removal.

  4. Dell Precision 7560 Fan Replacement: step 4, image 1 of 2 Dell Precision 7560 Fan Replacement: step 4, image 2 of 2
    • Gently pull the second fan connector from the head until it is removed.

    • The thin wire is prone to damage. Exercise extra caution during removal.

  5. Dell Precision 7560 Fan Replacement: step 5, image 1 of 2 Dell Precision 7560 Fan Replacement: step 5, image 2 of 2
    • Lifting from the bottom, carefully remove the laptop's fans.

Conclusion

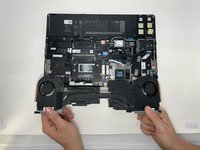
To reassemble your device, follow these instructions in reverse order.

Jack Allred

Member since: 02/09/23

336 Reputation

2 Guides authored

0 Comments

Add Comment

View Statistics:

Past 24 Hours: 0

Past 7 Days: 11

Past 30 Days: 58

All Time: 681