
Dell Latitude E5410 Screen Replacement

What you need

  1. Dell Latitude E5410 Screen Replacement, Dell Latitude E5410 Screen Replacement: step 1, image 1 of 1
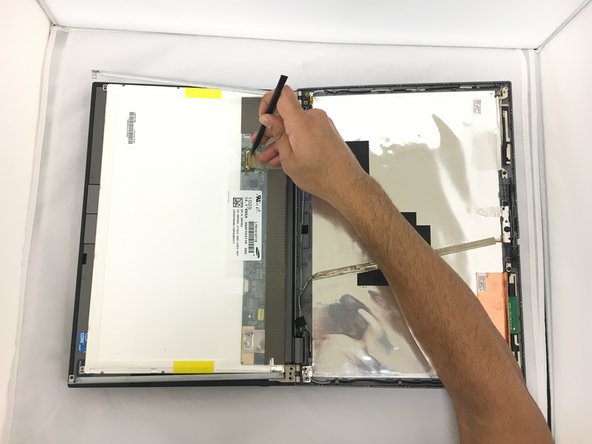
    • Have your laptop ready with your screen pulled all they way down parallel to the bottom of the laptop.

  2. Dell Latitude E5410 Screen Replacement: step 2, image 1 of 1
    • Start on the top left or right corner of the screen edge and unscrew the small screws.

    • Be sure to remove the rubber placeholders in order to access the screws.

  3. Dell Latitude E5410 Screen Replacement: step 3, image 1 of 2 Dell Latitude E5410 Screen Replacement: step 3, image 2 of 2
    • Using a plastic opening tool, pry the bezel away from the screen.

  4. Dell Latitude E5410 Screen Replacement: step 4, image 1 of 2 Dell Latitude E5410 Screen Replacement: step 4, image 2 of 2
    • Use the Phillips screwdriver to remove the screws from corners around the screen.

  5. Dell Latitude E5410 Screen Replacement: step 5, image 1 of 1
    • Remove the screws from both sides.

    • Once removed, they will release the screen.

  6. Dell Latitude E5410 Screen Replacement: step 6, image 1 of 2 Dell Latitude E5410 Screen Replacement: step 6, image 2 of 2
    • Use the spudger to move the sensor aside.

  7. Dell Latitude E5410 Screen Replacement: step 7, image 1 of 2 Dell Latitude E5410 Screen Replacement: step 7, image 2 of 2
    • Release the screen by pulling up and out.

Conclusion

To reassemble your device, follow these instructions in reverse order.

0 Comments

Add Comment

View Statistics:

Past 24 Hours: 1

Past 7 Days: 1

Past 30 Days: 5

All Time: 2,567