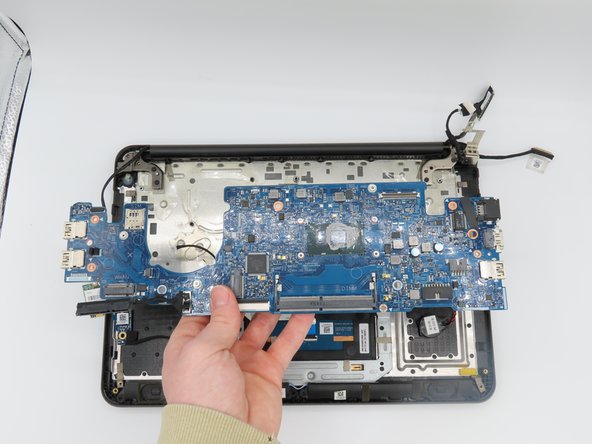
Dell Latitude 3380 Motherboard Replacement

What you need

  1. Dell Latitude 3380 Motherboard Replacement, Back Cover: step 1, image 1 of 2 Dell Latitude 3380 Motherboard Replacement, Back Cover: step 1, image 2 of 2
    • Turn the laptop over so that the back is facing up.

    • Remove the nine 3 mm screws with a Phillips #0 screwdriver.

  2. Dell Latitude 3380 Motherboard Replacement: step 2, image 1 of 2 Dell Latitude 3380 Motherboard Replacement: step 2, image 2 of 2
    • Use an opening tool to pry the back cover away from the laptop.

  3. Dell Latitude 3380 Motherboard Replacement, Motherboard: step 3, image 1 of 3 Dell Latitude 3380 Motherboard Replacement, Motherboard: step 3, image 2 of 3 Dell Latitude 3380 Motherboard Replacement, Motherboard: step 3, image 3 of 3
    • Remove the four 3 mm screws holding the battery in place using a Phillips #0 screwdriver.

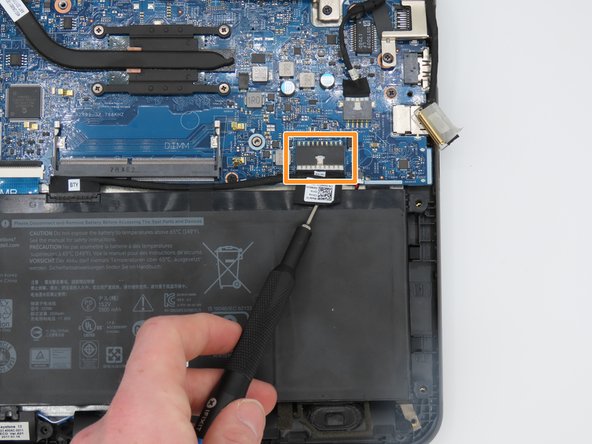
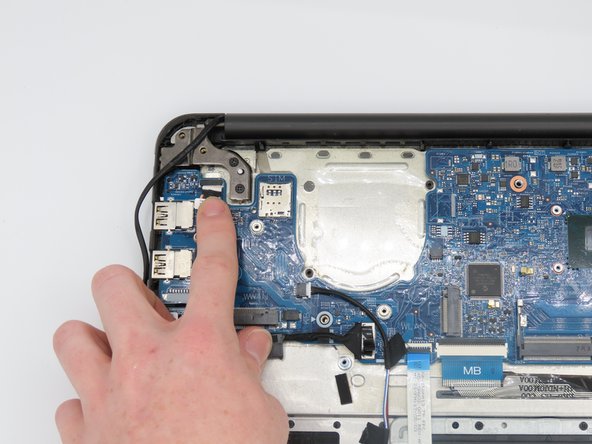
    • Disconnect the battery cable by gently pulling it out.
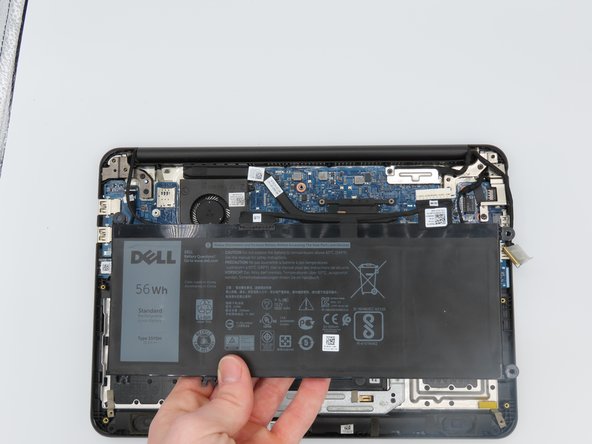
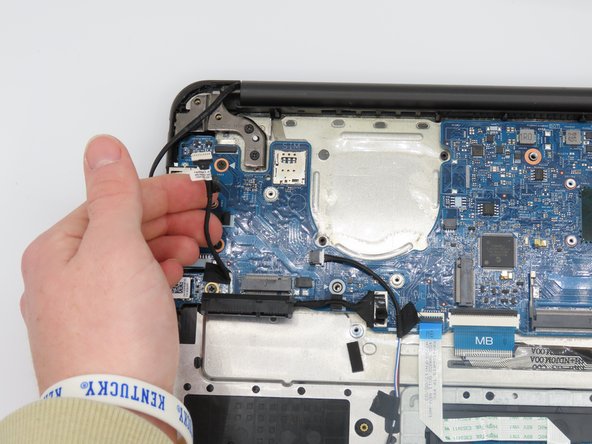
    • Remove the battery.

  4. Dell Latitude 3380 Motherboard Replacement: step 4, image 1 of 3 Dell Latitude 3380 Motherboard Replacement: step 4, image 2 of 3 Dell Latitude 3380 Motherboard Replacement: step 4, image 3 of 3
    • Remove the 3 mm screw from the WLAN card using a Phillips #0 screwdriver.

    • Disconnect and remove the WLAN card.

  5. Dell Latitude 3380 Motherboard Replacement: step 5, image 1 of 3 Dell Latitude 3380 Motherboard Replacement: step 5, image 2 of 3 Dell Latitude 3380 Motherboard Replacement: step 5, image 3 of 3
    • Disconnect the audio cable.

    • Remove the entire audio card piece.

  6. Dell Latitude 3380 Motherboard Replacement: step 6, image 1 of 3 Dell Latitude 3380 Motherboard Replacement: step 6, image 2 of 3 Dell Latitude 3380 Motherboard Replacement: step 6, image 3 of 3
    • Remove the two 5 mm screws from the fan using a Phillips #0 screwdriver.

    • Loosen the four captive screws on the heatsink using a Phillips #0 screwdriver.

    • Remove the heatsink from the motherboard.

  7. Dell Latitude 3380 Motherboard Replacement: step 7, image 1 of 2 Dell Latitude 3380 Motherboard Replacement: step 7, image 2 of 2
    • Using tweezers, loosen the power connector from the fan to the motherboard, fully disconnecting the fan.

  8. Dell Latitude 3380 Motherboard Replacement: step 8, image 1 of 3 Dell Latitude 3380 Motherboard Replacement: step 8, image 2 of 3 Dell Latitude 3380 Motherboard Replacement: step 8, image 3 of 3
    • Using a Phillips #0 screwdriver, unscrew and remove this metal plate.

    • Gently disconnect the cable under the metal plate.

  9. Dell Latitude 3380 Motherboard Replacement: step 9, image 1 of 2 Dell Latitude 3380 Motherboard Replacement: step 9, image 2 of 2
    • Disconnect the battery power cable.

  10. Dell Latitude 3380 Motherboard Replacement: step 10, image 1 of 2 Dell Latitude 3380 Motherboard Replacement: step 10, image 2 of 2
    • Disconnect the power cable that connects to the charging port.

  11. Dell Latitude 3380 Motherboard Replacement: step 11, image 1 of 2 Dell Latitude 3380 Motherboard Replacement: step 11, image 2 of 2
    • Disconnect the touchpad cable.

  12. Dell Latitude 3380 Motherboard Replacement: step 12, image 1 of 2 Dell Latitude 3380 Motherboard Replacement: step 12, image 2 of 2
    • Remove the five screws from the motherboard using a Phillips #0 screwdriver.

    • Remove the motherboard.

Conclusion

To reassemble your device, follow these instructions in reverse order.

0 Comments

Add Comment

View Statistics:

Past 24 Hours: 1

Past 7 Days: 10

Past 30 Days: 29

All Time: 261