Dell Inspiron 7573 2-in-1 Memory Modules (RAM) Replacement

What you need

  1. Dell Inspiron 7573 2-in-1 Memory Modules (RAM) Replacement, Battery: step 1, image 1 of 2 Dell Inspiron 7573 2-in-1 Memory Modules (RAM) Replacement, Battery: step 1, image 2 of 2
    • Make sure computer is off before you begin.

    • Remove the four 5 mm screws from the bottom edge of the laptop using a Phillips #00 screwdriver.

    • Loosen the remaining six captive screws from the bottom cover with a Phillips #00 screwdriver.

  2. Dell Inspiron 7573 2-in-1 Memory Modules (RAM) Replacement: step 2, image 1 of 3 Dell Inspiron 7573 2-in-1 Memory Modules (RAM) Replacement: step 2, image 2 of 3 Dell Inspiron 7573 2-in-1 Memory Modules (RAM) Replacement: step 2, image 3 of 3
    • Using a spudger, pry off the bottom cover by gently prying from corner to corner in order to disengage the plastic clips.

    • Lift off the bottom cover.

    • After the base cover is removed, your laptop should look similar as depicted in the images provided.

  3. Dell Inspiron 7573 2-in-1 Memory Modules (RAM) Replacement: step 3, image 1 of 1
    • Remove the four 3 mm screws holding the battery in place with a Phillips #00 screwdriver.

  4. Dell Inspiron 7573 2-in-1 Memory Modules (RAM) Replacement: step 4, image 1 of 3 Dell Inspiron 7573 2-in-1 Memory Modules (RAM) Replacement: step 4, image 2 of 3 Dell Inspiron 7573 2-in-1 Memory Modules (RAM) Replacement: step 4, image 3 of 3
    • Using the pull tab, disconnect the battery cable from the system board.

    • Lift the battery out from the laptop case.

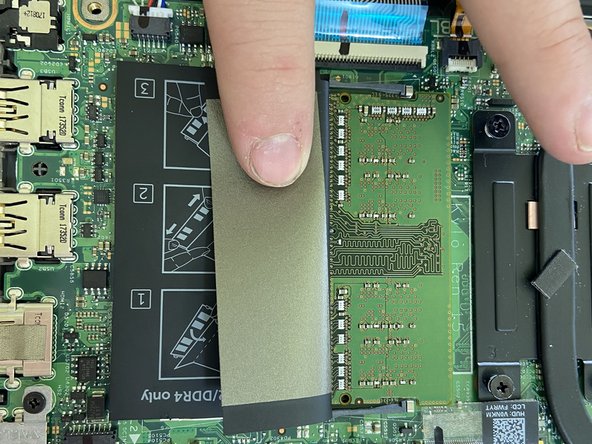
  5. Dell Inspiron 7573 2-in-1 Memory Modules (RAM) Replacement, Memory Modules: step 5, image 1 of 2 Dell Inspiron 7573 2-in-1 Memory Modules (RAM) Replacement, Memory Modules: step 5, image 2 of 2
    • Peel back the mylar coverings on the RAM chips on the right side of the system board.

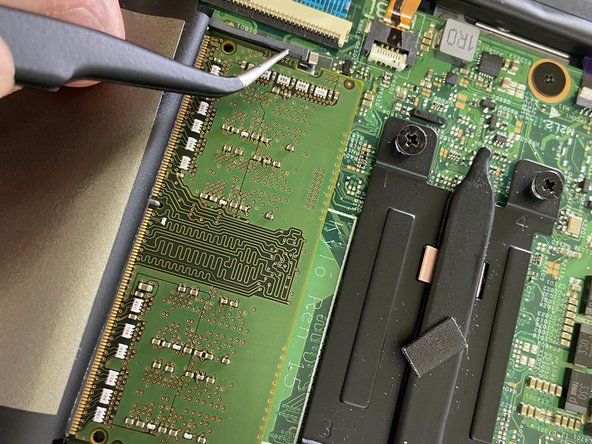
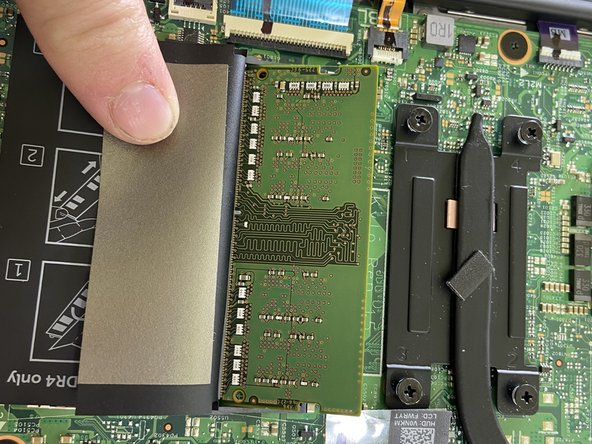
  6. Dell Inspiron 7573 2-in-1 Memory Modules (RAM) Replacement: step 6, image 1 of 3 Dell Inspiron 7573 2-in-1 Memory Modules (RAM) Replacement: step 6, image 2 of 3 Dell Inspiron 7573 2-in-1 Memory Modules (RAM) Replacement: step 6, image 3 of 3
    • Push outward on the two gray tabs on either side of the RAM module.

    • These tabs hold down the RAM modules, which should pop up when disengaged.

    • Gently pull the memory module out of its slot.

    • Be sure to only touch the edges of the RAM module, as the oil from your fingers can damage the components on the face.

  7. Dell Inspiron 7573 2-in-1 Memory Modules (RAM) Replacement: step 7, image 1 of 1
    • With the new memory module, line up the notch on the memory with the tab on the module slot.

    • Insert the memory module at an angle.

    • Push down on the module until the locking tabs on either side click into place.

    • If there is no click, reinsert the module.

  8. Dell Inspiron 7573 2-in-1 Memory Modules (RAM) Replacement: step 8, image 1 of 1
    • Repeat steps 5-7 for the other memory module.

    • In this laptop, one set of tabs was gray plastic and the other was metallic.

    • When pushing down on the memory modules, make sure you hear a click.

Conclusion

To reassemble your device, follow these instructions in reverse order.

One other person completed this guide.

Brady Kennedy

Member since: 09/27/21

109 Reputation

1 Guide authored

Team

Casper College, Team 1-2, Lareau Fall 2021 Member of Casper College, Team 1-2, Lareau Fall 2021

CASC-LAREAU-F21S1G2

3 Members

4 Guides authored

0 Comments

Add Comment

View Statistics:

Past 24 Hours: 0

Past 7 Days: 1

Past 30 Days: 5

All Time: 240