Introduction
Is your computer experiencing problems with loading? Consider using this guide to replace the RAM in your device.
What you need
-
-
Ensure the device is powered off and unplugged. Close the device and orient it face up, with the hinges further away from you.
-
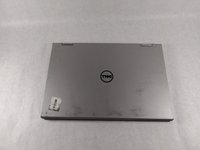
Flip the device over so the backside is facing you.
 Ask FixBot
-
-
-
-
Using the plastic opening tool, pull the back panel upward. Move the opening tool along the edge of the device and lift the panel off of your device.
-
-
-
There are two tabs on either side of the RAM chip. Pull them away from the chip.
-
-
-
Pinch the RAM between two fingers, making minimal contact. Gently pull away from its port.
-
Remove the RAM from the device.
-


To reassemble your device, follow these instructions in reverse order.
Cancel: I did not complete this guide.
One other person completed this guide.
Team

UMass Dartmouth, Team S1-G2, Simcock Fall 2018 Member of UMass Dartmouth, Team S1-G2, Simcock Fall 2018
UMASSD-SIMCOCK-F18S1G2
3 Members
7 Guides authored