Free Shipping on Domestic Orders $75+

Dell Inspiron 1545 Keyboard Replacement

What you need

    1. Dell Inspiron 1545 Keyboard Replacement, Battery: step 1, image 1 of 1
      • Before attempting to remove the battery ensure that the laptop is disconnected from all power sources and turned off.

      • Turn the laptop over to its back.

      Ask FixBot

      Add Comment

    2. Dell Inspiron 1545 Keyboard Replacement: step 2, image 1 of 1
      • Slide the release latch while simultaneously pulling backwards on the battery.

      Ask FixBot

      Add Comment

    3. Dell Inspiron 1545 Keyboard Replacement: step 3, image 1 of 1
      • Slide the battery out of the battery bay.

      Ask FixBot

      Add Comment

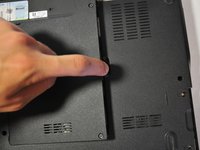
    1. Dell Inspiron 1545 Keyboard Replacement, Base Cover: step 4, image 1 of 1
      • Unscrew the four screws (3mm Phillips #1) that hold the base cover in place.

      • The top 3 screws are "captive" (held in by a retaining ring) and will not come out.

      Ask FixBot

      Add Comment

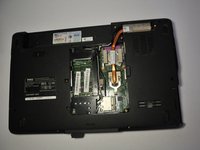
    2. Dell Inspiron 1545 Keyboard Replacement: step 5, image 1 of 2 Dell Inspiron 1545 Keyboard Replacement: step 5, image 2 of 2
      • Carefully lift the base cover vertically away from the laptop.

      Ask FixBot

      Add Comment

    1. Dell Inspiron 1545 Keyboard Replacement, Center Control Cover: step 6, image 1 of 1
      • After removing the battery, remove the two screws (3mm Phillips #1) beneath it. These screws hold the Center Control Cover in place.

      Ask FixBot

      Add Comment

    2. Dell Inspiron 1545 Keyboard Replacement: step 7, image 1 of 1
      • Flip the laptop over to the front and open the display as far as possible.

      Ask FixBot

      Add Comment

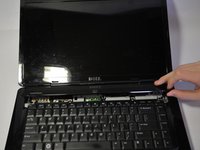
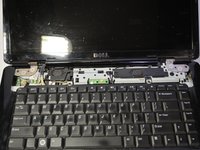
    3. Dell Inspiron 1545 Keyboard Replacement: step 8, image 1 of 3 Dell Inspiron 1545 Keyboard Replacement: step 8, image 2 of 3 Dell Inspiron 1545 Keyboard Replacement: step 8, image 3 of 3
      • The Center Control Cover is VERY fragile, be careful when using prying tools.

      • Pry the Center Control Cover from the laptop. On the right there is a small divot, it is advised that you start removing the panel from here.

      • Carefully lift the Center Control Cover away from the laptop.

      Ask FixBot

      Add Comment

    1. Dell Inspiron 1545 Keyboard Replacement, Keyboard: step 9, image 1 of 1
      • Remove the two screws (5mm Phillips #1) at the top of the keyboard.

      Ask FixBot

      Add Comment

    2. Dell Inspiron 1545 Keyboard Replacement: step 10, image 1 of 1
      • Slide the keyboard out and away from the laptop and lift it up to access the keyboard connector.

      • Do not pull hard on the keyboard while removing it, you may damage the keyboard or the keyboard connector.

      Ask FixBot

      Add Comment

    3. Dell Inspiron 1545 Keyboard Replacement: step 11, image 1 of 1
      • Lift the connector latch that secures the keyboard cable to the connector on the motherboard and remove the cable.

      Ask FixBot

      Add Comment

    4. Dell Inspiron 1545 Keyboard Replacement: step 12, image 1 of 1
      • Lift the keyboard up and away from the laptop.

      Ask FixBot

      Add Comment

Conclusion

To reassemble your device, follow these instructions in reverse order.

Cancel: I did not complete this guide.

15 other people completed this guide.

Nathan Lemay

Member since: 04/16/14

3,160 Reputation

15 Guides authored

Team

Cal Poly, Team 9-14, Regan Spring 2014 Member of Cal Poly, Team 9-14, Regan Spring 2014

CPSU-REGAN-S14S9G14

4 Members

180 Guides authored

3 Guide Comments

Step 4 and 5 are not needed.

James Thrun - Reply Share

Steps 4 and 5 are unnecessary for removing the keyboard. Other than that, well done.

lee - Reply Share

The connector latch is broken. What should I do?

Mjeed - Reply Share

Add Comment

View Statistics:

Past 24 Hours: 1

Past 7 Days: 14

Past 30 Days: 60

All Time: 8,034