Introduction
If your Dell Inspiron 15-7548 laptop is struggling to process the amount of apps you typically use, upgrading your RAM sticks may be a good option to keep the laptop working smoothly.
Before upgrading your RAM sticks, make sure all your laptop software is up to date. This could be another reason your computer is not operating at peak efficiency.
Before beginning, make sure to power off your laptop completely, and disconnect the laptop from any external power source.
What you need
-
-
Remove the six 6 mm screws from the back panel with a Phillips #1 screwdriver.
-
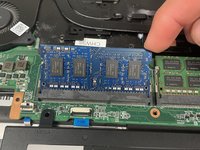
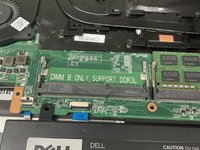
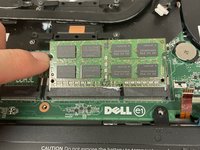
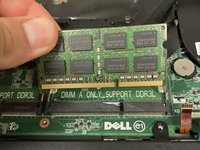
Loosen the four captive screws at the bottom using a Phillips #1 screwdriver.
-
-


To reassemble your device, follow these instructions in reverse order.
Cancel: I did not complete this guide.
One other person completed this guide.
Team

IUPUI, Team 3-3, Beck Spring 2022 Member of IUPUI, Team 3-3, Beck Spring 2022
IUPUI-BECK-S22S3G3
4 Members
2 Guides authored