Introduction
In this guide, you will successfully learn how to replace the battery in a Dell Inspiron 15-5565. Please see this page to perform troubleshooting.
Swollen batteries need to be replaced and should not be used. Visit this page for information on how to dispose of a swollen battery.
If the battery is stuck due to swelling, do not try to remove the battery yourself and seek professional assistance. For this device you can contact Dell Technical support to assist in this matter.
What you need
-
-
Remove the 4 mm screw that secures the optical drive bracket to the optical drive using a Phillips #00 screwdriver.
-
-
-
-
Remove 13 8 mm screws from the bottom of the device using a Phillips #00 screwdriver.
-
Remove the single 4 mm screw from the bottom of the device using a Phillips #00 screwdriver.
-
Remove the three 4 mm screws from the optical drive slot using a Phillips #00 screwdriver.
-
-
-
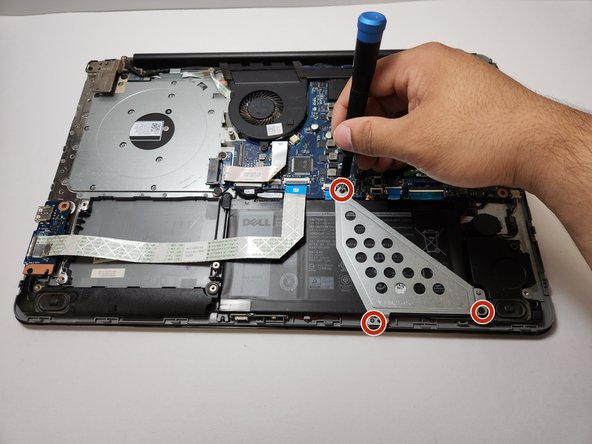
Remove the three 5 mm screws from the battery bracket using a Phillips #00 screwdriver.
-


To reassemble your device, follow these instructions in reverse order.
To reassemble your device, follow these instructions in reverse order.

Team

University of New Orleans, Team 4-5, McDonald Spring 2023 Member of University of New Orleans, Team 4-5, McDonald Spring 2023
UNO-MCDONALD-S23S4G5
4 Members
6 Guides authored