
Dell Inspiron 15-5559 Hard Drive Replacement

Kyla Ward and
Last updated on Nov 15, 2022
Views: 6.3K
View statistics:
- Past 24 Hours:
- 2
- Past 7 Days:
- 19
- Past 30 Days:
- 91
- All Time:
- 6,319
Comments: 2
2 guide comments.
Go to guide commentsCompleted: 4 5
4 people have marked this guide "completed." Will you be next?
5 people have marked this guide "completed." Including you — great job!
Favorites: 1 2
1 person has favorited (and subscribed to) this guide. Will you be next?
2 people have favorited (and subscribed to) this guide — including you!
Introduction
Go to step 1 ↓Before you begin, make sure that your device is disconnected from any power sources and be sure that the battery has been removed. You'll need a Phillips #1 screwdriver and a black nylon spudger to complete this guide.
What you need
Fix Kit
This kit contains all the parts and tools needed to complete this guide.

Parts


Tools
-
Spudger4.9


-
-
-
Use a Phillips #1 screwdriver to remove the two 2.5x8mm screws on the back panel.
 Ask FixBot
-
-
-
Place the plastic spudger in the slot. Using the flat side of the spudger pry the back panel upward and off.
-
-
-
-
-
-
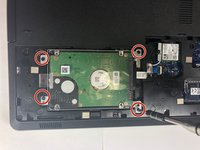
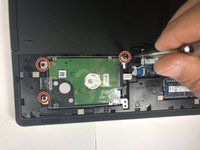
Remove each of the four (4) 2.5x8mm screws that anchor the hard drive using a Phillips #1 screwdriver.
-
-
-
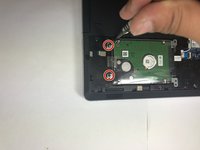
Use the plastic spudger to remove the hard drive conductive tape by lifting the black clasp holding it down, then pulling the conductive tape toward the left to remove it.
-
-
-
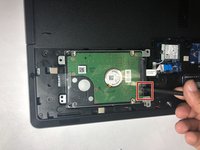
Place the plastic spudger underneath the hard drive at the indicated position.
-
Use the spudger along with your other hand to gently remove the hard drive.
-
-




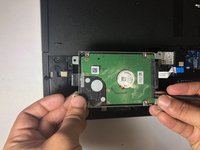
To reassemble your device, follow these instructions in reverse order.
Cancel: I did not complete this guide.
4 other people completed this guide.
Team

Baylor, Team S5-G5, Williams Spring 2018 Member of Baylor, Team S5-G5, Williams Spring 2018
BU-WILLIAMS-S18S5G5
3 Members
60 Guides authored
2 Guide Comments
The blue part came off is that important?
can i put this in a harddrive enclosure?
