
Dell DJ Top Panel Buttons Replacement

Brittany Abate and
Last updated on May 17, 2016
Views: 696
View statistics:
- Past 24 Hours:
- 2
- Past 7 Days:
- 12
- Past 30 Days:
- 69
- All Time:
- 696
Comments: 0
No one has left comments on this guide. Will you be first?
Go to guide commentsCompleted: 0 1
No one has marked this guide "completed." Will you be the first?
1 person has marked this guide "completed." It's you — great job!
Favorites: 0 1
No one has favorited (and subscribed to) this guide. Will you be the first?
1 person has favorited (and subscribed to) this guide — and that's you!
Markup Mishap
This guide needs better markups. Help out by correcting or making some markup annotations.
Introduction
Go to step 1 ↓This guide will help one identify, clean, and/or repair the issue that causes unresponsive/sticky buttons.
What you need
Tools


-
-
Tool used on this step:Metal Spudger$2.99
-
First check that the lock button is not engaged. If this button has been activated, a small lock symbol will appear on your screen and the buttons on the device will not respond. If this button is not engaged, then proceed to the next step.
-
Using the metal spudger, pop off the rubber cover that encases the buttons.
 Ask FixBot
-
-
-
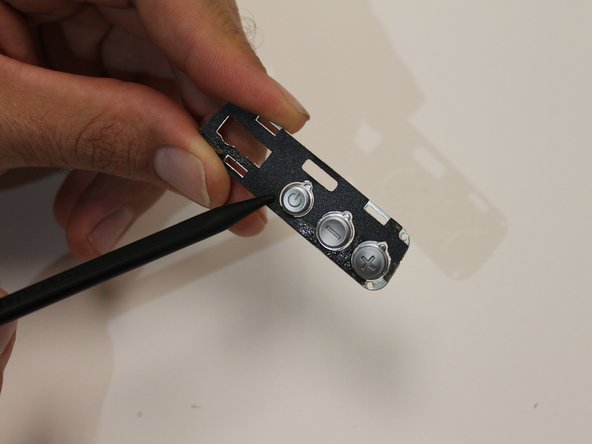
Using the Phillips J000 screw bit to remove the 4mm screws. If buttons are cracked or missing, you will need to replace this part.
-
Again, check to see if the buttons need cleaning.
-
-
-
-
Inspect both the metal plate of buttons and the internal components (circled in red). All three should be intact and at the same height. If any of these are damaged, permanently pushed in or missing, the parts will need to be bought and replaced.
-
Clean all of these parts carefully. Grime that collects under and around buttons can cause them to malfunction.
-
-
-
Reassemble the device, making sure to fully screw in the metal plate before replacing the rubber cover.
-
After the device is assembled, power the device on. The issue should be repaired.
-
If the device buttons are still defective, the circuit board or another internal component may be defective.
-
-




To reassemble your device, follow these instructions in reverse order.

Team

USF Sarasota-Manatee, Team 1-1, Stewart Spring 2016 Member of USF Sarasota-Manatee, Team 1-1, Stewart Spring 2016
USFSM-STEWART-S16S1G1
3 Members
60 Guides authored
