Introduction
In this guide I will show you how to replace the screen on a Dell 3100 Chromebook. I set this as moderate difficulty due to the strong adhesive under the screen cover. It can be tricky to remove the cover without a heat gun or blow dryer to weaken the adhesive. It's not impossible, but use caution to not damage the cover.
What you need
-
-
Loosen the 9 screws from the bottom cover with the Phillips #1 screwdriver. NOTE: You don't need to fully remove the screws. They will remain attached to the cover.
-
Once all of the screws are loose, use the opening tool to pry the cover from the frame. NOTE: I like to start near the hinges as shown in the pictures. There is a gap that allows for enough leverage to open the cover.
-
Locate the ribbon connecting the battery to the main board. Firmly grip the attached fabric and pull away from the main board.
-
-
-
Open the Chromebook and remove the black plastic covers over the screws. They are attached with a light coating of glue. I found that tweezers work best to get under the cover.
-
With the small covers removed, unscrew the four (4) screws holding the screen cover in place.
-
Using an opening tool, begin working on the sides of the screen cover to release the clips.
-
IMPORTANT: There is a stronger adhesive applied to the bottom part of the screen (Shown in image three under the "Dell" logo). If you have a blow dryer or heat gun, you can soften the adhesive for easier removal. Otherwise, you will need to work with a Jimmy to detach the cover.
-
-
-
-
Remove the four (4) screws attaching the screen to the frame.
-
Lift the screen and lay it on the keyboard. Be careful not to pull the screen too far or run the risk of damaging the wires.
-
-
-
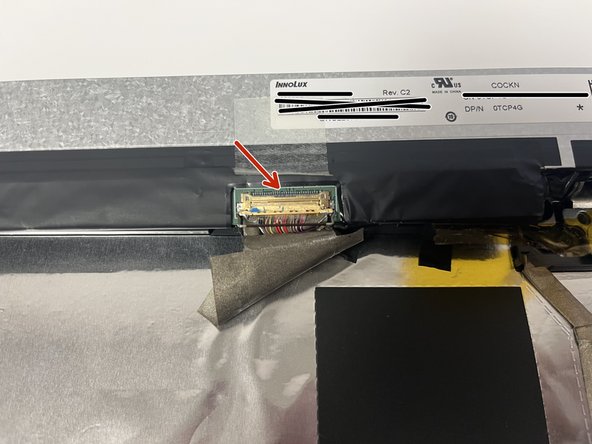
Remove the adhesive cover to expose the connector.
-
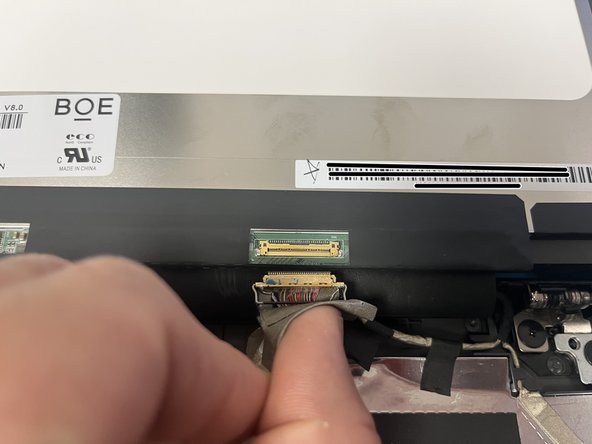
Look for the latch that holds the connector in place. It will be marked with black and needs to be lifted to remove the connector. (Shown in the second image with the red arrow.)
-
Grip the wires and gently pull to disconnect the wires from the screen.
-
-
-
Reverse the order to connect the new screen.
-
Lay the new screen back in place and screw it to the frame. Be sure to remove any plastic film on the screen before replacing the screen cover.
-


To reassemble your device, follow these instructions in reverse order. Test your device and confirm it is working properly.
To reassemble your device, follow these instructions in reverse order. Test your device and confirm it is working properly.
Cancel: I did not complete this guide.
4 other people completed this guide.
