
Dell Chromebook 3100 2-in-1 Display Replacement

What you need

  1. Dell Chromebook 3100 2-in-1 Display Replacement, Back Cover: step 1, image 1 of 2 Dell Chromebook 3100 2-in-1 Display Replacement, Back Cover: step 1, image 2 of 2
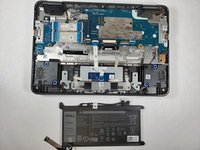
    • First of all, you have to shut down your Chromebook completely, unplug the power cable and remove any accessories like a mouse or USB drive.

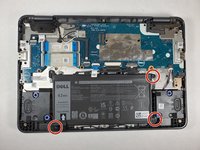
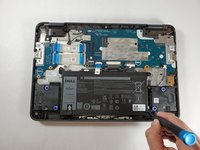
    • Turn the Chromebook upside down so the bottom panel is facing up.

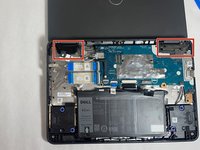
    • Use your Phillips #1 screwdriver to take out all 5mm screws from the bottom case, keep the screws safe, they’re easy to lose!

  2. Dell Chromebook 3100 2-in-1 Display Replacement: step 2, image 1 of 2 Dell Chromebook 3100 2-in-1 Display Replacement: step 2, image 2 of 2
    • Use the opening tool to pry the back cover off of the device.

    • Gently insert your plastic prying tool between the bottom cover and the keyboard deck.

    • Work your way around the edges until the case starts to pop open.

    • Lift off the bottom cover carefully.

  3. Dell Chromebook 3100 2-in-1 Display Replacement, Battery: step 3, image 1 of 2 Dell Chromebook 3100 2-in-1 Display Replacement, Battery: step 3, image 2 of 2
    • Disconnect the battery cable from the connector on the system board.

  4. Dell Chromebook 3100 2-in-1 Display Replacement: step 4, image 1 of 3 Dell Chromebook 3100 2-in-1 Display Replacement: step 4, image 2 of 3 Dell Chromebook 3100 2-in-1 Display Replacement: step 4, image 3 of 3
    • Using a Phillips #1 screwdriver, remove the three 4 mm screws that secure the battery.

    • Remove the adhesive tape that secures the battery in place.

  5. Dell Chromebook 3100 2-in-1 Display Replacement: step 5, image 1 of 2 Dell Chromebook 3100 2-in-1 Display Replacement: step 5, image 2 of 2
    • Carefully remove the battery from the device.

  6. Dell Chromebook 3100 2-in-1 Display Replacement, Display: step 6, image 1 of 2 Dell Chromebook 3100 2-in-1 Display Replacement, Display: step 6, image 2 of 2
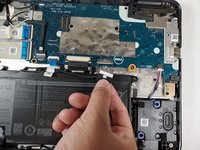
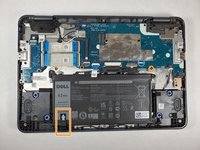
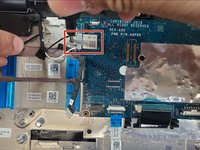
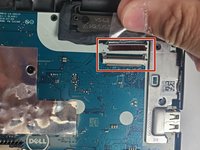
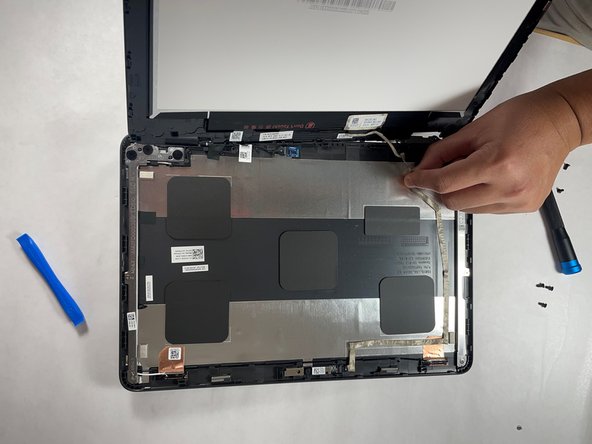
    • Remove the single 3 mm screw that secures the WLAN bracket to the system board using a Phillips #1 screwdriver.

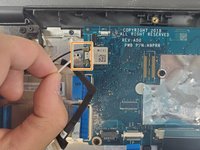
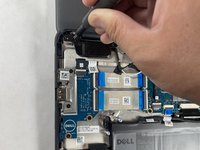
    • Lift the WLAN bracket from the system board.

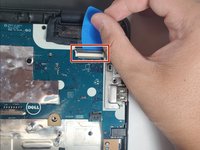
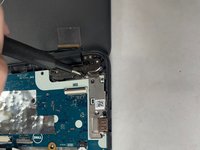
    • After lifting the bracket, carefully unplug the two coaxial cables.

  7. Dell Chromebook 3100 2-in-1 Display Replacement: step 7, image 1 of 1
    • Remove the single 4 mm screw that secures the eDP bracket to the motherboard using a Phillips #1 screwdriver.

    • Remove the eDP bracket.

  8. Dell Chromebook 3100 2-in-1 Display Replacement: step 8, image 1 of 2 Dell Chromebook 3100 2-in-1 Display Replacement: step 8, image 2 of 2
    • Disconnect the display cable from the motherboard by using a plastic opening pick.

  9. Dell Chromebook 3100 2-in-1 Display Replacement: step 9, image 1 of 1
    • Open the system to 180 degrees and place the computer on a flat surface, with the display hinges facing up.

  10. Dell Chromebook 3100 2-in-1 Display Replacement: step 10, image 1 of 3 Dell Chromebook 3100 2-in-1 Display Replacement: step 10, image 2 of 3 Dell Chromebook 3100 2-in-1 Display Replacement: step 10, image 3 of 3
    • Remove the three (on both hinges) 5 mm display hinge bracket screws that secure the display assembly to the system using a Phillips #1 screwdriver.

  11. Dell Chromebook 3100 2-in-1 Display Replacement: step 11, image 1 of 1
    • Remove the display assembly from the system.

  12. Dell Chromebook 3100 2-in-1 Display Replacement: step 12, image 1 of 2 Dell Chromebook 3100 2-in-1 Display Replacement: step 12, image 2 of 2
    • Use the opening tool to open the display panel starting from the pry points located above the left and right hinges.

    • Work your way around, through the left and right side of the panel, and carefully flip the display panel over.

  13. Dell Chromebook 3100 2-in-1 Display Replacement: step 13, image 1 of 2 Dell Chromebook 3100 2-in-1 Display Replacement: step 13, image 2 of 2
    • Peel back the adhesive tape securing the display cable on the back of the display panel and separate the display.

Conclusion

To reassemble your device, follow these instructions in reverse order.

2 other people completed this guide.

M Ali

Member since: 11/03/21

334 Reputation

2 Guides authored

Team

Gateway, Team 1-1, Pee Fall 2021 Member of Gateway, Team 1-1, Pee Fall 2021

GCC-PEE-F21S1G1

5 Members

5 Guides authored

0 Guide Comments

Add Comment

View Statistics:

Past 24 Hours: 1

Past 7 Days: 10

Past 30 Days: 44

All Time: 2,446