Free Shipping on Domestic Orders $75+

Dell Alienware 13 Solid-State Drive (SSD) Replacement

Prerequisite Only
This is a prerequisite-only guide! This guide is part of another procedure and isn’t meant to be used alone.

What you need

      • CAUTION: Solid-state drives are fragile. Exercise care when handling the hard drive.

      • CAUTION: To avoid data loss, do not remove the solid-state drive while the computer is in sleep or on state.

      Ask FixBot

      Add Comment

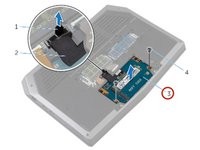
    1. Dell Alienware 13 Solid-State Drive (SSD) Replacement, Pull Tab: step 2, image 1 of 1
      • Using the pull tab, pivot the solid-state drive bracket and peel off the bracket from the tabs on the computer base.

      Ask FixBot

      Add Comment

    2. Dell Alienware 13 Solid-State Drive (SSD) Replacement, Disconnecting the State Drive: step 3, image 1 of 1
      • Using the pull tab, disconnect the solid-state drive cable from the system board.

      Ask FixBot

      Add Comment

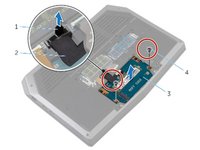
    3. Dell Alienware 13 Solid-State Drive (SSD) Replacement, Remove Screws: step 4, image 1 of 1
      • Remove the screws that secure the solid-state drive assembly to the computer base.

      Ask FixBot

      Add Comment

    4. Dell Alienware 13 Solid-State Drive (SSD) Replacement, Solid-State Drive Assembly Lift: step 5, image 1 of 2 Dell Alienware 13 Solid-State Drive (SSD) Replacement, Solid-State Drive Assembly Lift: step 5, image 2 of 2
      • Lift the solid-state drive assembly off the computer base.

      • Make sure the screws are off the solid-state assembly.

      Ask FixBot

      Add Comment

    5. Dell Alienware 13 Solid-State Drive (SSD) Replacement, Slide and Lift: step 6, image 1 of 1
      • Slide and lift the solid-state drive off the solid-state assembly.

      Ask FixBot

      Add Comment

    6. Dell Alienware 13 Solid-State Drive (SSD) Replacement, Replacing the Solid-State Drive: step 7, image 1 of 1
      • CAUTION: Solid-state drives are fragile. Exercise care when handling the hard drive.

      • Slide the new solid-state drive into the solid-state drive assembly.

      Ask FixBot

      Add Comment

    7. Dell Alienware 13 Solid-State Drive (SSD) Replacement, Replace the Screw: step 8, image 1 of 1
      • Replace the screw that secures the solid-state drive assembly with the screw holes on the computer base.

      Ask FixBot

      Add Comment

    8. Dell Alienware 13 Solid-State Drive (SSD) Replacement, Screw Align: step 9, image 1 of 1
      • Align the screw holes on the solid-state drive assembly with the screw holes on the computer base.

      Ask FixBot

      Add Comment

    9. Dell Alienware 13 Solid-State Drive (SSD) Replacement, Screw Replacement: step 10, image 1 of 1
      • Replace the screws that secure the solid-state drive assembly to the computer base.

      Ask FixBot

      Add Comment

    10. Dell Alienware 13 Solid-State Drive (SSD) Replacement, Connecting the Drive: step 11, image 1 of 1
      • Connect the solid-state drive cable to the system board.

      Ask FixBot

      Add Comment

    11. Dell Alienware 13 Solid-State Drive (SSD) Replacement, Aligning Screws: step 12, image 1 of 1
      • Align the screws on the solid-state drive bracket with the screw holes on the solid-state drive assembly.

      Ask FixBot

      Add Comment

    12. Dell Alienware 13 Solid-State Drive (SSD) Replacement, Replacing Screws: step 13, image 1 of 1
      • Replace the screws that secure the solid-state drive bracket to the solid-state drive assembly.

      Ask FixBot

      Add Comment

Finish Line

Cancel: I did not complete this guide.

Terrence15

Member since: 12/18/17

80,137 Reputation

441 Guides authored

Team

RampUP America, Inc. Member of RampUP America, Inc.

Community

45 Members

12,277 Guides authored

1 Guide Comment

Hi there. Could I have a link to the full service manual you got this from? Thanks.

Aiden - Reply Share

Add Comment

View Statistics:

Past 24 Hours: 2

Past 7 Days: 5

Past 30 Days: 18

All Time: 571