Free Shipping on Domestic Orders $75+

Dell Alienware 13 Keyboard Replacement

What you need

  1. Dell Alienware 13 Keyboard Replacement, Base Panel: step 1, image 1 of 1
    • Working on an electrical device while plugged in can cause injury due to electrical shock. Ensure that all external power is disconnected from the device.

    • Close the device and turn the device over.

    Ask FixBot

    Add Comment

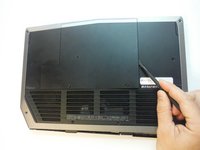
  2. Dell Alienware 13 Keyboard Replacement: step 2, image 1 of 1
    • Remove (2) 5 mm Phillips head screws attaching the small access panel to the base using a Phillips # 1 screwdriver.

    • The (2) screws are attached to the base panel with retaining clips and won't completely detach from the panel.

    Ask FixBot

    Add Comment

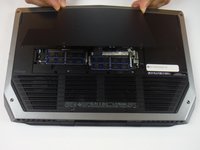
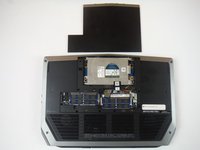
  3. Dell Alienware 13 Keyboard Replacement: step 3, image 1 of 3 Dell Alienware 13 Keyboard Replacement: step 3, image 2 of 3 Dell Alienware 13 Keyboard Replacement: step 3, image 3 of 3
    Tool used on this step:
    Heavy-Duty Spudger
    $4.99
    Buy
    Ask FixBot

    Add Comment

    • CAUTION: Solid-state drives are fragile. Exercise care when handling the hard drive.

    • CAUTION: To avoid data loss, do not remove the solid-state drive while the computer is in sleep or on state.

    Ask FixBot

    Add Comment

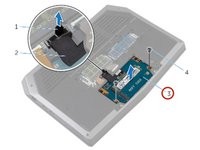
  4. Dell Alienware 13 Keyboard Replacement, Pull Tab: step 5, image 1 of 1
    • Using the pull tab, pivot the solid-state drive bracket and peel off the bracket from the tabs on the computer base.

    Ask FixBot

    Add Comment

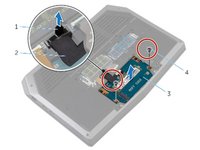
  5. Dell Alienware 13 Keyboard Replacement, Disconnecting the State Drive: step 6, image 1 of 1
    • Using the pull tab, disconnect the solid-state drive cable from the system board.

    Ask FixBot

    Add Comment

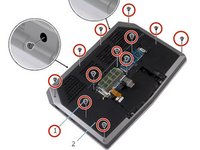
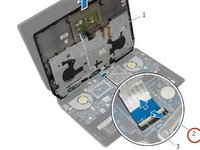
  6. Dell Alienware 13 Keyboard Replacement, Remove Screws: step 7, image 1 of 1
    • Remove the screws that secure the solid-state drive assembly to the computer base.

    Ask FixBot
    Add Comment

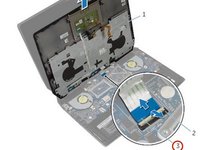
  7. Dell Alienware 13 Keyboard Replacement, Solid-State Drive Assembly Lift: step 8, image 1 of 2 Dell Alienware 13 Keyboard Replacement, Solid-State Drive Assembly Lift: step 8, image 2 of 2
    • Lift the solid-state drive assembly off the computer base.

    • Make sure the screws are off the solid-state assembly.

    Ask FixBot
    Add Comment

  8. Dell Alienware 13 Keyboard Replacement, Slide and Lift: step 9, image 1 of 1
    • Slide and lift the solid-state drive off the solid-state assembly.

    Ask FixBot

    Add Comment

  9. Dell Alienware 13 Keyboard Replacement, Replacing the Solid-State Drive: step 10, image 1 of 1
    • CAUTION: Solid-state drives are fragile. Exercise care when handling the hard drive.

    • Slide the new solid-state drive into the solid-state drive assembly.

    Ask FixBot

    Add Comment

  10. Dell Alienware 13 Keyboard Replacement, Replace the Screw: step 11, image 1 of 1
    • Replace the screw that secures the solid-state drive assembly with the screw holes on the computer base.

    Ask FixBot

    Add Comment

  11. Dell Alienware 13 Keyboard Replacement, Screw Align: step 12, image 1 of 1
    • Align the screw holes on the solid-state drive assembly with the screw holes on the computer base.

    Ask FixBot

    Add Comment

  12. Dell Alienware 13 Keyboard Replacement, Screw Replacement: step 13, image 1 of 1
    • Replace the screws that secure the solid-state drive assembly to the computer base.

    Ask FixBot

    Add Comment

  13. Dell Alienware 13 Keyboard Replacement, Connecting the Drive: step 14, image 1 of 1
    • Connect the solid-state drive cable to the system board.

    Ask FixBot

    Add Comment

  14. Dell Alienware 13 Keyboard Replacement, Aligning Screws: step 15, image 1 of 1
    • Align the screws on the solid-state drive bracket with the screw holes on the solid-state drive assembly.

    Ask FixBot

    Add Comment

  15. Dell Alienware 13 Keyboard Replacement, Replacing Screws: step 16, image 1 of 1
    • Replace the screws that secure the solid-state drive bracket to the solid-state drive assembly.

    Ask FixBot

    Add Comment

  16. Dell Alienware 13 Keyboard Replacement, Disconnecting the Keyboard: step 17, image 1 of 1
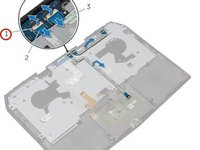
    • WARNING: Before working inside your computer, read the safety information that shipped with your computer and follow the steps in Before Working Inside Your Computer. After working inside your computer, follow the instructions in After Working Inside Your Computer.

    • Lift the latches and disconnect the keyboard and keyboard-backlight cables from the system board

    Ask FixBot

    Add Comment

  17. Dell Alienware 13 Keyboard Replacement, Removing the Screws: step 18, image 1 of 2 Dell Alienware 13 Keyboard Replacement, Removing the Screws: step 18, image 2 of 2
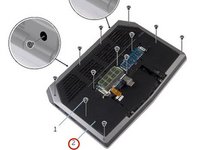
    • Remove the screws that secure the palm-rest assembly to the computer base.

    Ask FixBot

    Add Comment

  18. Dell Alienware 13 Keyboard Replacement, Popping out the Palm-Rest Assembly: step 19, image 1 of 1
    • Lift the computer base slightly and push the release tabs on the palm-rest assembly until it pops out.

    Ask FixBot

    Add Comment

  19. Dell Alienware 13 Keyboard Replacement, Turn the Computer Over: step 20, image 1 of 1
    • Turn the computer over and open the display as far as possible.

    Ask FixBot

    Add Comment

  20. Dell Alienware 13 Keyboard Replacement, Prying the Edges: step 21, image 1 of 1
    • Using a plastic scribe, pry up along the edges of the palm-rest assembly.

    Ask FixBot

    Add Comment

  21. Dell Alienware 13 Keyboard Replacement, Lifting the Palm-Rest Assembly: step 22, image 1 of 1
    • Gently lift the palm-rest assembly and turn it over.

    Ask FixBot

    Add Comment

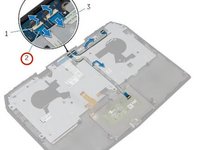
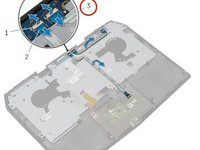
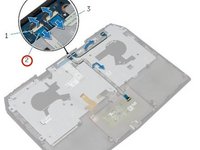
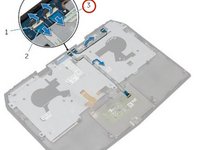
  22. Dell Alienware 13 Keyboard Replacement, Disconnecting the Power-Board Cable: step 23, image 1 of 2 Dell Alienware 13 Keyboard Replacement, Disconnecting the Power-Board Cable: step 23, image 2 of 2
    • Lift the connector latch and disconnect the power-button board cable from the system board.

    Ask FixBot

    Add Comment

    • Remove the Keyboard.

    • Remove the power-button board.

    • Remove the status-light board.

    • Remove the touchpad.

    Ask FixBot

    Add Comment

    • Replace the touchpad.

    • Replace the status-light board.

    • Replace the power-button board.

    • Replace the keyboard.

    Ask FixBot

    Add Comment

  23. Dell Alienware 13 Keyboard Replacement, Connecting the Power-Button Board Cable: step 26, image 1 of 1
    • Connect the power-button board cable to the system board.

    Ask FixBot

    Add Comment

  24. Dell Alienware 13 Keyboard Replacement, Aligning the Palm-Rest Assembly.: step 27, image 1 of 1
    • Align the palm-rest assembly on the computer base and snap it into place.

    Ask FixBot

    Add Comment

    • Close the display and turn the computer over.

    Ask FixBot

    Add Comment

    • Replace the screws that secure the palm-rest assembly to the computer base.

    Ask FixBot

    Add Comment

    • Connect the keyboard cable and the keyboard-backlight cable to the system board.

    Ask FixBot

    Add Comment

  25. Dell Alienware 13 Keyboard Replacement, Disconnecting the Touchpad Cable: step 31, image 1 of 3 Dell Alienware 13 Keyboard Replacement, Disconnecting the Touchpad Cable: step 31, image 2 of 3 Dell Alienware 13 Keyboard Replacement, Disconnecting the Touchpad Cable: step 31, image 3 of 3
    • WARNING: Before working inside your computer, read the safety information that shipped with your computer and follow the steps in Before Working Inside Your Computer. After working inside your computer, follow the instructions in After Working Inside Your Computer.

    • Lift the connector latches and disconnect the touchpad cable and the status-light cable from the power-button board.

    Ask FixBot

    Add Comment

  26. Dell Alienware 13 Keyboard Replacement, Peeling the Cables: step 32, image 1 of 1
    • Peel the touchpad cable and status-light cable off the keyboard bracket.

    Ask FixBot

    Add Comment

  27. Dell Alienware 13 Keyboard Replacement, Removing the Keyboard Bracket: step 33, image 1 of 1
    • Lift the keyboard bracket off the palm-rest assembly.

    Ask FixBot

    Add Comment

  28. Dell Alienware 13 Keyboard Replacement, Remove the Screws: step 34, image 1 of 1
    • Remove the screws that secure the keyboard to the palm-rest assembly.

    Ask FixBot

    Add Comment

  29. Dell Alienware 13 Keyboard Replacement, Lifting the Keyboard: step 35, image 1 of 1
    • Slide and lift the keyboard, along with the cables, off the palm-rest assembly.

    Ask FixBot

    Add Comment

  30. Dell Alienware 13 Keyboard Replacement, Aligning the Screw Holes: step 36, image 1 of 1
    • Align the screw holes on the NEW keyboard with the screw holes on the palm-rest assembly.

    Ask FixBot

    Add Comment

  31. Dell Alienware 13 Keyboard Replacement, Replacing Screws: step 37, image 1 of 1
    • Replace the screws that secure the keyboard to the palm-rest assembly.

    Ask FixBot

    Add Comment

    • Align the screw holes on the keyboard bracket with the screw holes on the palm-rest assembly.

    Ask FixBot

    Add Comment

  32. Dell Alienware 13 Keyboard Replacement, Replace the Screws: step 39, image 1 of 1
    • Replace the screws that secure the keyboard bracket to the palm-rest assembly.

    Ask FixBot

    Add Comment

  33. Dell Alienware 13 Keyboard Replacement, Adhering the Cables: step 40, image 1 of 2 Dell Alienware 13 Keyboard Replacement, Adhering the Cables: step 40, image 2 of 2
    • Adhere the touchpad cable and status-light cable to the keyboard bracket.

    Ask FixBot

    Add Comment

  34. Dell Alienware 13 Keyboard Replacement, Sliding the Cables: step 41, image 1 of 1
    • Slide the touchpad cable and the status-light cable into their respective connectors on the power-button board and press down the latches to secure the cables.

    Ask FixBot

    Add Comment

Conclusion

To reassemble your device, follow these instructions in reverse order.

Cancel: I did not complete this guide.

Terrence15

Member since: 12/18/17

80,125 Reputation

441 Guides authored

Team

RampUP America, Inc. Member of RampUP America, Inc.

Community

45 Members

2,003 Guides authored

0 Guide Comments

Add Comment

View Statistics:

Past 24 Hours: 0

Past 7 Days: 7

Past 30 Days: 42

All Time: 1,224