Introduction
As discussed in Miroslav's guide on Debadging a Car, there are many reasons why you would want to remove the badge from your car. However, not all badges are the same especially if you want to debadge your Ferrari. This guide will give a brief overview of removing your Ferrari badge so you can drive label-free or install a custom badge.
This video guide has been created by How To Remove A Car Badge DIY Ferrari 458. All credit for screenshots goes to the Youtube Channel Do You Know Alex...?.
What you need
Video Overview
-
-
-
Depending on the model of Ferrari you own, you may need to remove several bolts that hold the badge in place.
 Ask FixBot
-
-
-
Line the badge of your Ferrari with masking tape as shown.
-
-
-
-
Warm up the badge using your heat gun.
-
-
-
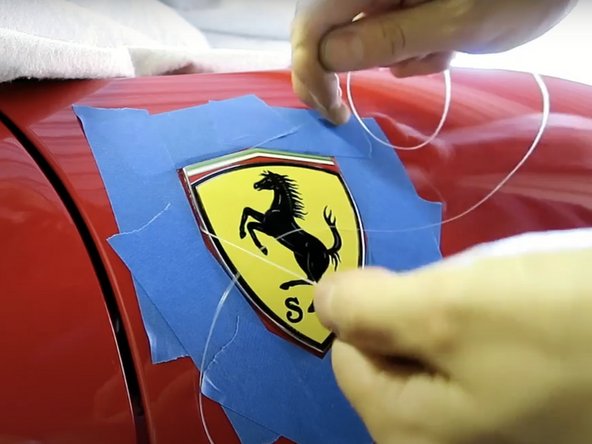
Using the plastic prying tool, carefully pry up one corner of the badge, and slip the floss underneath.
-
Draw the floss back and forth in a sawing motion and simultaneously pull it along the perimeter of the badge until it detaches from the panel.
-
-
-
With the badge removed you can now use soapy water and the abrasive side of a sponge to remove the excess adhesive. Other products such as Goo Gone or Goof Off are also excellent adhesive removers.
-
-


To reattach your badge, apply new adhesive and follow these instructions in reverse order.

