
DeWalt DCS380 Motor Armature Replacement

What you need

  1. DeWalt DCS380 Motor Armature Replacement, Removing shoe and boot.: step 1, image 1 of 1
    • Remove the battery before disassembly.

    • Remove the shoe by pressing the yellow button on the left side of the hand grip.

  2. DeWalt DCS380 Motor Armature Replacement: step 2, image 1 of 2 DeWalt DCS380 Motor Armature Replacement: step 2, image 2 of 2
    • Remove the two M8x18mm T20 bolts from the front plate.

  3. DeWalt DCS380 Motor Armature Replacement: step 3, image 1 of 1
    • Pull the front of the grip while holding the saw body in place.

  4. DeWalt DCS380 Motor Armature Replacement, DeWalt DCS380 Grip Disassembly: step 4, image 1 of 2 DeWalt DCS380 Motor Armature Replacement, DeWalt DCS380 Grip Disassembly: step 4, image 2 of 2
    • Remove the battery before dissasembly.

    • Remove the M3x16mm T10 screw from the back of the grip. Keep it separate from the rest of the grip screws

    • Remove the six M3.63x19 T15 screws from the grip.

  5. DeWalt DCS380 Motor Armature Replacement: step 5, image 1 of 3 DeWalt DCS380 Motor Armature Replacement: step 5, image 2 of 3 DeWalt DCS380 Motor Armature Replacement: step 5, image 3 of 3
    • Remove the top half of the grip.

    • Turn the saw over and locate the power connectors to the motor.

    • Use needle nose pliers to remove the spade connectors. Take care not to grab the wires on removal, only the end of the spade terminal.

    • Note the polarity for the power connectors and be sure they are not reversed on reassembly.

  6. DeWalt DCS380 Motor Armature Replacement, Motor Armature: step 6, image 1 of 2 DeWalt DCS380 Motor Armature Replacement, Motor Armature: step 6, image 2 of 2
    • Remove three M8x18 T20 bolts from the back of the gearbox.

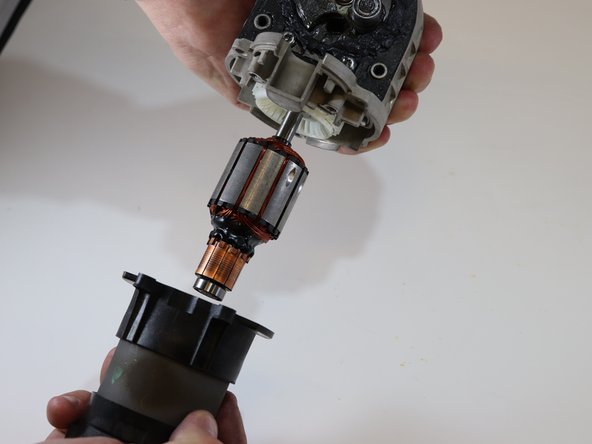
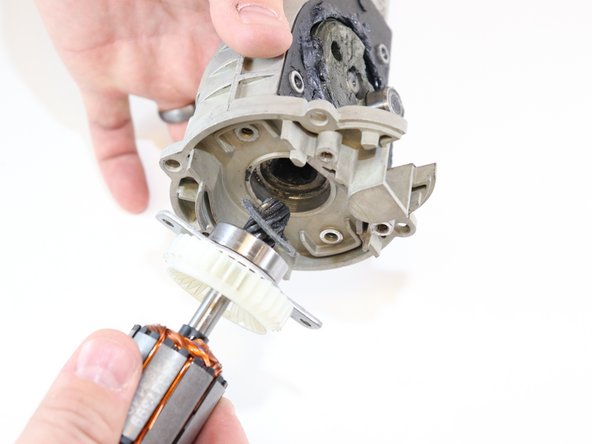
    • Pull the motor case off of the armature.

  7. DeWalt DCS380 Motor Armature Replacement: step 7, image 1 of 2 DeWalt DCS380 Motor Armature Replacement: step 7, image 2 of 2
    • Remove two M8x12mm T20 bolts from the bearing retainer.

    • Pull the shaft out of the gearbox.

    • Please note, the brushes will need to be disengaged to reassemble the motor. See the end of the Motor Brush replacement section of this guide for details.

Conclusion

To reassemble your device, follow these instructions in reverse order.

0 Comments

Add Comment

View Statistics:

Past 24 Hours: 0

Past 7 Days: 5

Past 30 Days: 26

All Time: 976