Introduction
If your DeWalt DCF887B Impact Driver has started to shake or malfunction at the job site or at home, it can be because of spring inside the tip of the driver has failed. Luckily, this is a simple fix, and the spring can be replaced with just a pick and this guide.
The spring is placed behind the metal ball spring and the sleeve. The spring provides the mechanisms for releasing and holding the drill bits. Without the spring, the impact driver will start to wobble and will make it difficult to screw in screws adequately.
Make sure that you have a clean surface to work on and not lose any of the small parts.
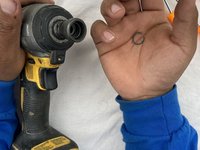
Remove the driver's battery before beginning.
What you need
-
-
Once you pop out the first washer with a slight gap in it, called a "hog ring," a plain washer will follow.
-
-
-
Remove the collar by grabbing the outer rim and pulling it out gently with your fingers.
-
Once you remove the collar, place it on the side of the table with the shortest end pointing upwards.
-
-
-
-
Remove the steel ball by popping it out with the picker, or ideally, grabbing it with a magnetic tool.
-
Set the steel ball somewhere it won't roll away.
-
-
-
Replace the steel ball.
-
Align the crook in the spring with the steel ball's hole in the spindle to install the new spring.
-
Compress the spring right back through the middle of the steel ball frame.
-
-
-
Attach the collar over the spring.
-
Apply light pressure on the spring with your left hand to pop the collar back on top.
-
-
-
With the collar facing up, add the plain washer back into the center of the collar, then the hog ring.
-
Press down on the hog ring along with the collar until you hear it "click" into place.
-


Your impact driver should now be fully-functional!
Cancel: I did not complete this guide.
One other person completed this guide.
Team

University of Memphis, Team 2-2, Willis Spring 2022 Member of University of Memphis, Team 2-2, Willis Spring 2022
UM-WILLIS-S22S2G2
1 Member
1 Guide authored
2 Guide Comments
Getting the hog ring back on is difficult. Is there a tool, besides picks, to help with this?
Nope, patience and diligence. Get one side of the ring completely seated and then slide slowly around the inside of it so widen it as you push down. 2 small drivers can help