Free Shipping on Domestic Orders $75+

DJI Phantom 3 Advanced Motor Replacement

What you need

    1. DJI Phantom 3 Advanced Motor Replacement, Battery: step 1, image 1 of 2 DJI Phantom 3 Advanced Motor Replacement, Battery: step 1, image 2 of 2
      • With the battery facing you, locate the two tabs on the top and bottom of the battery as shown.

      • Remember to disarm and power down your quadcopter before beginning any disassembly.

      Ask FixBot

      Add Comment

    2. DJI Phantom 3 Advanced Motor Replacement: step 2, image 1 of 2 DJI Phantom 3 Advanced Motor Replacement: step 2, image 2 of 2
      • Press the two tabs with your finger and thumb, and gently slide the battery towards you, out of the quadcopter frame.

      • With your other hand, be sure to hold the quadcopter steady to ensure that it stays still.

      Ask FixBot

      Add Comment

    1. DJI Phantom 3 Advanced Motor Replacement, Cover: step 3, image 1 of 1
      • Turn the Phantom 3 Advanced upside down.

      Ask FixBot

      Add Comment

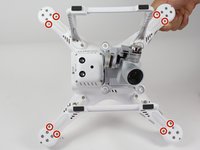
    2. DJI Phantom 3 Advanced Motor Replacement: step 4, image 1 of 1
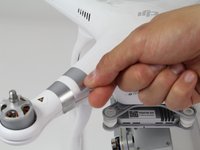
      • Remove the four 7mm long 2mm screws with a T-6 screwdriver.

      • There is one screw per arm, located at the tip of the arm.

      Ask FixBot

      Add Comment

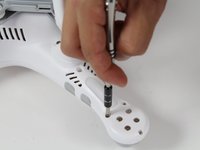
    3. DJI Phantom 3 Advanced Motor Replacement: step 5, image 1 of 2 DJI Phantom 3 Advanced Motor Replacement: step 5, image 2 of 2
      • Remove the eight 5mm long 2.5mm screws using the T-8 screwdriver.

      • There are two 5mm screws on each arm.

      Ask FixBot

      Add Comment

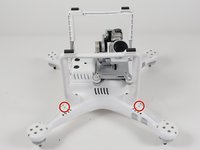
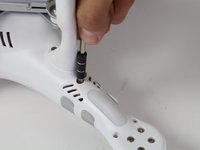
    4. DJI Phantom 3 Advanced Motor Replacement: step 6, image 1 of 2 DJI Phantom 3 Advanced Motor Replacement: step 6, image 2 of 2
      • Remove the four 10mm long deep 3mm screws using the T-8 screwdriver.

      • There is one screw on each arm located near the landing gear.

      Ask FixBot

      Add Comment

    5. DJI Phantom 3 Advanced Motor Replacement: step 7, image 1 of 3 DJI Phantom 3 Advanced Motor Replacement: step 7, image 2 of 3 DJI Phantom 3 Advanced Motor Replacement: step 7, image 3 of 3
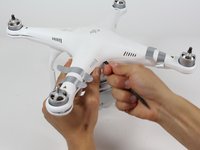
      • Carefully flip the phantom back over with the motors facing up.

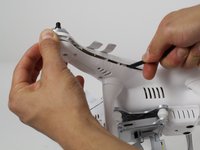
      • Peel back the silver stickers from the seam in the cover.

      • Using a plastic spudger, slowly separate the two halves of the plastic shell.

      • This step requires some force, and the plastic will click loudly as the shell separates.

      • Do not fully remove the cover. There is a wire that needs to be detached from the control board before the cover is completely free.

      Ask FixBot

      Add Comment

    6. DJI Phantom 3 Advanced Motor Replacement: step 8, image 1 of 3 DJI Phantom 3 Advanced Motor Replacement: step 8, image 2 of 3 DJI Phantom 3 Advanced Motor Replacement: step 8, image 3 of 3
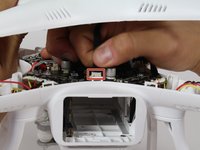
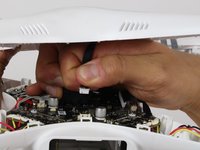
      • Slowly remove the upper half of the plastic case about halfway. There is a ribbon cable that's connects the cover and the control board.

      • Follow the ribbon cable to the control board and locate the connector that connects the cable to the control board.

      • Press the tab on the side of the connector and pull up on the cable.

      • Continue to remove the shell the rest of the way.

      Ask FixBot

      Add Comment

    1. DJI Phantom 3 Advanced Motor Replacement, Motor: step 9, image 1 of 3 DJI Phantom 3 Advanced Motor Replacement, Motor: step 9, image 2 of 3 DJI Phantom 3 Advanced Motor Replacement, Motor: step 9, image 3 of 3
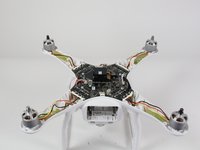
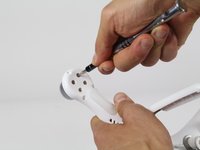
      • Turn the drone upside down with the motors facing the table.

      • Unscrew the four 5.5mm long 3mm screws directly under the motor using a 2.0mm hex bit screwdriver.

      Ask FixBot

      Add Comment

    2. DJI Phantom 3 Advanced Motor Replacement: step 10, image 1 of 2 DJI Phantom 3 Advanced Motor Replacement: step 10, image 2 of 2
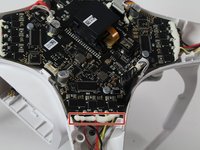
      • Remove the glue that covers the three wires that connect the motor to the flight controller. Use a plastic opening tool or a metal tool if needed.

      • Repeat for each arm.

      Ask FixBot

      Add Comment

    3. DJI Phantom 3 Advanced Motor Replacement: step 11, image 1 of 2 DJI Phantom 3 Advanced Motor Replacement: step 11, image 2 of 2
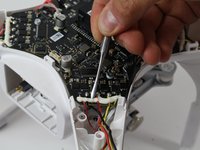
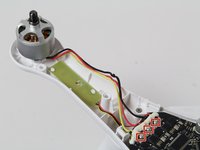
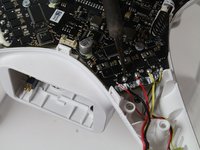
      • Trace the black, yellow, and red wires from the motor to the flight controlle .

      • Desolder the three wires where they connect to the flight controller. Check out this desoldering guide to learn how to desolder: Desoldering Guide.

      • Take out the motor and repeat for the other motors if needed.

      Ask FixBot

      Add Comment

Conclusion

To reassemble your device, follow these instructions in reverse order.

Cancel: I did not complete this guide.

9 other people completed this guide.

Tate Morell

Member since: 10/06/16

812 Reputation

2 Guides authored

Team

Cal Poly, Team 10-2, Livingston Fall 2016 Member of Cal Poly, Team 10-2, Livingston Fall 2016

CPSU-LIVINGSTON-F16S10G2

3 Members

36 Guides authored

1 Guide Comment

Great teardown, clear instructions, thank you!

Kyle Michael - Reply Share

Add Comment

View Statistics:

Past 24 Hours: 1

Past 7 Days: 10

Past 30 Days: 79

All Time: 9,538