
D-Link DIR-890L Heat Sink Replacement

What you need

  1. D-Link DIR-890L Heat Sink Replacement, Case: step 1, image 1 of 3 D-Link DIR-890L Heat Sink Replacement, Case: step 1, image 2 of 3 D-Link DIR-890L Heat Sink Replacement, Case: step 1, image 3 of 3
    • Peel off the four rubber rectangular feet with your fingers.

    • The feet may be hard to remove. Apply additional force if necessary.

  2. D-Link DIR-890L Heat Sink Replacement: step 2, image 1 of 3 D-Link DIR-890L Heat Sink Replacement: step 2, image 2 of 3 D-Link DIR-890L Heat Sink Replacement: step 2, image 3 of 3
    • Unscrew the 5mm screws in each corner using the Phillips #1 screwdriver.

  3. D-Link DIR-890L Heat Sink Replacement: step 3, image 1 of 3 D-Link DIR-890L Heat Sink Replacement: step 3, image 2 of 3 D-Link DIR-890L Heat Sink Replacement: step 3, image 3 of 3
    • Wedge the opening tool between the red top panel and the gray bottom panel.

    • Twist the opening tool to separate the panels. Work your way around the case until both of the panels are separated.

  4. D-Link DIR-890L Heat Sink Replacement, Heat Sink: step 4, image 1 of 3 D-Link DIR-890L Heat Sink Replacement, Heat Sink: step 4, image 2 of 3 D-Link DIR-890L Heat Sink Replacement, Heat Sink: step 4, image 3 of 3
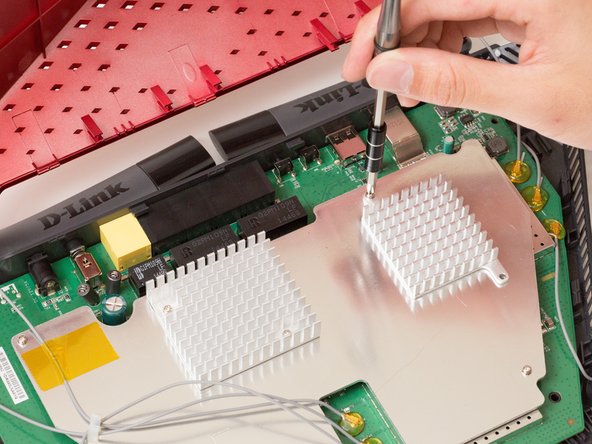
    • Unscrew the two 7mm screws with a Phillips #1 screwdriver.

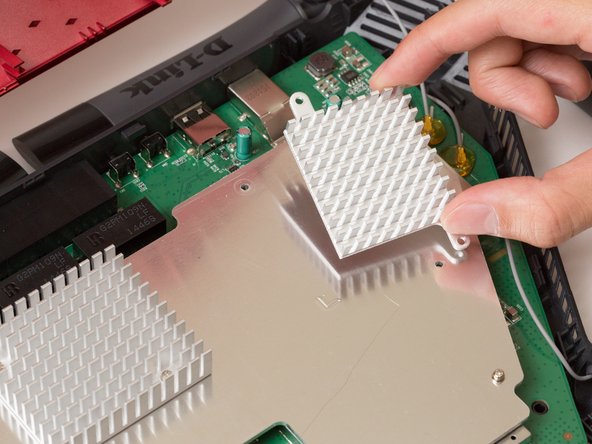
    • Lift the heat sink off the metal plate with your fingers.

Conclusion

To reassemble your device, follow these instructions in reverse order.

One other person completed this guide.

Michael Hilomen

Member since: 10/06/16

201 Reputation

1 Guide authored

Team

Cal Poly, Team 10-7, Livingston Fall 2016 Member of Cal Poly, Team 10-7, Livingston Fall 2016

CPSU-LIVINGSTON-F16S10G7

4 Members

12 Guides authored

0 Comments

Add Comment

View Statistics:

Past 24 Hours: 0

Past 7 Days: 2

Past 30 Days: 4

All Time: 1,175