Introduction
Double the iPhone, double the teardown! With the iPhone 6 Plus laid out for inspection, we turn our attention to the smaller iPhone 6—though at 4.7", it's still a giant among iPhones. What was so big that Apple couldn't fit it into the familiar form factor? Let's shake it out onto the teardown table and find out!
This year we're doing the iPhone 6 teardown in English, Français, Deutsch, Español, Italiano, Nederlands, Русский, and 中文. Just click the flag icon to swap languages.
Gear up for more teardown! Follow us on Facebook, Instagram, or Twitter for the latest teardown news.
What you need
Video Overview
-
-
It's iPhone 6 time! Let's check out some tech specs:
-
Apple A8 processor with 64-bit architecture
-
M8 second-generation motion coprocessor
-
16, 64, or 128 GB onboard storage capacity
-
4.7-inch 1334x750 pixels (326 ppi) Retina HD display
-
8 MP iSight camera (with 1.5µ pixels and phase-detection autofocus) and a 1.2 MP FaceTime camera
-
Touch ID home button fingerprint sensor, barometer, 3-axis gyro, accelerometer, ambient light sensor
-
802.11a/b/g/n/ac Wi‑Fi + Bluetooth 4.0 + NFC + 20-band LTE
-
-
-
We stood in some pretty long lines to get our hands on the new curved iPhone 6, and we couldn't be more excited to delve into it!
-
We want to send out a big thanks to our good friends at MacFixit Australia for letting us use their office in Melbourne for the teardown. They stock Mac and iPhone upgrades/accessories, and also carry our iFixit toolkits. Thanks MacFixit Australia!
-
-
-
Apple has decided to brand this particular iPhone 6 as model A1586.
-
The camera bump, as it's widely known, is prominently visible along the top of the iPhone 6. Apple chose improved optics in exchange for a lens assembly that is slightly thicker than the rest of the phone.
-
You win this time, optics.
-
-
-
The rounded corner design of the iPhone 6 is very reminiscent of the first generation iPhone, sans the Lightning connector and Pentalobe screws.
-
With our 64 Bit Driver Kit, we proceed to remove the Pentalobe screws from the iPhone 6.
-
-
-
While there may not be any Phillips screws on the outside of this phone, there are certainly Phillips screws on the inside. Fortunately, our Pro Tech Screwdriver Set can handle any type of screw this phone dishes out.
-
With screwdriver in hand, we tackle the metal bracket screws that secure the front panel assembly in place.
-
-
-
-
So far, the overall construction of this "small" iPhone 6 is a dead ringer for its big brother, the 6 Plus.
-
This metal plate and the front panel assembly it covers are perfect examples. The design mirrors that of the iPhone 6 Plus, which in this case is a definite improvement.
-
-
-
The iPhone 6 features an 1810 mAh, 3.82 V Lithium-ion Polymer battery with an energy rating of 6.91 Wh. Turning it over, the rating improves to 7.01 Wh! Perhaps the engineers were able to squeeze an extra 0.1 Wh in the battery after confirming the text on the front.
-
Apple preaches that this 28-gram (3.75" x 1.5" x 0.13") power pack will let you talk for up to 14 hours on 3G and offers 250 hours of standby time.
-
This is a fair bit smaller than the iPhone 6 Plus's 11.1 Wh, 2915 mAh battery—but still a notable bump from the 1560 mAh unit in the iPhone 5s.
-
-
-
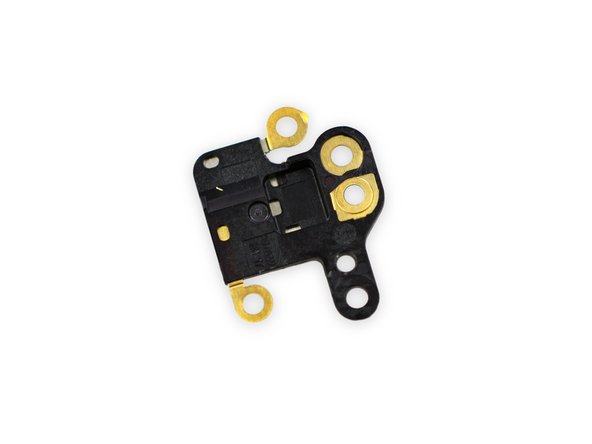
Good news, everyone! The rear-facing camera is easily removed with a pair of tweezers.
-
Though it lacks the fancy optical image stabilization of the camera in the iPhone 6 Plus, this unit shares virtually all of its other specs: 8 megapixels, f/2.2 aperture, True Tone flash, and phase-detection autofocus.
-
It also features electronic image stabilization, which aims to mimic the effects of OIS (optical image stabilization) using image processing techniques.
-
-
-
We tweeze out antennas faster than you can remove punny parts from a buzzing board game.
-
Up next is the logic board. While it's quite elegantly dressed in its EMI shields, we want to see what lies beneath the veil.
-
-
-
The front side of the logic board:
-
Apple A8 APL1011 SoC + SK Hynix RAM as denoted by the markings H9CKNNN8KTMRWR-NTH (we presume it is 1 GB LPDDR3 RAM, the same as in the iPhone 6 Plus)
-
Qualcomm MDM9625M LTE Modem
-
Skyworks 77802-23 Low Band LTE PAD
-
Avago A8020 High Band PAD
-
Avago A8010 Ultra High Band PA + FBARs
-
Skyworks 77803-20 Mid Band LTE PAD
-
InvenSense MP67B 6-axis Gyroscope and Accelerometer Combo
-
-
-
Back side of the logic board:
-
SanDisk SDMFLBCB2 128 Gb (16 GB) NAND Flash
-
Murata 339S0228 Wi-Fi Module
-
Apple/Dialog 338S1251-AZ Power Management IC
-
Broadcom BCM5976 Touchscreen Controller
-
NXP LPC18B1UK ARM Cortex-M3 Microcontroller (also known as the M8 motion coprocessor)
-
NXP 65V10 NFC module + Secure Element (likely contains an NXP PN544 NFC controller inside)
-
Qualcomm WTR1625L RF Transceiver
-
-
-
More ICs await us on the back of the logic board:
-
Qualcomm WFR1620 receive-only companion chip. Qualcomm states that the WFR1620 is "required for implementation of carrier aggregation with WTR1625L."
-
Qualcomm PM8019 Power Management IC
-
Texas Instruments 343S0694 Touch Transmitter
-
AMS AS3923 NFC Booster IC designed to “improve performance of existing NFC controllers for challenging environments such as mobile and wearables” and also delivers “less restrictive antenna design requirements”.
-
We believe this chip is an NFC frontend to improve performance in noisy environments using 'active peer to peer bit rates [up to] 212kb/s.'
-
Cirrus Logic 338S1201 Audio Codec
-
-
-
Removing the vibrator assembly. It's new and... improved?
-
Vibrator mechanisms seem to be one of those choices like Coke or Pepsi where there is never a clear answer. Apple keeps changing this part's design:
-
iPhone 4 (counterweight)
-
iPhone 4S (linear oscillating)
-
iPhone 5/5s (counterweight)
-
Based on appearances, we're guessing that Apple went with a linear oscillating design in this rendition of the iPhone.
-
-
-
This year's model is sporting a new design for the speaker assembly.
-
Since markings are scarce, we expect that this is just a minor update from the iPhone 5s speaker.
-
-
-
That's all folks. The iPhone 6 earned a respectable seven out of ten. Here's why:
-
Continuing the trend from the iPhone 5 series, the display assembly comes out of the phone first, simplifying screen repairs.
-
The battery is straightforward to access. Removing it requires a proprietary pentalobe screwdriver and knowledge of the adhesive removal technique, but is not difficult.
-
The fingerprint sensor cable has been re-routed, fixing a significant repairability issue with the iPhone 5s and making the phone much safer to open. (On the 5s, the cable is easily torn if a user is not careful while opening the phone.)
-
The iPhone 6 still uses proprietary Pentalobe screws on the exterior, requiring a specialty screwdriver to remove.
-
Apple does not share repair information for the iPhone 6 with independent repair shops or consumers.
-


45 Comments
Anybody know where the Liquid Contact Indicators (LCI's) are located? I didn't see one inside the SIM card reader as it was on the iPhone 5, 5S.