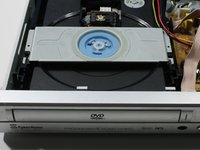
CyberHome CH-DVD 300 Disc Tray Replacement

What you need

  1. CyberHome CH-DVD 300 Disc Tray Replacement, Top Panel: step 1, image 1 of 2 CyberHome CH-DVD 300 Disc Tray Replacement, Top Panel: step 1, image 2 of 2
    • Turn the DVD player off. Unplugging the DVD player while it is on may result in damage to the DVD player or an inserted CD.

    • Unplug the DVD player from the wall socket.

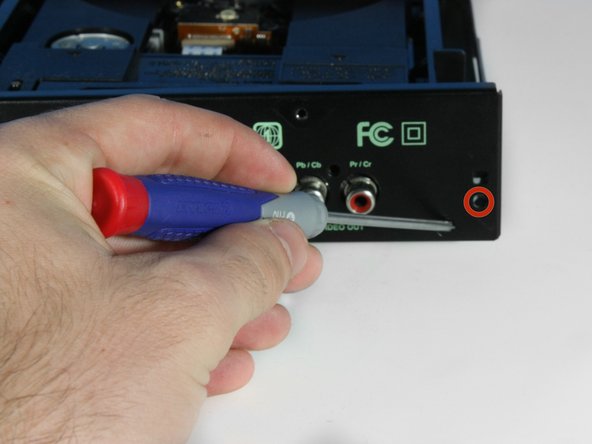
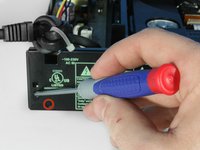
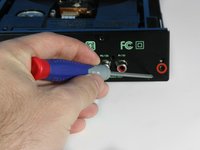
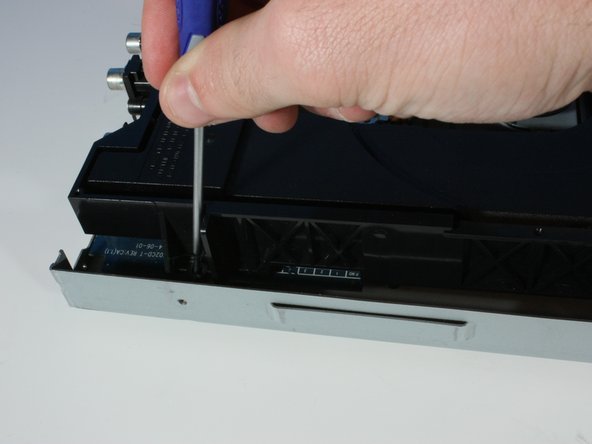
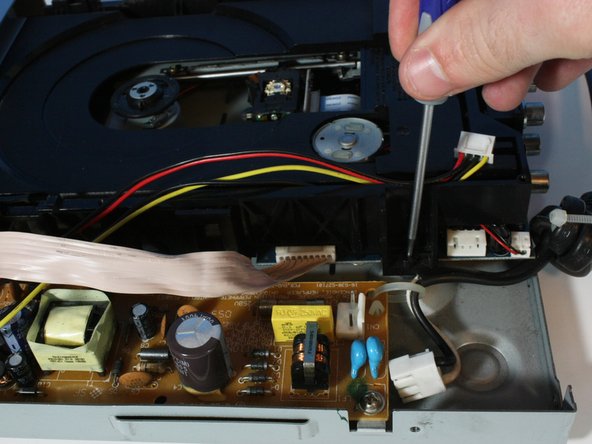
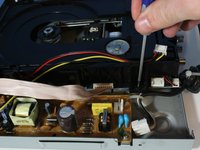
    • Locate the 15mm Phillips screws on the left side (1 screw), right side (1 screw), and back (4 screws) of the DVD Player. Use the appropriate Phillips head screwdriver to remove the six screws.

  2. CyberHome CH-DVD 300 Disc Tray Replacement: step 2, image 1 of 2 CyberHome CH-DVD 300 Disc Tray Replacement: step 2, image 2 of 2
    • Remove the top panel of the DVD Player by:

    • Sliding the top panel backwards.

    • Gently lifting the back of the top panel up.

  3. CyberHome CH-DVD 300 Disc Tray Replacement, Back Panel: step 3, image 1 of 2 CyberHome CH-DVD 300 Disc Tray Replacement, Back Panel: step 3, image 2 of 2
    • Remove the remaining screws on the back of the DVD player:

    • There will be four 15 mm screws and two 6.3 mm screws.

  4. CyberHome CH-DVD 300 Disc Tray Replacement: step 4, image 1 of 1
    • Remove the back panel by:

    • Lifting up on the back panel.

    • Pulling the back panel backwards from the DVD player.

  5. CyberHome CH-DVD 300 Disc Tray Replacement, Disc Tray: step 5, image 1 of 3 CyberHome CH-DVD 300 Disc Tray Replacement, Disc Tray: step 5, image 2 of 3 CyberHome CH-DVD 300 Disc Tray Replacement, Disc Tray: step 5, image 3 of 3
    • Remove the four 8.1mm screws in each of the corners of the disc tray.

  6. CyberHome CH-DVD 300 Disc Tray Replacement: step 6, image 1 of 2 CyberHome CH-DVD 300 Disc Tray Replacement: step 6, image 2 of 2
    • Orient the device so the front is facing towards you. Remove the disc tray faceplate by lifting up on both corners firmly.

    • The faceplate is located on the front of the DVD player and will prevent the disc tray removal if not removed.

  7. CyberHome CH-DVD 300 Disc Tray Replacement: step 7, image 1 of 2 CyberHome CH-DVD 300 Disc Tray Replacement: step 7, image 2 of 2
    • Detach the ribbon cable from the side of the DVD player by gently pulling it out.

  8. CyberHome CH-DVD 300 Disc Tray Replacement: step 8, image 1 of 1
    • Orient the device so the back is facing towards you. Remove the disk tray out towards the back of the DVD player by lifting it.

Conclusion

To reassemble your device, follow these instructions in reverse order.

One other person completed this guide.

Chris Menezes

Member since: 04/07/14

642 Reputation

5 Guides authored

Team

Cal Poly, Team 6-5, Forte Spring 2014 Member of Cal Poly, Team 6-5, Forte Spring 2014

CPSU-FORTE-S14S6G5

5 Members

5 Guides authored

One Comment

Bom dia. gostaria de obter informação sobre a referência desse componente CI u7 da placa ficarei muito grato

Gilvando - Reply

Add Comment

View Statistics:

Past 24 Hours: 1

Past 7 Days: 1

Past 30 Days: 12

All Time: 1,657