
Cuisinart Mini-Prep DLC-2A Button Replacement

What you need

  1. Cuisinart Mini-Prep DLC-2A Button Replacement, Cuisinart Mini-Prep DLC-2A Case Disassembly: step 1, image 1 of 2 Cuisinart Mini-Prep DLC-2A Button Replacement, Cuisinart Mini-Prep DLC-2A Case Disassembly: step 1, image 2 of 2
    • Remove the back panel using a Phillips #1 Screwdriver on the four screws that hold it in place.

  2. Cuisinart Mini-Prep DLC-2A Button Replacement, Button: step 2, image 1 of 1
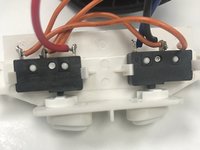
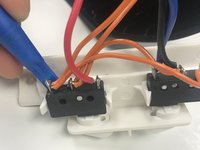
    • Locate the Button Panel inside the blender.

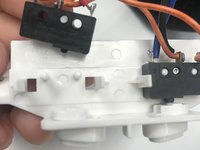
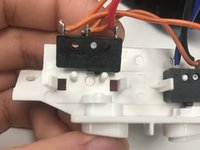
    • Using your Phillips #1 Screwdriver, remove the two screws which hold the panel in place.

  3. Cuisinart Mini-Prep DLC-2A Button Replacement: step 3, image 1 of 3 Cuisinart Mini-Prep DLC-2A Button Replacement: step 3, image 2 of 3 Cuisinart Mini-Prep DLC-2A Button Replacement: step 3, image 3 of 3
    • Locate the black box held in place on the panel.

    • Using your Spudger, wedge the black box out of its place to uncover the button

  4. Cuisinart Mini-Prep DLC-2A Button Replacement: step 4, image 1 of 2 Cuisinart Mini-Prep DLC-2A Button Replacement: step 4, image 2 of 2
    • Once the black box is out of place, use your finger to push out the button.

    • Now replace the old button with your newly acquired button.

Conclusion

To reassemble your device, follow these instructions in reverse order.

One other person completed this guide.

Xavier Tapia

Member since: 09/25/17

144 Reputation

1 Guide authored

One Comment

Hi,

Where’d you get the new buttons?

Mark B - Reply

Add Comment

View Statistics:

Past 24 Hours: 0

Past 7 Days: 0

Past 30 Days: 6

All Time: 272