Introduction
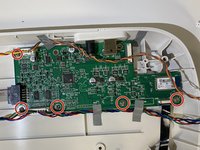
If you need to replace the motherboard, use this guide to access and remove it. If the Cricut's cutter or any other part begins to malfunction, the motherboard may be the cause. Use the Front Door Replacement Guide as a prerequisite to access the internal parts of the Cricut.
For this repair, you will need Phillips #1 and #2 screwdrivers and a prying tool, ideally plastic in order to not damage the machine. No steps are particularly difficult, but the handling of the motherboard and surrounding parts require delicate care.
What you need
-
-
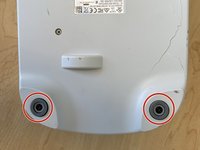
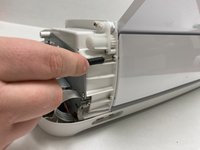
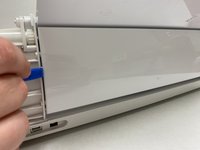
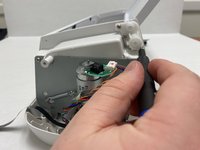
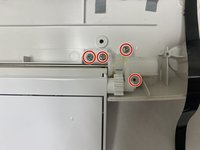
On both the left and right sides of the Cricut, locate the two internal screws.
-
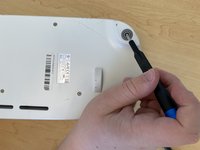
Use a Phillips #1 screwdriver bit to unscrew the top 10.8 mm screw and the lower 9.1 mm screw on each side, four screws in total.
-
-
-
-
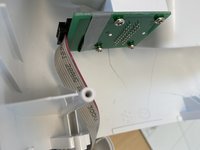
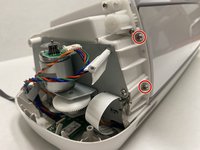
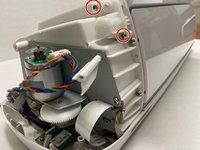
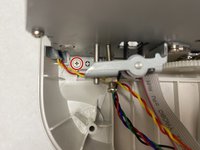
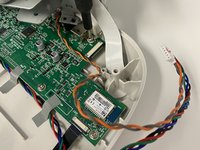
Locate the plug above the motor on the left side of the Cricut.
-
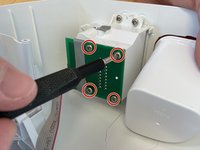
Gently unplug the two wires from the plug.
-


To reassemble your device, follow these instructions in reverse order.

Team

Western Carolina University, Team 1-1, Virtue Spring 2024 Member of Western Carolina University, Team 1-1, Virtue Spring 2024
WCU-VIRTUE-S24S1G1
4 Members
5 Guides authored
4 Guide Comments
where can we purchase the mother board uk
Where we can purchase the mother board in Sydney Australian
the guide is missing a few steps:
-between step 4 and 5: Remove the silver cover of the cutter (two screws in total), Remove the internal horizontal cover panel by lifting it upwards, remove the screws behind the panel (two screws in total).
-between step 12 and 13: Remove all screws on the bottom (7 in total)
over all very resourceful guide huge thank you to Hannah for giving us this good guide <3