Installing Creative Ziio 7" Battery

What you need

  1. Installing Creative Ziio 7" Battery, Back Panel: step 1, image 1 of 3 Installing Creative Ziio 7" Battery, Back Panel: step 1, image 2 of 3 Installing Creative Ziio 7" Battery, Back Panel: step 1, image 3 of 3
    • Remove the back panel by using the plastic opening tool to carefully pry around the panel's edges.

    • The volume control button and the top power button may fall out during this step.

  2. Installing Creative Ziio 7" Battery, Battery: step 2, image 1 of 3 Installing Creative Ziio 7" Battery, Battery: step 2, image 2 of 3 Installing Creative Ziio 7" Battery, Battery: step 2, image 3 of 3
    • Remove the copper plate covering the motherboard by desoldering the ten solder points so that the copper plate is free.

    • The last point is hidden by the soldering iron.

    • Remove the copper plate once all the solder points are undone.

  3. Installing Creative Ziio 7" Battery: step 3, image 1 of 2 Installing Creative Ziio 7" Battery: step 3, image 2 of 2
    • Remove adhesive tape covering the three wires connected to the motherboard.

    • Desolder the solder points connecting the wires to the mother board.

  4. Installing Creative Ziio 7" Battery: step 4, image 1 of 2 Installing Creative Ziio 7" Battery: step 4, image 2 of 2
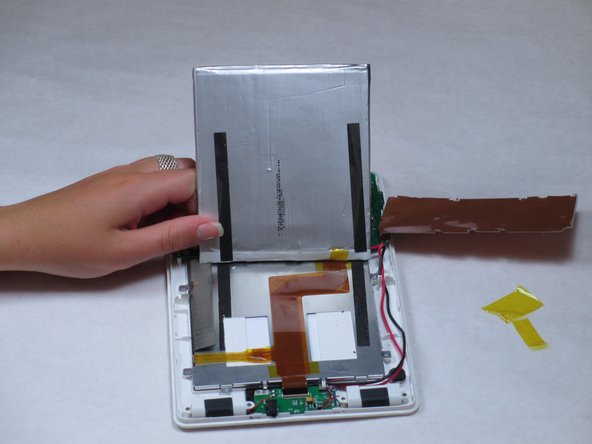
    • With a spudger, pry the battery from the back of the LCD screen.

    • The battery is attached with double sided foam tape. When prying, the tape will probably not come apart easy. This will result in the tape tearing and leaving residue.

  5. Installing Creative Ziio 7" Battery: step 5, image 1 of 1
    • Remove old battery and dispose of it responsibly.

Bryce Simmons

Member since: 04/16/13

150 Reputation

2 Guides authored

Team

Cal Poly, Team 14-10, Maness Spring 2013 Member of Cal Poly, Team 14-10, Maness Spring 2013

CPSU-MANESS-S13S14G10

4 Members

13 Guides authored

View Statistics:

Past 24 Hours: 0

Past 7 Days: 1

Past 30 Days: 16

All Time: 969