
Creative Zen Vision W Motherboard Replacement

What you need

  1. Creative Zen Vision W Motherboard Replacement, Battery Removal: step 1, image 1 of 3 Creative Zen Vision W Motherboard Replacement, Battery Removal: step 1, image 2 of 3 Creative Zen Vision W Motherboard Replacement, Battery Removal: step 1, image 3 of 3
    • Push the black button and slide the battery casing to the left simultaneously, until the battery is completely separated from the device.

  2. Creative Zen Vision W Motherboard Replacement, Front Cover: step 2, image 1 of 2 Creative Zen Vision W Motherboard Replacement, Front Cover: step 2, image 2 of 2
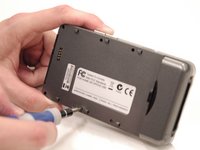
    • Remove the two screws (2.5 mm) on the top and bottom of the device using a Phillips #0 screwdriver.

  3. Creative Zen Vision W Motherboard Replacement: step 3, image 1 of 3 Creative Zen Vision W Motherboard Replacement: step 3, image 2 of 3 Creative Zen Vision W Motherboard Replacement: step 3, image 3 of 3
    • Run the spudger along the cover and pry.

    • Do this gently to preserve the screen

    • The button pad may fall off when the cover is removed.

  4. Creative Zen Vision W Motherboard Replacement, LCD Screen: step 4, image 1 of 3 Creative Zen Vision W Motherboard Replacement, LCD Screen: step 4, image 2 of 3 Creative Zen Vision W Motherboard Replacement, LCD Screen: step 4, image 3 of 3
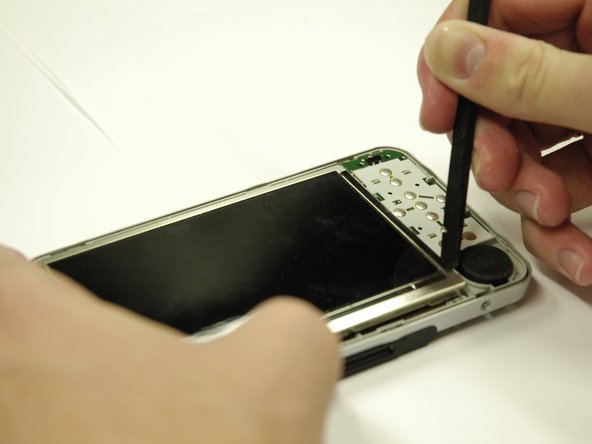
    • Use a spudger to separate the metal tabs that hold the screen in place on the right side.

    • The screen is still attached underneath with two ribbon cables. Lift it very carefully.

  5. Creative Zen Vision W Motherboard Replacement: step 5, image 1 of 1
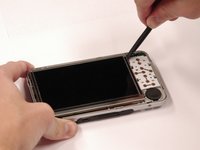
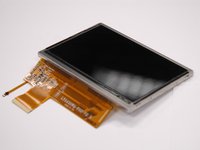
    • Put the screen face down so you can see where the ribbon cables are attached.

    • Remove the red sticker that covers the ribbon cable connections.

  6. Creative Zen Vision W Motherboard Replacement: step 6, image 1 of 1
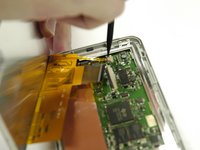
    • Use a plastic opening tool to get underneath the black flap on the larger ribbon cable connection and lift it.

  7. Creative Zen Vision W Motherboard Replacement: step 7, image 1 of 3 Creative Zen Vision W Motherboard Replacement: step 7, image 2 of 3 Creative Zen Vision W Motherboard Replacement: step 7, image 3 of 3
    • Use a spudger to slide the two small gray tabs away from the ribbon cable connection.

    • Remove the screen from the device.

  8. Creative Zen Vision W Motherboard Replacement, Keypad: step 8, image 1 of 1
    • Peel the orange sticker off of the motherboard.

  9. Creative Zen Vision W Motherboard Replacement: step 9, image 1 of 2 Creative Zen Vision W Motherboard Replacement: step 9, image 2 of 2
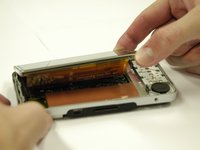
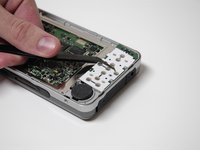
    • Lift the keypad from the left side and use tweezers to slide it out to the left.

  10. Creative Zen Vision W Motherboard Replacement: step 10, image 1 of 2 Creative Zen Vision W Motherboard Replacement: step 10, image 2 of 2
    • Use a small flat head screw driver to slide the white tabs away from the ribbon cable connection.

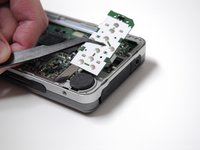
    • Remove the ribbon cable from the keypad.

  11. Creative Zen Vision W Motherboard Replacement, Back Cover: step 11, image 1 of 1
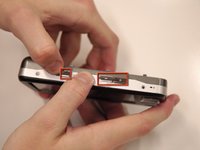
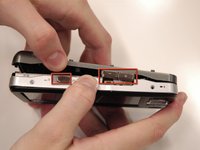
    • Remove the 2 screws (3.5 mm) on the Compact Flash insert, located on the left hand side, with a Phillips #000 screwdriver.

  12. Creative Zen Vision W Motherboard Replacement: step 12, image 1 of 2 Creative Zen Vision W Motherboard Replacement: step 12, image 2 of 2
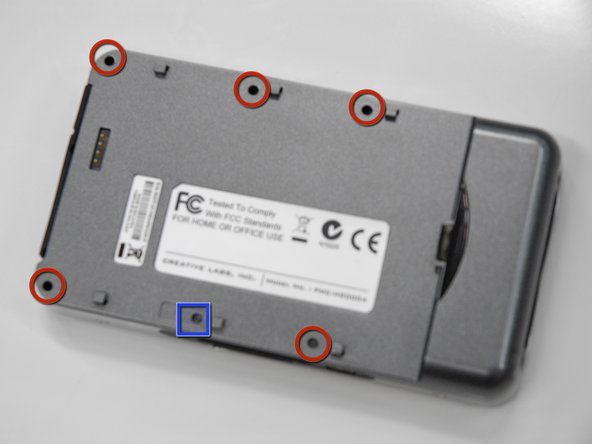
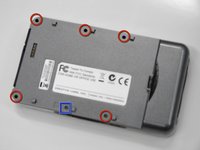
    • Remove the 5 screws (5.5 mm), circled in red, using a Phillips #0. Use a flashlight if necessary.

    • Peel off the sticker that says "Creative warranty void if broken" and remove the screw (5.5 mm) underneath with a Phillips #0.

    • Be careful, some of the screws are difficult to see and can be easily stripped.

  13. Creative Zen Vision W Motherboard Replacement: step 13, image 1 of 3 Creative Zen Vision W Motherboard Replacement: step 13, image 2 of 3 Creative Zen Vision W Motherboard Replacement: step 13, image 3 of 3
    • Carefully pull the back cover off of the rest of the device.

    • The volume control buttons and power slider may fall off when removing the cover, do not lose these small pieces.

    • The USB input cover on the bottom of the device may also fall off.

  14. Creative Zen Vision W Motherboard Replacement, Hard Drive: step 14, image 1 of 2 Creative Zen Vision W Motherboard Replacement, Hard Drive: step 14, image 2 of 2
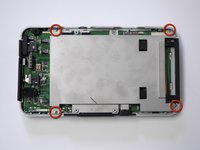
    • Remove 4 screws (3.5 mm) on the metal cover with a Phillips #0.

    • Lift the metal cover off.

  15. Creative Zen Vision W Motherboard Replacement: step 15, image 1 of 3 Creative Zen Vision W Motherboard Replacement: step 15, image 2 of 3 Creative Zen Vision W Motherboard Replacement: step 15, image 3 of 3
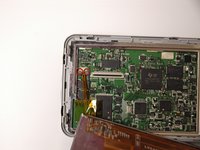
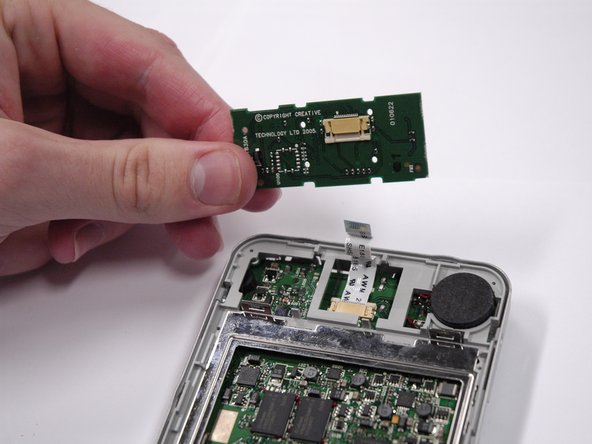
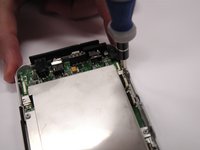
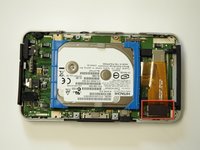
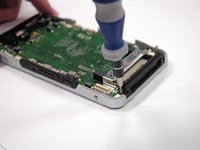
    • Lift the white and black ribbon connection off of the motherboard.

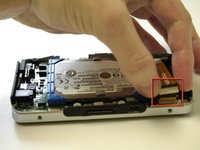
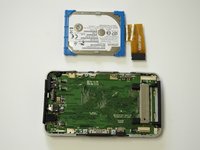
    • The hard drive can now be removed.

  16. Creative Zen Vision W Motherboard Replacement, Motherboard: step 16, image 1 of 3 Creative Zen Vision W Motherboard Replacement, Motherboard: step 16, image 2 of 3 Creative Zen Vision W Motherboard Replacement, Motherboard: step 16, image 3 of 3
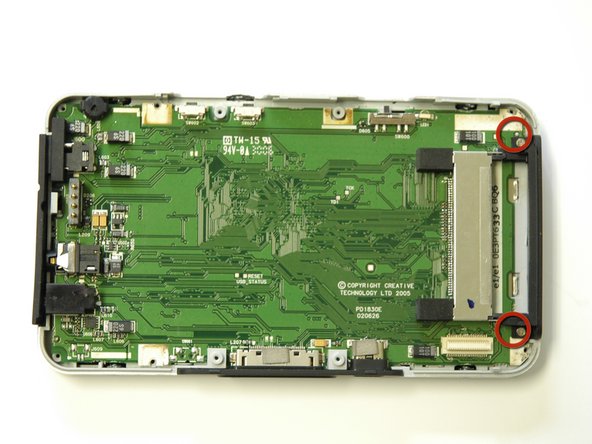
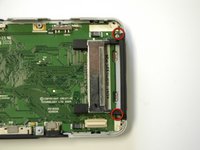
    • Remove 2 screws (3.5 mm) on the black compact flash input using a Phillips #0.

  17. Creative Zen Vision W Motherboard Replacement: step 17, image 1 of 1
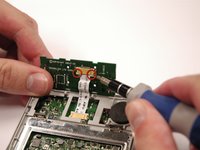
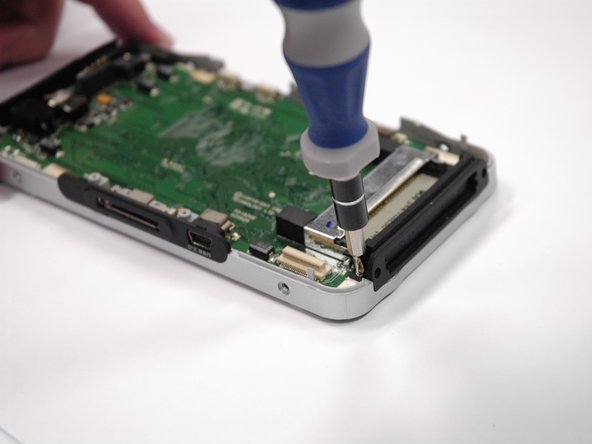
    • Use a small flat head screwdriver to bend the plastic tab holding the compact flash input in place.

    • The compact flash input should pop off easily, be careful not to break it.

  18. Creative Zen Vision W Motherboard Replacement: step 18, image 1 of 1
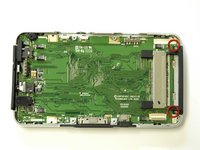
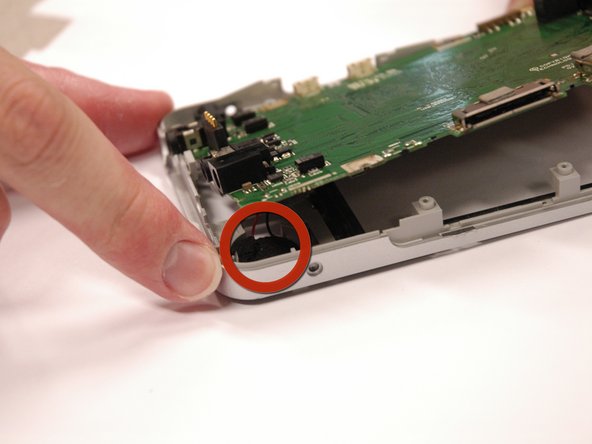
    • Turn the device over so the side where the screen was is facing up.

    • Push on the motherboard lightly to separate it from the casing.

  19. Creative Zen Vision W Motherboard Replacement: step 19, image 1 of 2 Creative Zen Vision W Motherboard Replacement: step 19, image 2 of 2
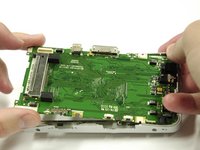
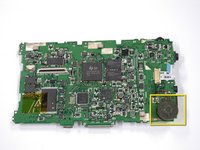
    • Turn the device over again and pull on the motherboard very lightly.

    • The speaker will be covered in a black glue and you must cut through this in order to remove the motherboard.

  20. Creative Zen Vision W Motherboard Replacement: step 20, image 1 of 1
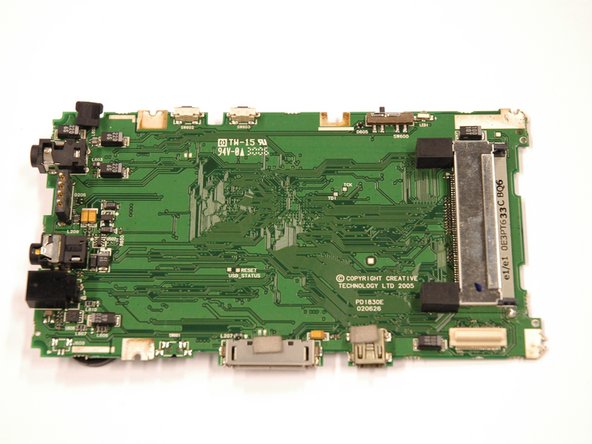
    • Turn the speaker on its side so it can fit through the casing and the motherboard can be removed.

  21. Creative Zen Vision W Motherboard Replacement: step 21, image 1 of 2 Creative Zen Vision W Motherboard Replacement: step 21, image 2 of 2
    • You have now removed the motherboard.

    • Speaker

Conclusion

To reassemble your device, follow these instructions in reverse order.

2 other people completed this guide.

Tim Wilson

Member since: 04/11/13

143 Reputation

6 Guides authored

Team

Cal Poly, Team 17-2, Regan Spring 2013 Member of Cal Poly, Team 17-2, Regan Spring 2013

CPSU-REGAN-S13S17G2

4 Members

8 Guides authored

2 Comments

does the creative vision W have a 44 pin hard disk connector on the main board same as creative vision m has?

leohobb - Reply

If the main board on vision w hard disk connector has 44 pins as vision m has but the vision w has a zif 40 pin ribbon in to the hard disk.it make me belive that it is possible to use a zif connector style hard disk on vision M to with the hard disk cable from vision w?Or does i miss something?i want to try to use a 1.8 hard disk with around 100 GB capacity on vision M if possible

leohobb - Reply

Add Comment

View Statistics:

Past 24 Hours: 0

Past 7 Days: 1

Past 30 Days: 7

All Time: 1,049