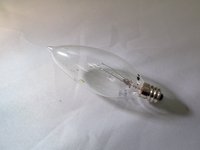
Crayola Crayon Maker Light Bulb Removal and Replacement

What you need

  1. Crayola Crayon Maker Light Bulb Removal and Replacement, Take out the melting tray that is out of place.: step 1, image 1 of 3 Crayola Crayon Maker Light Bulb Removal and Replacement, Take out the melting tray that is out of place.: step 1, image 2 of 3 Crayola Crayon Maker Light Bulb Removal and Replacement, Take out the melting tray that is out of place.: step 1, image 3 of 3
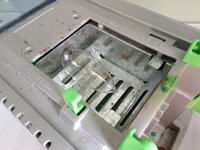
    • Press the green arm away from the melting tray. Remove the melting tray.

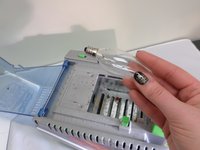
    • Pop the metal arms out of the green pivot support.

  2. Crayola Crayon Maker Light Bulb Removal and Replacement, Remove the metal melting tray.: step 2, image 1 of 3 Crayola Crayon Maker Light Bulb Removal and Replacement, Remove the metal melting tray.: step 2, image 2 of 3 Crayola Crayon Maker Light Bulb Removal and Replacement, Remove the metal melting tray.: step 2, image 3 of 3
    • Remove the 2 screws (.75cm in length) currently securing the metal melting tray with a Phillips #2 screwdriver.

  3. Crayola Crayon Maker Light Bulb Removal and Replacement, Remove the light bulb: step 3, image 1 of 3 Crayola Crayon Maker Light Bulb Removal and Replacement, Remove the light bulb: step 3, image 2 of 3 Crayola Crayon Maker Light Bulb Removal and Replacement, Remove the light bulb: step 3, image 3 of 3
    • The light bulb should now be revealed. Unscrew the burned out bulb and replace with a new bulb.

Finish Line

One other person completed this guide.

Heidi Clarke

Member since: 09/21/14

222 Reputation

2 Guides authored

0 Comments

Add Comment

View Statistics:

Past 24 Hours: 0

Past 7 Days: 9

Past 30 Days: 41

All Time: 6,536