
Crain Jamb Saw 775 2014 Switch Replacement

What you need

  1. Crain Jamb Saw 775 2014 Switch Replacement, Unfasten the saw housing: step 1, image 1 of 1
    • Unplug the power cord before you begin.

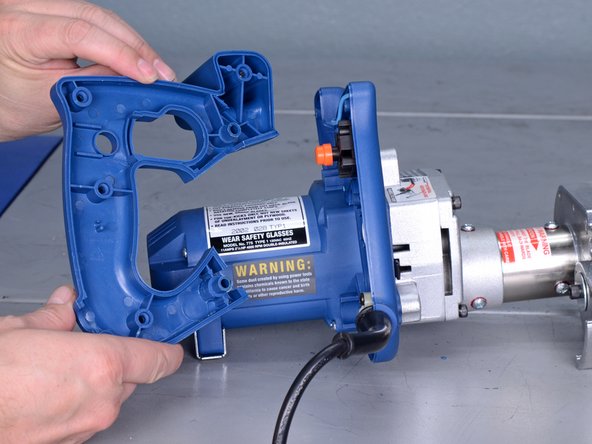
    • Use a Phillips #2 screwdriver to remove the eight screws securing the saw housing:

    • Four 20 mm screws

    • Two 50 mm screws

    • Two 55 mm screws

  2. Crain Jamb Saw 775 2014 Switch Replacement, Remove the housing bracket: step 2, image 1 of 1
    • Remove the metal housing bracket.

  3. Crain Jamb Saw 775 2014 Switch Replacement, Remove the saw housing: step 3, image 1 of 2 Crain Jamb Saw 775 2014 Switch Replacement, Remove the saw housing: step 3, image 2 of 2
    • Remove the saw housing.

  4. Crain Jamb Saw 775 2014 Switch Replacement, Unfasten the switch wires: step 4, image 1 of 1
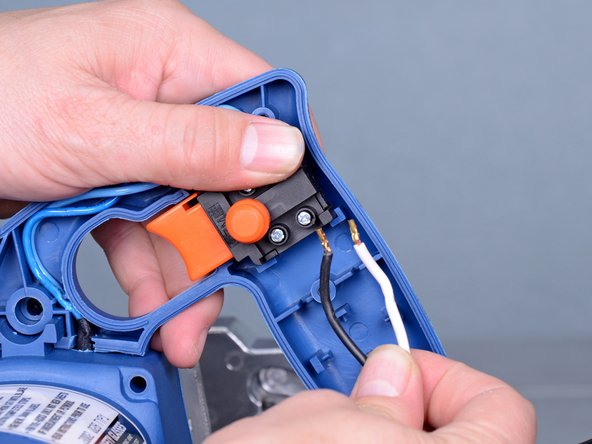
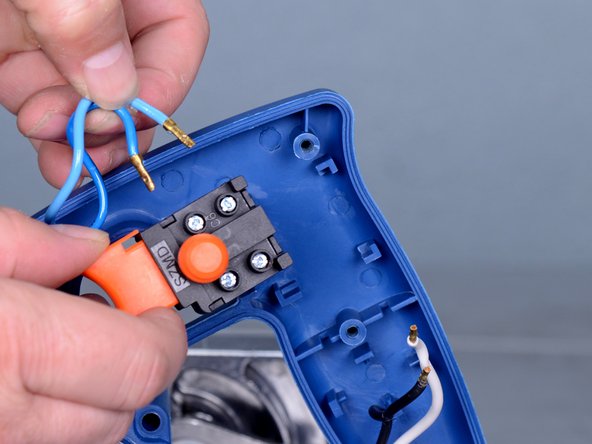
    • Use a Phillips #2 screwdriver to loosen the four screw terminals securing the power cord and motor wires.

    • Take note of which wire connects to which terminal for reassembly purposes.

    • The switch is not secured to the housing; be sure to hold it in place when removing the motor and power cord wires.

  5. Crain Jamb Saw 775 2014 Switch Replacement, Disconnect the power cord wires: step 5, image 1 of 2 Crain Jamb Saw 775 2014 Switch Replacement, Disconnect the power cord wires: step 5, image 2 of 2
    • Remove the power cord wires from the main switch.

  6. Crain Jamb Saw 775 2014 Switch Replacement, Disconnect the motor wires: step 6, image 1 of 2 Crain Jamb Saw 775 2014 Switch Replacement, Disconnect the motor wires: step 6, image 2 of 2
    • Remove the motor wires from the switch.

  7. Crain Jamb Saw 775 2014 Switch Replacement, Remove the switch: step 7, image 1 of 1
    • Remove the switch.

Conclusion

To reassemble your device, follow these instructions in reverse order.

Tarun Thiruma

Member since: 11/20/19

35,848 Reputation

134 Guides authored

0 Comments

Add Comment

View Statistics:

Past 24 Hours: 0

Past 7 Days: 0

Past 30 Days: 1

All Time: 60